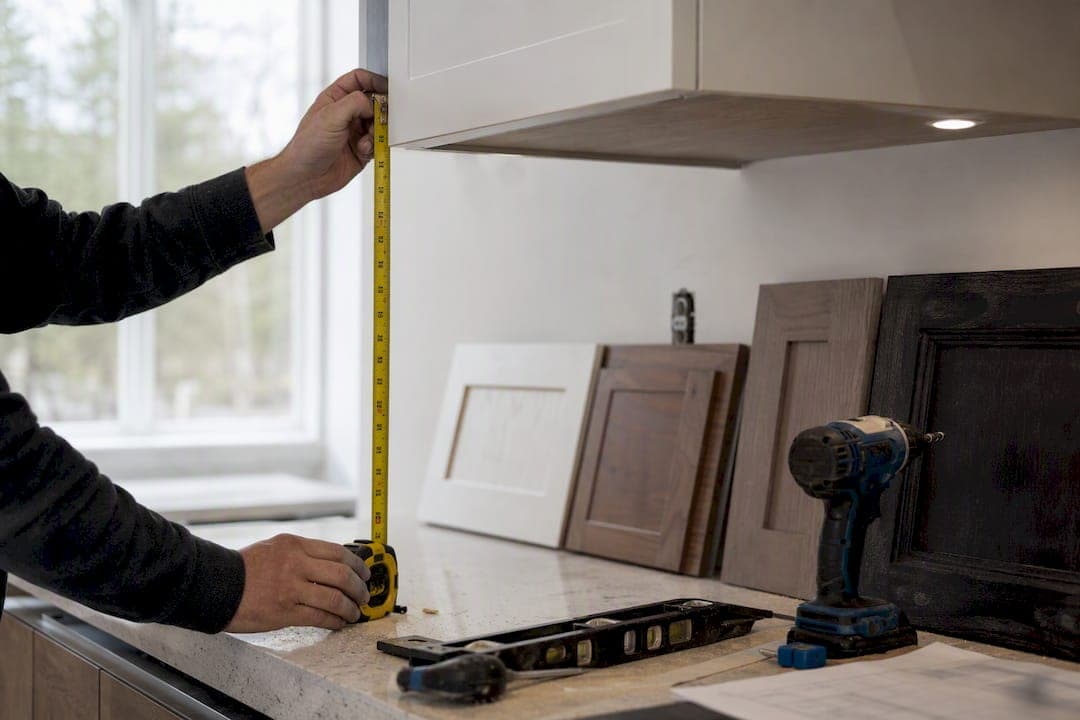
The bottom of your upper cabinets should sit a standard height from the finished floor, which is typically based on standard countertop and reveal measurements. That number comes from two fixed points: a 36 inch countertop and an 18 inch reveal, the gap between counter and cabinet bottom. Standard wall cabinets commonly come in heights like 30, 36, and 42 inches, which determines the overall cabinet height from floor to top. Those baselines work for most kitchens, but stove hoods, ADA requirements, and appliance manufacturer specs can all push you off the standard number.
Before you order cabinets or start marking walls, know these fixed points:
- About 54 inches floor to cabinet bottom is the standard mounting height.
- Common wall cabinet heights are around 30, 36, and 42 inches.
- The industry-standard reveal between counter and cabinet is typically around 18 inches.
- Appliance and range hood clearances can override all of the above.
Key Takeaways
Upper cabinet height starts at a 54 inch floor-to-bottom baseline, but appliance clearances, ceiling type, and household reach all justify adjusting that number.
| Point | Details |
|---|---|
| Standard baseline | Mount cabinet bottoms at 54 inches from the finished floor (36" counter + 18" reveal). |
| Wall cabinet sizing | Choose 30", 36", or 42" cabinets based on your ceiling height and crown molding plans. |
| Reveal flexibility | Stay within 15 to 20 inches typically, or 20 to 24 inches for a modern look. |
| Appliance clearances rule | Stove and hood manufacturer specs, often 24 to 30 inches, override standard reveal numbers. |
| Sloped ceilings need custom sizing | Measure ceiling height at multiple points along the wall, not just the peak. |
| Best Cabinet Specialist stocks standard sizes | Order 30", 36", or 42" plywood cabinets with fast shipping once your measurements are confirmed. |
Primary sources and client resources
Every measurement in this guide comes from established installation standards, including Bob Vila's cabinet height guide, Planner 5D's wall cabinet sizing data, and The Spruce's cabinet dimension guide. For layout planning, see our cabinet configuration guide and ADA cabinet resource.
Table of Contents
- Standard Cabinet Sizes and How They Relate to Ceiling Height
- How Much Space Should Be Between Counter and Cabinet?
- Should Cabinets Reach the Ceiling or Leave Room for Trim?
- Ergonomics and ADA: When to Adjust the Standard Height
- How to Measure and Mark Cabinets for Installation
- Does Cabinet Height Limit Your Material and Finish Choices?
- How Cabinet Height Changes Your Kitchen Storage
- What About Sloped Ceilings and Non-Standard Layouts?
- Sources
Standard Cabinet Sizes and How They Relate to Ceiling Height
The math behind upper cabinet height starts at the base cabinet, not the ceiling. Standard base cabinets run 34.5 inches tall, and once you add a 1.5 inch countertop, you land on the familiar 36 inch counter height used across nearly every kitchen design. Add the 18 inch reveal and you get 54 inches, the point where your upper cabinets begin.
From there, the cabinet height you choose determines where the top lands:
- A 30 inch wall cabinet puts the top at 84 inches, a comfortable fit for standard 8 foot (96 inch) ceilings with room left for crown molding or a soffit.
- A 36 inch wall cabinet puts the top at 90 inches, still workable on 8 foot ceilings but tighter for trim.
- A 42 inch wall cabinet puts the top at 96 inches, which reaches the ceiling exactly on an 8 foot wall, leaving zero clearance for crown molding unless you modify the plan.
If your kitchen has 9 foot ceilings, you gain 12 extra inches to play with. That's often enough room to run 42 inch cabinets and still add crown molding, or to install 36 inch cabinets with a decorative soffit above them. Full-to-ceiling cabinetry looks clean and adds real storage, but it only works cleanly when your cabinet height and ceiling height actually line up. Measure your ceiling before you fall in love with a cabinet size.
How Much Space Should Be Between Counter and Cabinet?
Eighteen inches is the number builders have used since the 1970s, originally set to match standard range heights so a stove would fit cleanly underneath a cabinet run. It's a strong default, not a law. Most kitchens work well anywhere in the 15 to 20 inch range, and plenty of designers now push the reveal to 20 or even 24 inches for a more open, architectural feel with better sightlines across the kitchen.
The reveal range that matters most: 15–20 inches is typical, 20–24 inches is a common modern upgrade, and 24–30 inches is often required above a stove or range hood.
A few things push that number around in practice:
- Tall countertop appliances, like stand mixers or coffee stations, need real clearance to fit and operate underneath cabinets.
- Faucet height and reach can make a slightly larger reveal feel more comfortable near the sink.
- Compact kitchens sometimes drop to a 15 or 16 inch reveal to maximize storage, though that limits which appliances fit underneath.
Stove and range hood clearances are the one place where you don't get to choose. Appliance manufacturers set their own required clearances, commonly 24 to 30 inches, and those specs override the standard reveal every time. Check them before you finalize any cabinet order.
Should Cabinets Reach the Ceiling or Leave Room for Trim?
Running cabinets straight to the ceiling looks sleek and adds usable storage up top, but it only works when the math lines up with your ceiling height. On a standard 8 foot ceiling, 42 inch cabinets mounted at 54 inches hit 96 inches exactly, which is the ceiling itself. There's no room left for crown molding without adjusting the plan.
A few ways around that:
- Drop to 36 inch cabinets and use the leftover 6 inches for crown molding or a decorative soffit.
- Add a filler strip or scribe piece above the cabinets sized to fit your actual ceiling.
- Skip crown entirely and finish the cabinet top flush to the ceiling for a modern, streamlined look.
- On 9 foot ceilings, 42 inch cabinets typically leave enough clearance for standard crown profiles without modification.
Soffits used to be the default fix for this gap; now most homeowners prefer full-height cabinets or a clean crown detail instead.
Ergonomics and ADA: When to Adjust the Standard Height
The 54 inch baseline assumes an average-height user reaching a mid-range shelf comfortably. If your household doesn't fit that average, the standard number stops being ideal. Someone under 5'4" may struggle to reach the top shelf of a 90 inch cabinet run, while someone over 6'0" might find a 54 inch bottom edge crowds their counter workspace.
Reasonable adjustments by household:
- Shorter users (under 5'4"): Lower the baseline slightly, or plan lower shelves and pull-down storage for anything above eye level.
- Taller users (over 6'0"): Raise the mounting height to 56 or even 58 inches for more headroom and easier counter visibility.
- ADA and universal design: Accessibility guidelines generally cap the highest usable shelf at 48 inches from the floor for a seated or limited-reach user, which usually means lowering cabinet bottoms well below 54 inches.
Pro Tip: If your household includes people of very different heights, consider a 52 inch floor-to-bottom compromise. It splits the difference between standard reach and lower accessibility, and works well when paired with pull-down shelving for the top rows.
Our ADA-compliant cabinet guide covers shelf-height limits and layout choices in more depth if accessibility is a priority for your project.
How to Measure and Mark Cabinets for Installation
Getting this right on paper is one thing. Getting it right on the wall, with a level and a stud finder, is where most kitchens actually succeed or fail. Follow these steps in order:
- Find the finished floor's high point. Floors aren't perfectly level, so measure from the highest point in the installation area to avoid a crooked cabinet run.
- Confirm your countertop height. Standard is 36 inches, but verify it against your actual base cabinets and countertop material before marking anything.
- Mark the 54 inch baseline. Measure up from the finished floor high point and mark where the bottom of your upper cabinets will sit.
- Snap a level line. Use a laser level or chalk line across the wall at your marked height so every cabinet in the run hangs at the same elevation.
- Account for appliances and backsplash. If a range hood is going in, confirm its clearance requirement now, not after cabinets are already on the wall. Factor in backsplash thickness too, since tile can add a fraction of an inch that shifts your final mark.
- Install a temporary ledger board. Fasten a board along your marked line to support the cabinets' weight while you position and fasten them.
- Hang, fasten, and check plumb. Screw cabinets into wall studs, not just drywall, then shim as needed and check that each cabinet is plumb and level before removing the ledger board.
Pro Tip: Don't skip the ledger board even if you're only hanging one cabinet. Holding cabinet weight by hand while trying to drive screws into studs is how corners get chipped and lines get crooked. Our full kitchen measuring guide walks through the same process with more detail on tricky wall conditions.
Installer Tips and Common Mistakes to Avoid
The ledger board trick isn't optional if you want a straight run. It carries cabinet weight while you square and fasten, which prevents the sagging and misalignment that shows up once you remove your hands. The other mistake we see constantly: homeowners order the tallest cabinets that fit their ceiling height without checking crown molding clearance first, then find out too late there's no room for trim. Plan your crown return before you order, not after. Our cabinet layout guide and installation walkthrough cover both in practical, step-by-step detail.
Does Cabinet Height Limit Your Material and Finish Choices?
Cabinet height rarely restricts finish options, but it does change how those finishes read in the room—helping you when selecting the right pantry door to complete your cabinetry design. Taller wall cabinets, the 42 inch runs that reach an 8 foot ceiling, show off a solid wood door's grain and panel detail across more visible surface area. That makes them a strong match for shaker-style doors or raised-panel designs where the craftsmanship is part of the appeal.
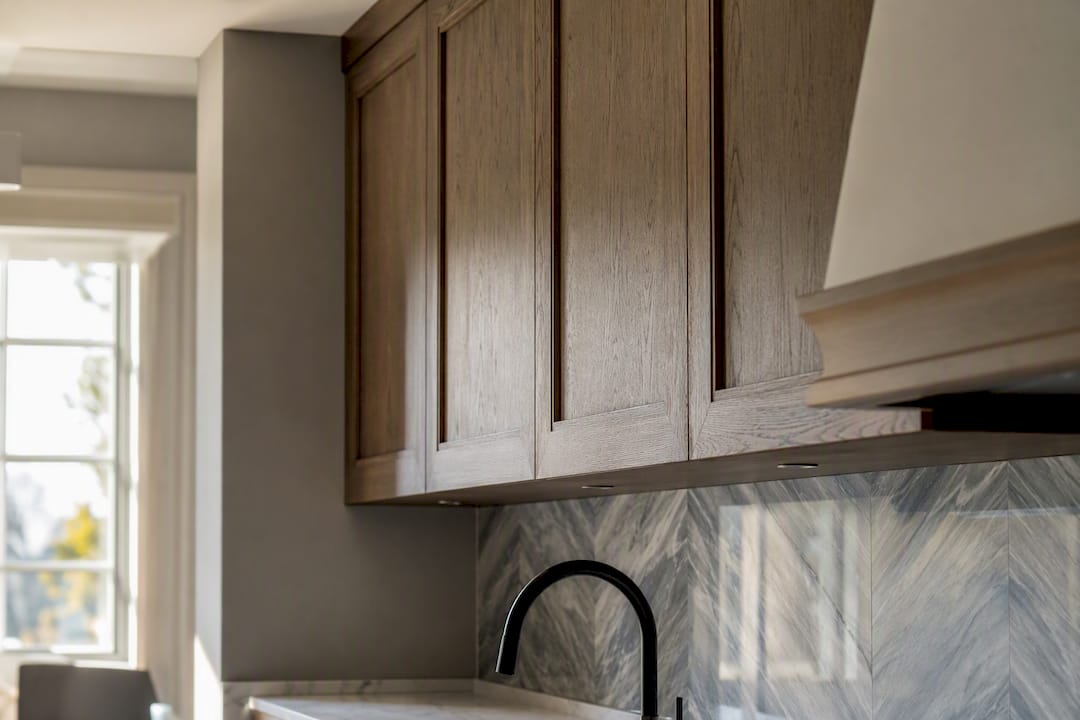
Shorter cabinets, the 30 inch runs with more open wall space above them, tend to work better with simpler flat-panel or slab doors, since there's less vertical surface to draw the eye. Glass-front doors follow a similar logic: they show best on taller cabinets where there's enough vertical space to actually display dishware, rather than on a compressed 30 inch box where the glass panel feels cramped.
Finish also matters for practical reasons tied to height. Darker finishes and high-gloss doors on taller cabinets near the ceiling can make a kitchen feel closed in, especially with 8 foot ceilings and minimal natural light. Lighter finishes and matte doors tend to keep tall cabinet runs from feeling heavy overhead. If you're running cabinets to the ceiling, a lighter finish or a two-tone approach, darker on the base and lighter above, keeps the room from feeling top-heavy.
None of this changes the underlying measurements. A 36 inch cabinet is still 36 inches whether it's finished in painted maple or stained oak, but the finish you choose should account for how much of that surface will actually be visible at eye level versus overhead.
How Cabinet Height Changes Your Kitchen Storage
Every inch of cabinet height is cubic storage space, and the difference between a 30 inch and 42 inch wall cabinet adds up fast. Over a full kitchen run, that's the difference between cramming everything into one layer of shelves and having a genuine second tier for rarely-used items.
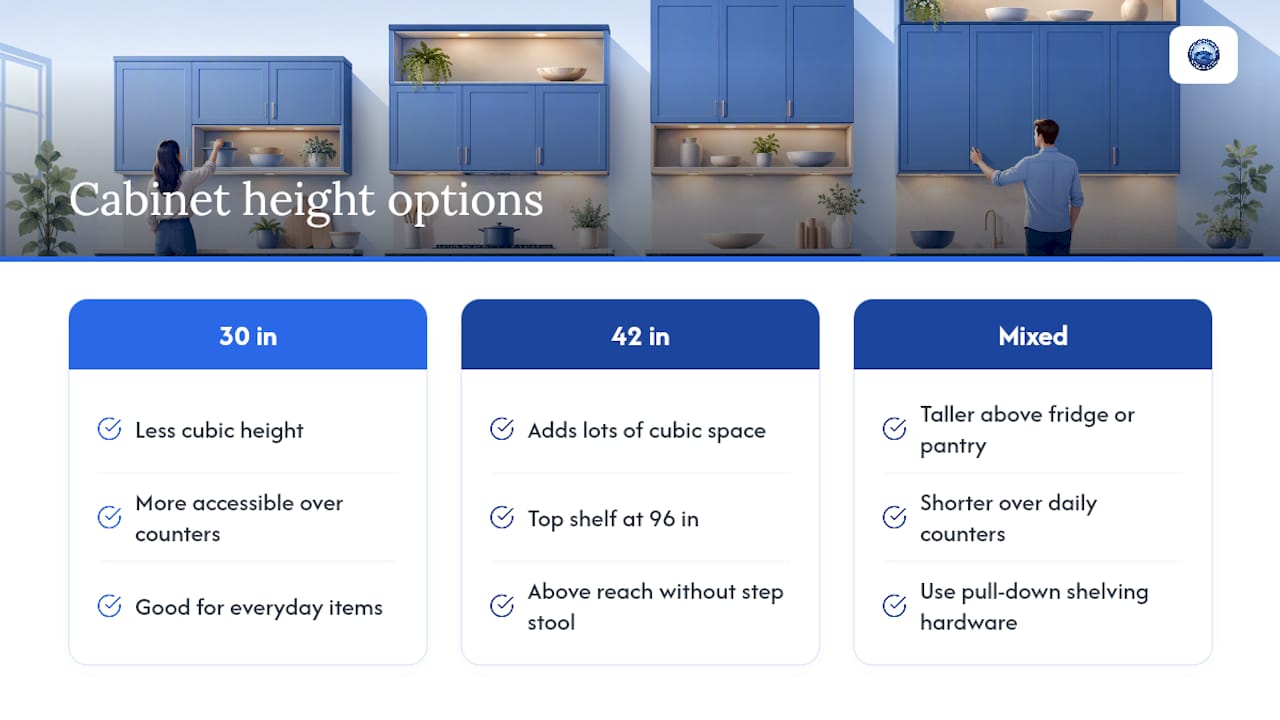
The catch is accessibility. Storage you can't comfortably reach doesn't function as storage, it functions as clutter you forget about. A 42 inch cabinet mounted at the standard 54 inch baseline puts its top shelf at 96 inches, well above what most adults can reach without a step stool. That space is fine for holiday dishware and small appliances you use twice a year, but poor for everyday glasses or plates.
The practical answer for most kitchens is a mixed approach: taller cabinets over areas where a step stool is acceptable, like above the refrigerator or in a pantry wall, and shorter, more accessible cabinets over the counters you use daily. Pull-down shelving hardware can also convert an otherwise-unreachable top shelf into usable daily storage, which is worth considering if you're set on maximizing height across the whole kitchen. Planning your cabinet layout around how you actually use each zone matters more than maximizing total cubic footage.
What About Sloped Ceilings and Non-Standard Layouts?
Sloped ceilings, common in attic conversions, dormered kitchens, and some open-concept great rooms, break the standard height math because there's no single, consistent ceiling height to calculate against. The 54 inch baseline still applies to the cabinet bottom, since that's driven by countertop height and reach, not ceiling shape. What changes is the cabinet top and how much room you have to work with as the slope rises or falls.
Under a sloped ceiling, custom cabinet heights usually make more sense than stock sizes. A run of standard 36 inch cabinets might fit comfortably at the tall end of the slope but collide with the ceiling a few feet down the wall. Many kitchen designers solve this by stepping the cabinet heights down to match the slope, using shorter cabinets where the ceiling drops and reserving standard or taller sizes for the section with full headroom.
Angled cabinet tops, cut to follow the ceiling's pitch, are another option, though they typically cost more since they require custom millwork rather than stock cabinet boxes. If the sloped section is small, some homeowners skip upper cabinets there entirely and rely on open shelving or a lower run of base cabinets instead.
The consistent rule across all of this: measure the actual ceiling height at every point along the wall before ordering, not just at the tallest point. A single measurement taken at the peak of a slope will mislead you badly everywhere else along that run.
Sensible defaults for most homeowners
For most households, 54 inches is still the right starting point. Go to 56 or 58 inches if everyone in the house is over 6 feet tall, and drop to 48 or 52 inches if accessibility or shorter users are a priority. Whatever height you land on, confirm your actual appliance and range hood specs before finalizing an order. If you're unsure, measure a real appliance in place and test your own reach before you commit.
— Nathan
Best Cabinet Specialist: Cabinets Sized Right, Shipped Fast
Once you know your numbers, ordering shouldn't be the slow part. Best Cabinet Specialist stocks standard wall cabinet sizes, 30", 36", and 42", in plywood-box construction with solid wood doors, so you're not stuck waiting months for a run that fits your measured height.

Whether you're a homeowner finalizing a single kitchen or a contractor ordering for multiple units, our team can help you match cabinet heights to your ceiling, appliance clearances, and reach needs before you order. We work with trade professionals on bulk pricing and fast shipping, so a full kitchen order doesn't sit on a lead-time list for months. If you've measured your space and you're ready to see sizes and finishes side by side, browse cabinet options at Best Cabinet Specialist or reach out to our team with your measurements for sizing help before you buy.
Sources
- How high to hang upper kitchen cabinets | Bob Vila
- Standard kitchen wall cabinet height | Planner 5D
- Distance between countertop and upper cabinets: sizing guide - D and G Flooring
- Upper cabinet height: complete guide for homeowners - A Prepared Kitchen
- Guide to common kitchen cabinet sizes | The Spruce