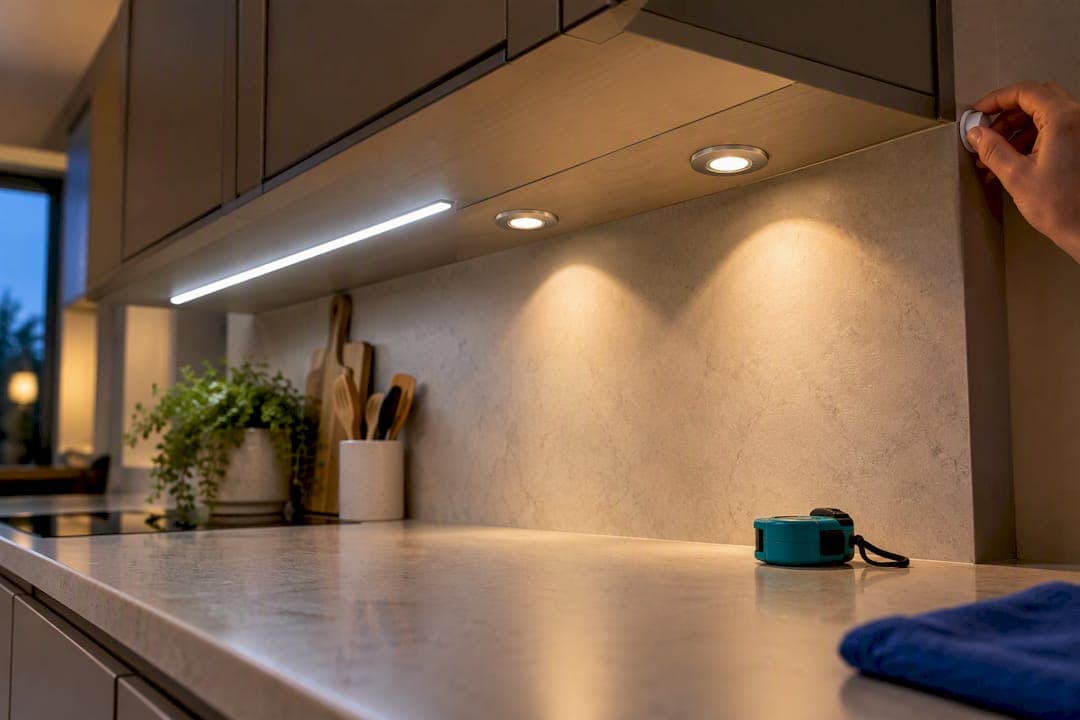
For most kitchens, low profile LED strips or slim linear bars are the best under cabinet option because they deliver continuous, efficient task lighting with low heat and long life. Puck lights still make sense for accent lighting or small, angled cabinet runs. Your choice comes down to four decisions: form factor, power source, color temperature, and mounting method.
TL;DR:
- LED strip lighting with at least 125 lumens per foot, a CRI of 90 or higher, and a color temperature of 2700 to 3000K provides the best task illumination.
- Surface-mounted or recessed puck lights are ideal for accent lighting, but require careful spacing to avoid dark gaps or hotspots, and buying from the same batch improves color consistency.
- Linear LED bars offer a simple, factory-built alternative for long, straight counter runs, with easier installation and consistent performance compared to cuttable strips.
- Replacing older fluorescent or halogen fixtures with LED options reduces heat, improves color rendering, and offers longer lifespan backed by LM-80 lumen maintenance data.
- Proper mounting, avoiding voltage drop on long runs, and early planning for cabinet dimensions and wiring are crucial for a clean, durable, and code-compliant installation.
Table of Contents
- 1. Common under cabinet lighting types and what each one solves
- 2. LED strip lighting: what to check before you buy
- 3. Puck lights: best uses and how to avoid hotspots
- 4. Linear light bars: pre-made fixtures for simpler wiring
- 5. Fluorescent and halogen: why LEDs replaced them
- 7. Reading the specs: brightness, color temperature, and CRI
- 8. Installation and mounting: getting a clean, lasting result
- 9. How to choose: a checklist, costs, and questions to ask
- 10. Why lighting decisions start with your cabinets
- Where to read the primary specs
- Sources
- FAQ
1. Common under cabinet lighting types and what each one solves
Before you shop, it helps to know what you are actually comparing. Under cabinet fixtures fall into a few clear categories, and each one produces a different kind of light on your countertop.
- LED strip or tape lighting runs in a continuous line for even, shadow-free task light along the whole counter.
- Puck lights create small pools of light and work well as accents or inside glass-front cabinets.
- Linear light bars are pre-made fixtures that give the coverage of a strip with simpler, factory-set wiring.
- Recessed mini fixtures sit flush inside the cabinet bottom for a cleaner look on shallow cabinets.
- Fluorescent and halogen fixtures are legacy options still found in older kitchens, largely replaced by LED for heat and lifespan reasons.
Strips and bars suit anyone who wants a bright, even wash across a long counter run. Pucks fit smaller accent needs, like lighting a coffee station or highlighting open shelving. Legacy fluorescent and halogen units mostly show up during a remodel when you are deciding whether to replace or retrofit what is already there.
2. LED strip lighting: what to check before you buy
Strips are the most flexible type on the market because they can be cut to length, bent around corners, and hidden almost entirely from view. That flexibility is exactly why they have become the default choice for kitchen renovations: one continuous run instead of several separate fixtures with visible gaps between them.
Before buying, compare a few numbers on the spec sheet rather than judging a strip by its price or its box photo.
- Lumens per foot: aim for output that meets task lighting needs, not decorative-only brightness.
- CRI (color rendering index): look for 90 or higher so food and countertop colors read true.
- CCT (color temperature): pick one value and stick to it across the whole run.
- LED density: more diodes per foot generally means smoother, more even light with fewer visible dots.
- LM-80 or lumen maintenance data: this is the manufacturer's own lifetime testing, and its presence on a spec sheet is one of the clearest signs of a serious product versus a bargain-bin strip.
- IP rating, driver voltage, and maximum run length: these determine whether the strip can handle kitchen humidity and how far you can run it before power drops off.
Mounting matters as much as the strip itself. Aluminum channels pull heat away from the LEDs, which protects their lifespan, and they diffuse the light so you get a smooth glow instead of a row of individual dots. On glossy stone or lacquered countertops, a dot-less COB strip is worth the upgrade since it cuts down on the distracting reflections that a standard strip can create.
Power choice affects how far you can run a single strip. A 12-volt strip is common and affordable, but it loses brightness noticeably over longer runs unless you add a mid-run power injection point. A 24-volt strip tolerates longer continuous runs with less visible dimming toward the far end, which makes it the better pick for a kitchen with a long, unbroken counter.
Pro Tip: Ask any strip supplier for their LM-80 test data before you buy. If they can't produce it, treat the lifespan claim on the box as marketing, not fact.
3. Puck lights: best uses and how to avoid hotspots
Puck lights are small, round fixtures, typically two to four inches across, that throw a circular pool of light rather than a continuous line. They work best where you want an accent rather than an even wash, such as above a coffee station, inside a glass-front cabinet, or along a short run where a strip would feel like overkill.
The tradeoff is spacing. Space pucks too far apart and you get visible dark gaps between the pools of light; space them too close and you are paying for more fixtures than the task requires. A diffuser lens or frosted cover helps blend the light pools into something closer to a continuous glow, which also cuts down on the harsh hotspot look that bare pucks can create on a countertop.
- Recessed pucks sit flush with the cabinet bottom for a cleaner look but need enough clearance above the counter to install.
- Surface-mounted pucks install faster and work on cabinets too shallow for a recessed housing.
- Wiring typically runs in a cluster from one transformer, so plan the cable path before you drill.
- Power options range from battery-powered pucks for a no-wiring install to plug-in sets and fully hardwired systems.
Color consistency is the other issue worth watching. Because pucks are individual fixtures rather than one continuous strip, small manufacturing differences between units can show up as slightly different color temperatures side by side. Buying pucks from a single production batch, when possible, reduces that risk.
4. Linear light bars: pre-made fixtures for simpler wiring
Linear bars give you most of what a strip offers, an even line of light, but as a self-contained fixture with the diffuser, housing, and wiring already built in. That makes them appealing for anyone who wants predictable results without cutting or splicing anything.
Bars mount in a few common ways: surface-mounted directly to the cabinet bottom, slim recessed into a routed channel for a flush look, or integrated into cabinetry designed with a lighting rail built in. Because the fixture arrives complete, connecting several bars end to end for a long counter run is usually simpler than wiring multiple strip segments together, which is one reason electricians often prefer bars for hardwired jobs.
- Bars win when you want consistent, factory-tested specs and a simpler hardwired install with fewer connection points.
- Strips win when your counter run has an unusual length or shape that a fixed-length bar cannot match.
- Both can use the same dimmer and driver logic, so the choice mostly comes down to installation complexity versus custom fit.
If your kitchen has long, uninterrupted counter runs of a standard length, a bar system can actually be the lower-effort choice. If your cabinets have jogs, corners, or varied lengths, a cuttable strip will fit the space more precisely.
5. Fluorescent and halogen: why LEDs replaced them
Fluorescent under cabinet fixtures were common for decades, but they come with real drawbacks: flicker as the tubes age, limited or no dimming ability, and color rendering that makes food and countertops look duller than they should. Halogen fixtures solved the color problem but introduced a new one, generating enough heat to warm the cabinet above them and burning through bulbs faster than LED equivalents.

LED under cabinet products address both issues at once. They run cooler, dim more predictably, and last considerably longer, and DOE research on solid-state lighting confirms that LED under cabinet fixtures offer better directionality, a lower profile, and improved countertop appearance compared with older fluorescent and halogen options.
If you are replacing an old system, you have a few paths forward:
- LED replacement tubes can sometimes drop into existing fluorescent fixtures, though compatibility with the old ballast varies.
- Full fixture replacement with an LED strip or bar avoids ballast compatibility questions entirely.
- Driver compatibility should be confirmed before buying, since an old transformer built for halogen will not necessarily work with new LED hardware.
7. Reading the specs: brightness, color temperature, and CRI
Once you know the fixture type, the numbers on the box tell you whether it will actually perform. ENERGY STAR's solid-state lighting program sets a practical baseline here.
A recognized baseline for task lighting is 125 lumens per linear foot, the minimum ENERGY STAR sets for qualifying under cabinet kitchen fixtures. Treat that number as a floor for genuine task lighting rather than a target, since accent-only setups can run dimmer.
Color temperature and rendering matter just as much as raw brightness.
- CCT: most kitchens land well with 2700 to 3000K, which reads as warm without looking dim or yellow.
- CRI: aim for 90 or above so colors on the counter and in food look accurate rather than washed out.
- Consistency: never mix CCT values on the same run, since the eye picks up small color shifts more easily at warmer Kelvin values.
- Lifetime claims: look for LM-80 test data behind any stated lifespan, since a number with no testing behind it is just a guess.
Designers commonly settle on 3000K as the safe, neutral-warm default for kitchens, and mixing product lines with different CCT binning is one of the most common ways a finished install ends up looking inconsistent from one end of the counter to the other.
8. Installation and mounting: getting a clean, lasting result
A good fixture choice still needs a solid installation to perform the way its spec sheet promises. A few decisions make the biggest difference.
- Mount strips in an aluminum channel rather than sticking them directly to the cabinet bottom. The channel pulls heat away from the LEDs and diffuses the light for a cleaner look, while direct-stick mounting shortens LED life and can create a visible dotted pattern unless you are using a COB strip.
- Watch voltage drop on long runs. A single 12-volt strip run that stretches too far will visibly dim toward the far end; either switch to 24-volt for longer runs or add a second driver partway through.
- Space and offset pucks carefully so their light pools overlap slightly rather than leaving dark gaps or, on the other extreme, stacking bright spots on top of each other.
- Check recessed housing depth against your actual cabinet bottom thickness before committing to a recessed layout, since not every cabinet has the clearance for it.
- Call an electrician for hardwired work, especially anything involving a new junction box, since that is where code compliance and safety actually matter.
Cabinet construction affects almost every one of these decisions, which is why it pays to think about lighting before your cabinets are already installed. Our guide to plywood cabinet construction covers how box depth and material choice shape what fits underneath.
9. How to choose: a checklist, costs, and questions to ask
Choosing under cabinet lighting is easier once you work through it in order rather than shopping fixture by fixture.
- Measure each counter run so you know exact lengths before comparing strip or bar options.
- Pick a form factor based on run length and whether you want continuous wash or accent pools.
- Settle on CCT and CRI and apply that choice across every fixture in the kitchen.
- Decide on power type: battery and plug-in for flexibility, hardwired for a permanent, cord-free finish.
- Confirm dimming and driver compatibility before ordering, not after installation.
- Buy mounting channels and diffusers at the same time as the lights so the install doesn't stall waiting on a second order.
Costs vary widely by scope. A buyer's guide from This Old House notes that battery or plug-in kits sit at the affordable end, while a fully hardwired professional install with an electrician costs more once labor and code-compliant wiring are factored in. Treat any quote as a starting point for comparison rather than a fixed number until you have specifics for your own kitchen.
| Consideration | Battery or plug-in kit | Hardwired professional install |
|---|---|---|
| Installation effort | DIY, no wiring needed | Requires an electrician |
| Finished look | Visible cords or battery packs | Clean, no visible wiring |
| Permanence | Easy to remove or relocate | Fixed in place |
| Best for | Renters, quick upgrades | Full renovations, resale value |
When talking to a vendor or electrician, ask directly for lumens per foot, CRI, driver specs, and LM-80 data. A supplier who cannot answer those questions, or who offers a long warranty with no testing data behind it, is a sign to keep shopping.
10. Why lighting decisions start with your cabinets
Cabinet depth, door overhangs, and the profile of the bottom rail all decide how much room you actually have for a channel, a puck housing, or a driver. A shallow upper cabinet with a thin bottom panel limits you to slim strips or surface-mounted bars, while a deeper box gives you room for a recessed puck.
Bringing your cabinet plans and your lighting plans together early, ideally before installation day, avoids the rework of drilling new access holes or relocating a driver after the boxes are already hung. Our plywood-box cabinets are built with consistent depth and construction that make planning lighting placement straightforward from the start.
— Nathan
Where to read the primary specs
For product-level detail, ENERGY STAR's solid-state lighting requirements list the under cabinet minimums referenced above, and the DOE's undercabinet lighting brief covers LED performance testing. This Old House's buyer's guide is a useful next stop for current product picks.
Sources
Your power choice affects both the finished look and how much work the install takes. Each option fits a different situation.
- ENERGY STAR Program Requirements for Solid-State Lighting Version 1.2
- Residential Undercabinet Lighting with LEDs (DOE SSL brief)
- Best Under-Cabinet Lighting (This Old House)
Dimming adds another layer to check before you buy. Not every LED driver works with every dimmer, and smart-home protocols vary between systems, so confirm compatibility between the strip or bar, its driver, and the dimmer switch before you install anything. Dim-to-warm products, which mimic the way an old incandescent bulb shifts color as it dims, are a newer option worth asking about, though they rely on specific driver designs and should be evaluated for long-term reliability before you commit to a whole-kitchen installation.
Pro Tip: If you're hardwiring, ask your electrician where the driver will sit. It needs airflow, not a sealed cabinet corner, or it will run hot and fail early.
FAQ
What is the best type of lighting for under kitchen cabinets?
LED strips or linear bars are generally the best choice for everyday task lighting because they give even, continuous coverage with low heat output and long life. Puck lights work better as accents for smaller areas rather than as your main task light.
What are the four main types of lighting?
In a kitchen, the common under cabinet types are LED strips, puck lights, linear light bars, and legacy fluorescent or halogen fixtures. Most new installs now favor LED strips or bars, with fluorescent and halogen mainly appearing in older kitchens awaiting a retrofit.
What are the different styles of cabinet lights?
Styles range from flexible LED tape that can be cut to length, to pre-made linear bars with built-in diffusers, to small round puck lights for accents, to recessed mini fixtures set flush into the cabinet bottom. Each style suits a different mix of counter length, cabinet depth, and desired light effect.
What is the longest-lasting under cabinet lighting?
LED fixtures with documented LM-80 lumen maintenance data tend to hold their brightness and color longest, since that testing is the manufacturer's own evidence of how the LEDs degrade over time. Fluorescent and halogen fixtures generally wear out faster and lose color quality sooner than a well-specified LED product.
How do I know if I need an electrician for under cabinet lighting?
A plug-in or battery-powered kit is a straightforward DIY project with no electrical work required. A hardwired system, especially one involving a new junction box or tying into existing house wiring, should go to a licensed electrician to meet code and stay safe.