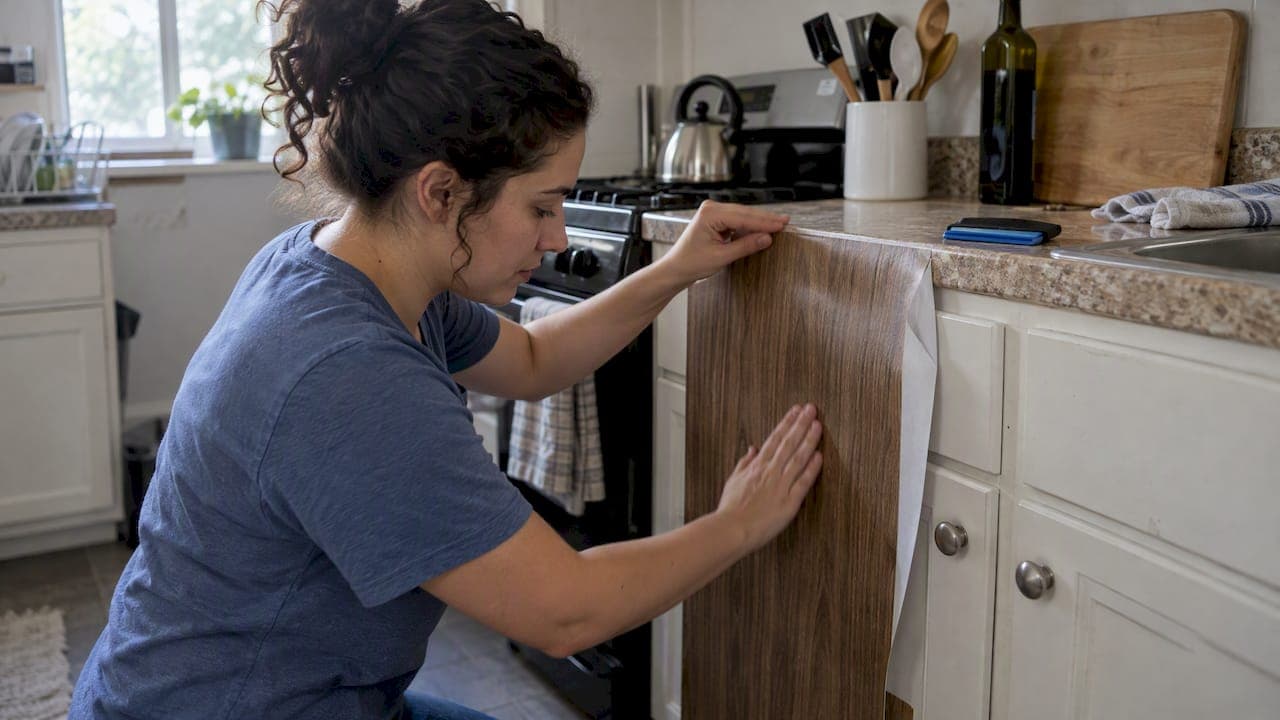
The upgrades that return the most for a renter are new knobs and pulls, peel-and-stick surfaces, no-drill organizers, and adhesive lighting. Get written landlord approval first, because that single step protects your deposit more than any technique does. Most of these projects vary in cost and can take anywhere from a short session to a weekend.
TL;DR:
- Get written landlord approval that names the work and restoration responsibility, then photograph surfaces before and after to protect your deposit.
- Hardware costs about $10–$200 and takes 30–120 minutes, while organizers cost $10–$100 and take 30–90 minutes; tackle quick changes first.
- Peel and stick wraps or tile cost about $30–$400 and take 2–8 hours; test a hidden patch for a week before covering visible surfaces.
- Choose thick vinyl over thin contact paper near the stove, where steam and grease can cause bubbling; matte or satin finishes hide fingerprints better.
Table of Contents
- 1. Swap hardware and add lighting in an afternoon
- 2. Which peel-and-stick and vinyl wrap options work for cabinets?
- 3. Add organization and storage inserts without drilling
- 4. Remove doors, go open, or hang a curtain
- 5. Use removable decor to tie the look together
- 6. Get landlord approval and protect your deposit
- 7. What do these projects cost, and how long do they take?
- 8. Choose durable materials and finishes for a rental
- 9. Pick eco-friendly and budget-conscious upgrades
- 10. Maximize storage and function in a rental kitchen
- 11. Use smart space-saving solutions for rental cabinets
- 12. Match rental cabinets to your existing decor without permanent changes
- 13. When renter-first advice says it is time for real cabinets
- 14. Planning a permanent kitchen? Start with our cabinets
- FAQ
- Sources
1. Swap hardware and add lighting in an afternoon
Hardware is the fastest way to change how a kitchen looks. New knobs or pulls make flat, builder-grade doors feel intentional, and you can reverse the whole job in minutes.
Start by measuring the distance between screw holes on your existing pulls, center to center. Buy replacements that match that spacing so you never drill a new hole. If you want help with placement on new doors later, our guide to cabinet handle placement jigs shows how to avoid drilling mistakes.
- Remove the originals and drop every knob, pull and screw into a labeled bag. Keep it under the sink or in another spot you will remember.
- Swap in new hardware with the same hole spacing, and tighten gently so you don't crack the finish.
- Add battery-operated adhesive LED strips or motion-sensor puck lights under the cabinets. Peel, stick, and pull off cleanly at move-out.
- Budget roughly $5–$30 per knob or pull and $15–$60 for lighting, with each swap taking 15–120 minutes.
For lighting that uses wiring, see how Forever Glow Lighting approaches under-cabinet color temperature, then choose a plug-in or battery version that stays reversible.
Pro Tip: Use museum putty or removable adhesive pads to hold lightweight organizers and light fixtures steady without leaving marks.
2. Which peel-and-stick and vinyl wrap options work for cabinets?
Match the product to the surface. Contact paper suits small areas and counters, full vinyl wraps suit cabinet faces, and peel-and-stick tile suits backsplashes. Done carefully, each one looks custom and comes off later.
One Apartment Therapy renter makeover shows how far a wrap can go. A wood-grain peel-and-stick project transformed cabinet fronts, and the installer used a scraper and heat for a flat finish, joined seams on grain patterns rather than knots, and covered the visible fronts first when material ran short.
A renter's peel-and-stick tile project can cost as little as $30. That makes tile the cheapest way to change a kitchen's whole mood.
Watch for rounded sinks, appliance edges and running out of material. Cover the faces people see every day before anything else. One protective trick: lay a removable vinyl shelf liner first, then apply a stronger-adhesive tile on top so removal is less likely to damage the surface.
- Clean and fully dry the surface, then lightly degrease it.
- Measure and cut each piece slightly oversized.
- Peel back a little backing, press from the center outward, and smooth with a scraper.
- Warm corners and curves with a hairdryer so the adhesive conforms.
- To remove, heat the edge, peel slowly at a low angle, and wipe off residue with a gentle adhesive remover.
3. Add organization and storage inserts without drilling
Inserts give you the storage a new cabinet would, with nothing screwed into the box. Good renter options include over-the-door organizers, adhesive-backed hooks, tension rods for a makeshift under-sink curtain, and shelf inserts. Apartment Therapy's contact paper makeover notes that these expand usable space without permanent mounts.
Taste of Home's kitchen storage roundup points to specific products worth knowing: expandable utensil organizers, cutting board organizers, Lazy Susans, spice organizer drawers, sliding pan and lid organizers, and under-sink slide-out organizers. Measure before you buy, and pick durable options with weight limits that suit what you plan to store.
- Measure the inside width, depth and height of every cabinet or drawer, then allow enough clearance for the insert to fit.
- Use clear, labeled containers on shelf risers to use vertical space.
- Choose organizers in neutral colors so they blend with the cabinet interior.
- Check the weight rating before loading heavy pots.
Tight kitchens benefit from our guide to small kitchen cabinet ideas, and awkward corners are covered in corner cabinet solutions.
4. Remove doors, go open, or hang a curtain
Taking doors off is one of the cheapest reversible changes, and it can make a small kitchen feel larger. Do it in an order that makes reinstallation painless.
- Photograph the cabinet with the doors on, hinges visible.
- Unscrew each door, labeling the door and its hinge position with painter's tape.
- Bag the hinges and screws together per door and tape the bag to the door's back.
- Store the doors flat, wrapped, somewhere dry like a closet or under a bed.
- Fill the open space with a tidy, styled display.
Open shelving looks best when the contents match: stacked white plates, a few glasses, a plant. It turns into clutter when you keep mismatched food packaging on show, so keep those items behind remaining doors.
For a softer approach, mount a tension rod inside the cabinet frame and hang a café curtain or skirt. It hides the contents and adds pattern, and it lifts out in seconds at move-out.

5. Use removable decor to tie the look together
Once the cabinets look right, decor makes the whole room feel finished. Renter guidance from the University of Texas Off-Campus Living team recommends removable wallpaper and decals, drawer organizers, and lighting changes, and advises putting more money into decor that can move with you.
- Pick a removable backsplash wallpaper that picks up a tone from the cabinet finish rather than competing with it.
- Swap lamp shades, clip on a pendant shade, or use adhesive LED strips for renter-safe light.
- Keep counters edited: a tray, one plant, one cutting board.
- Spend on rugs, cookware and art you will take to the next place, and keep fixed changes cheap.
6. Get landlord approval and protect your deposit
Even reversible changes can count as unauthorized if you never asked. Get written permission before you start, and make the note specific: the scope of work, the reversible methods you will use, and who pays for restoration if something goes wrong.
- Photograph every cabinet, wall and counter before and after, with the date visible.
- Store original hardware in a labeled bag so nothing is missing at move-out.
- Use a hairdryer or heat gun on low to loosen adhesive, then peel slowly and wipe residue with a mild adhesive remover.
- If a surface is marked, offer to pay for professional restoration or ask whether the landlord will accept the change.
For a sense of what trips people up at the end, read our list of kitchen cabinet mistakes.
Pro Tip: Email your landlord a short list of the changes and ask for a reply in writing. A text or email thread counts as documentation.
7. What do these projects cost, and how long do they take?
Plan your budget around how long you will stay. A well-known renter project on The Kitchn used peel-and-stick tile for as little as $30, which shows how small a starting point can be.
Typical ranges from the projects above:
- Hardware swap: about $10–$200, 30–120 minutes.
- Peel-and-stick faces or backsplash: about $30–$400, 2–8 hours.
- Organizers: about $10–$100, 30–90 minutes.
- Lighting: about $15–$60, under an hour.
Do quick wins first. Save the full-face wraps for a weekend and for a tenancy long enough to enjoy them.
8. Choose durable materials and finishes for a rental
Rental kitchens take hard use, so choose finishes that survive steam, grease and scrubbing. Wood-grain vinyl and thick, quality contact paper hold up better than thin sheets, which tend to bubble near the stove. Matte or satin finishes hide fingerprints and light scratches better than high gloss.
Test first. Stick a small piece inside a cabinet and leave it for a week, then peel it off to see whether it lifts paint. Cabinets in older rentals often have worn finishes, and a strong adhesive can pull flaking paint with it.
Prioritize durability where hands land: the lower doors, the drawer fronts and the area around the sink. Save thinner, cheaper materials for upper shelves and interiors that nobody touches daily. For hardware, solid metal pulls outlast hollow, plated ones, and you are going to put the originals back anyway, so buy the better pair only if you will keep using it in your next place.
Wipe-clean surfaces matter most. Choose finishes you can clean with a damp cloth and mild soap, and avoid harsh solvents on adhesives while they are still applied.
9. Pick eco-friendly and budget-conscious upgrades
The greenest upgrade is the one you reuse. Thrifted knobs, secondhand organizers and baskets, and leftover paper from a friend's project cut cost and waste at once. Choosing a product you can peel off and reuse in your next kitchen, such as removable hardware or shelf risers, stretches the value too.
Spend where visual impact is highest and save elsewhere: wood-grain wrap or standout hardware on visible fronts, simple solutions on everything else. Treat each project as a temporary makeover so you don't over-invest in a place you will leave.
- Buy durable kitchenware that doubles as decor, such as a good cutting board or ceramic crock.
- Reuse jars and baskets as organizers.
- Choose adhesives and wraps that remove cleanly so nothing ends up in the trash early.
- Keep the original hardware so the next tenant, or your landlord, gets the kitchen back as found.
10. Maximize storage and function in a rental kitchen
Think vertically first. Shelf risers, stackable bins and over-the-door racks add layers inside cabinets that were designed with one open shelf. Apartment Therapy's contact paper makeover underlines the idea: professional organizers point out that vertical space and clear, labeled containers can significantly improve small, deep or awkward cabinets without changing the cabinet structure.
- Install a tension rod under the sink to hang spray bottles.
- Add a slide-out organizer under the sink for cleaning supplies.
- Put a Lazy Susan in a deep corner so nothing gets lost in the back.
- Use adhesive hooks inside doors for measuring cups and pot lids.
Group items by task: baking, coffee, cooking. When each task has a home, you spend less time hunting through cabinets and the kitchen feels bigger without a single new shelf.
11. Use smart space-saving solutions for rental cabinets
Space-saving works best when you pick tools that fit the cabinet you already have. A narrow pull-out organizer slides next to the fridge, a sliding pan and lid organizer tames the cookware cabinet, and a spice drawer insert turns a shallow drawer into an organized station.

The trick is the measuring. Record the interior dimensions, door swing and any pipe or hinge that will block an insert. A tool that is too wide will not allow the door to close, so build in clearance.
Look at the back of doors and the sides of cabinets, too. Adhesive-backed hooks and slim racks use space you were not using. Keep the weight light, test the hold for a few days, and place items you use daily at eye level.
Where a closet or pantry needs a bigger fix, a professional option like One Day Doors & Closets home organization systems can be worth asking about, with your landlord's written approval.
12. Match rental cabinets to your existing decor without permanent changes
Start with the fixed things you cannot change: counters, flooring and appliances. Look at their undertones. If the counter is cool gray, a warm wood-grain wrap may clash, while a soft white or gray-green will settle in.
Pull one color from a permanent feature and repeat it in two removable places, like hardware finish and a rug. Repetition makes the room look planned. Keep metal finishes to two at most, such as brass pulls and black light fixtures, so the room doesn't feel busy.
Lighting changes undertones, too, so check samples at night. A yellow-toned cabinet can look cleaner under a daylight bulb, and a warm bulb makes wood grain richer. If the cabinets are dated yellow wood, a contrasting tile or a cool-toned wrap can reset the whole palette, as The Kitchn's makeover of yellow-toned cabinets showed.
13. When renter-first advice says it is time for real cabinets
Temporary upgrades are the right call for a short stay. They cost little, come off cleanly and don't tie your money to a kitchen you don't own. My honest view is that the instinct to keep pouring money into a rental is where most people go wrong. If you expect to stay for a while, stop at hardware, wraps and organizers.
Permanent cabinetry makes sense only when you own the place, or the landlord agrees in writing and your tenure and budget justify it. For that situation, our RTA and assembled cabinets, with plywood boxes, solid wood doors and fast shipping, are a practical next step.
— Nathan
14. Planning a permanent kitchen? Start with our cabinets
If you own your home, have your landlord's written permission, or plan a long stay, we can help you move beyond temporary fixes. We make RTA cabinets and assembled cabinets for kitchens and bathrooms, built with plywood boxes and solid wood doors, and we ship fast. Homeowners and trade professionals both buy from us.

- Order sample doors to see finish and color in your own light.
- Measure your cabinet footprint before you plan the layout.
- Tell us your dimensions and ask for a quote on the full set.
Browse our kitchen and bathroom range at Best Cabinet Specialist and tell us what you are planning.
FAQ
What are good renter-friendly kitchen cabinet options?
Peel-and-stick wraps, new knobs and pulls, and no-drill organizers are the most reliable choices, because each one removes without damage. Pair them with written landlord approval. If you want permanent cabinets, wait until you have permission or own the home.
How can you make cabinets look better in a rental?
Change the hardware first, then cover the most visible doors with a wood-grain or solid-color wrap. Adding under-cabinet adhesive lighting finishes the look. Keep the original hardware in a labeled bag so you can restore everything at move-out.
Which kitchen trends will look outdated in 2026?
No one can say for certain, and trends shift quickly. A safer approach is to spend little on trendy finishes and more on portable decor you can take with you. That way, if a style fades, you can avoid spending much on changes that are hard to take with you.
What is a good way to design a rental kitchen?
Work with what is fixed, then add removable layers: hardware, wraps, lighting and organizers. Group items by task and use vertical space inside cabinets. Treat every project as temporary so nothing you do is hard to undo.
Sources
- This Kitchen’s Wood-Clad Makeover Can Be Totally Reversed | Apartment Therapy
- The 20 Best Kitchen Storage Ideas for an Organized Space 2026
- Decorate Your Apartment Without Losing Your Deposit | Off-Campus Living Resources