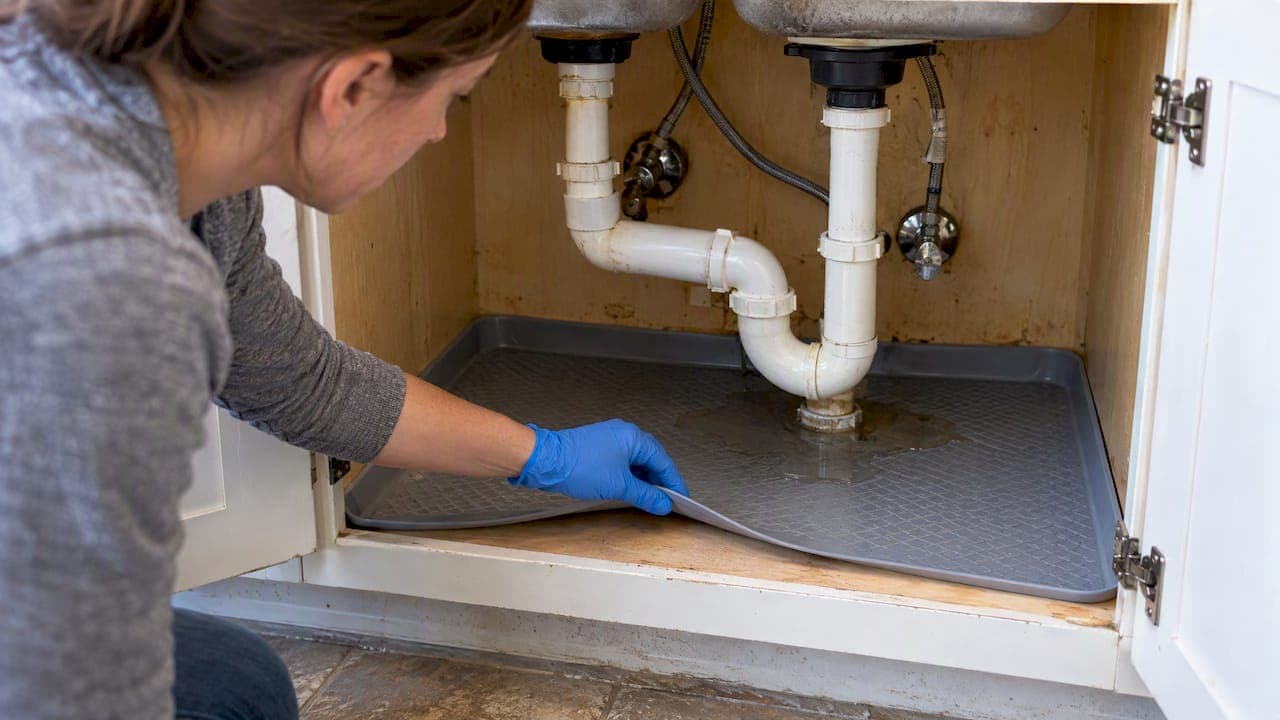
Protect a sink base cabinet by containing leaks with a removable waterproof mat or tray, sealing seams and pipe penetrations with neutral-cure silicone, and checking the interior every 6 to 12 months. These three steps catch the drips that cause the most damage: the slow, unnoticed kind. Together they cost little and take less than an hour to put in place.
TL;DR:
- Flexible silicone mats are the most affordable and easiest to install, suitable for catching small drips and short-term leaks in most kitchens.
- Rigid trays offer better protection against larger failures and are recommended for cabinets with aging or unreliable supply lines.
- Peel-and-stick liners provide permanent, full-coverage protection but can damage cabinet finishes if removed later.
- Proper measurement and sealing with neutral-cure silicone are critical to ensure effective fit and prevent slow leaks from seeping into cabinet materials.
- Regular inspections every 6 to 12 months are essential to identify early signs of leaks and avoid costly damage, especially in moisture-sensitive materials like MDF or particleboard.
Table of Contents
- Which products actually protect a sink base cabinet?
- How do you measure, fit, and seal a sink cabinet for protection?
- Why does cabinet material determine how well protection works?
- How often should you inspect a sink base cabinet for leaks?
- How do you choose the right sink cabinet protector for your home?
- When should you repair versus replace a sink base cabinet?
- What most advice on this topic gets wrong
- How Best Cabinet Specialist can help when containment isn't enough
- FAQ
- Sources
Which products actually protect a sink base cabinet?
Three product categories cover most leak scenarios, and picking the right one depends on how much water you expect and how much floor space you need to cover.
Silicone and rubber mats are the most common fix, and for good reason. A flexible mat like the FLATO Waterproof Under Sink Mat sits directly on the cabinet floor, catches drips from a leaking P-trap or a sweating pipe, and wipes clean in seconds. Under-sink mats and trays sold through major retailers are built for exactly this job: immediate containment with no tools and no adhesive. They flex around pipe obstructions, so fitting one around a garbage disposal or a shutoff valve rarely requires cutting.
Molded rigid trays work best when you are worried about a bigger failure, not just a slow drip. A rigid tray holds standing water instead of letting it pool against the cabinet floor, which matters if a supply line or P-trap fails outright while you are away. The tradeoff is fit: rigid trays do not flex around obstacles the way a silicone mat does, so you need to measure carefully before buying one.
Peel-and-stick waterproof liners take a different approach. Instead of sitting loose on the floor, they bond to the cabinet bottom and create a continuous waterproof layer across the entire base. That full-coverage bond is the main advantage: no gaps at the edges, no mat sliding out of place when you pull out a trash can. The downside is permanence. Once a liner is adhered and has done its job absorbing a spill, pulling it up for replacement can take some of the cabinet's finish with it.
For the highest-risk zone, the area directly under the drain and P-trap, some homeowners skip full coverage entirely and just center a smaller rigid tray or disposable drip pan there. It is a practical compromise: less material, less cost, and it still protects the spot most likely to leak.
| Product type | Material | Ease of cleaning | Durability | Best for |
|---|---|---|---|---|
| FLATO Waterproof Under Sink Mat | Silicone/rubber | Wipes clean, removable | Flexible, resists punctures | Quick containment for drips and small leaks |
| Molded rigid drip tray | Hard plastic | Removable, rinse clean | Holds standing water during larger leaks | Homes with aging or unreliable supply lines |
| Peel-and-stick waterproof liner | Vinyl/waterproof laminate | Wipeable surface, not removable | Durable while bonded, hard to replace | Full-floor coverage in cabinets with frequent spills |
A few quick takeaways if you are choosing between these:
- A flexible mat is the fastest, cheapest option and suits most kitchens with no known plumbing issues.
- A rigid tray makes sense once a cabinet has already seen a leak or sits under an aging water heater or dishwasher connection.
- A peel-and-stick liner is worth the commitment only if you want permanent, edge-to-edge protection and do not plan to swap cabinets soon.
How do you measure, fit, and seal a sink cabinet for protection?
Getting the fit right matters more than the product you buy. A mat that is too small leaves gaps at the corners; a liner cut wrong around a disposal leaves an opening right where leaks are most likely.
- Measure the interior floor of the cabinet, not the exterior door width. Record depth, width, and the location of the drain, disposal, and shutoff valves.
- Clear the cabinet completely and vacuum out dust and old debris so the surface is clean before you fit anything.
- For a mat or rigid tray, dry-fit it first. Trim flexible silicone mats with scissors around pipe penetrations, leaving a little slack rather than cutting tight.
- For a peel-and-stick liner, clean the floor with a degreaser and let it dry fully. Adhesive liners bond poorly to any residual moisture or grease.
- Cut the liner using a cardboard template of the cabinet floor, then transfer the cutout for pipes and the disposal base before applying the adhesive backing.
- Apply a continuous bead of neutral-cure silicone sealant along back corners, seams between cabinet panels, and around pipe collars where they pass through the floor.
- Tool the silicone bead with a gloved finger or a caulk tool so it bonds evenly to both surfaces, then leave it undisturbed for the cure time listed on the tube, typically 24 hours.
- Reposition any rigid tray so it sits centered under the P-trap while still leaving clear access to the shutoff valves for future repairs.
Pro Tip: Always keep the shutoff valves accessible after installing any mat or tray. A protector that blocks quick access to the water supply turns a five-minute fix into a bigger job.
Neutral-cure silicone is worth specifying by name when you buy sealant. It resists moisture better over time than standard acrylic caulk and will not degrade metal hardware the way some acidic formulas can.
Why does cabinet material determine how well protection works?
Not all sink base cabinets respond to moisture the same way, and that difference decides whether a mat and some sealant are enough or whether you are looking at a bigger repair down the line.
Engineered wood products like MDF and particleboard absorb water readily. EPA guidance on moisture control notes that areas around plumbing are especially prone to leaks and recommends avoiding moisture-sensitive materials in those zones where possible. Once MDF or particleboard gets wet, it swells, and the swelling does not reverse when the material dries. Repeated exposure leads to delamination, where the surface layer separates from the core, and once that happens the cabinet floor loses its structural integrity.
Plywood behaves differently. Its layered construction resists swelling far better than engineered wood, and when edges are sealed properly, water has a much harder time reaching the core material at all.
- MDF and particleboard swell and delaminate once soaked, and that damage does not reverse with drying.
- Plywood boxes with sealed cut edges resist water penetration far longer under the same conditions.
- Containment mats and liners are a stopgap on any material. Once a cabinet floor has already swelled or delaminated, no mat will restore its structure, and replacement becomes the practical option.
Our guide on which cabinet materials actually resist water breaks down the construction differences in more detail if you are deciding whether to repair or replace.
How often should you inspect a sink base cabinet for leaks?
A simple inspection schedule catches most problems before they become expensive. Check the cabinet interior every 6 to 12 months, and always after any plumbing work, since a technician reconnecting a line can leave a fitting slightly loose without anyone noticing right away.
Watch for these signs between scheduled checks:
- Staining or discoloration on the cabinet floor or back panel.
- Soft spots when you press on the floor or lower side panels.
- A musty or moldy odor when you open the cabinet doors.
- Corrosion or white buildup at pipe fittings and shutoff valves.
- Persistent dampness that does not dry out between uses.
When wet materials stay wet for several days, mold colonies can begin forming within 48 to 72 hours, according to HUD research on moisture problems in housing. That narrow window is why catching a leak early, rather than during a scheduled check months later, matters so much.
A moisture meter is a useful middle step before calling in a professional: it tells you whether a stain is active or just cosmetic residue from an old, already-fixed leak. If the meter shows ongoing moisture, or if you cannot identify where water is coming from, that is the point to bring in a plumber rather than keep inspecting on your own. Leak detection and repair services can trace a leak to its source, which matters because cosmetic fixes without finding the root cause tend to fail again.

How do you choose the right sink cabinet protector for your home?
Matching the product to your actual risk level saves money and avoids buying more protection than you need, or less than your plumbing history suggests you should have.
- Measure the interior cabinet floor first, and note the location of the drain, disposal, and any shutoff valves before buying anything.
- Choose a flexible silicone mat if your main concern is occasional splashes or drips. It is the lowest-cost option and the easiest to clean.
- Choose a rigid tray if you have older supply lines, a water heater nearby, or any history of leaks. A tray holds standing water that a thin mat would let soak through.
- Choose a peel-and-stick liner only if you want full-floor coverage and do not expect to replace the cabinet soon, since removing a liner later can damage the finish underneath.
- Factor in cleaning frequency. A removable mat suits households that want to pull it out and rinse it regularly; a bonded liner suits those who want to install it once and leave it alone.
- Weigh price against expected service life. A cheap mat may need replacing sooner, while a durable rigid tray or liner costs more upfront but holds up longer under repeated exposure.
When should you repair versus replace a sink base cabinet?
Plywood-box construction with sealed cut edges is the standard we build toward, because it holds up to the kind of slow, repeated moisture exposure that under-sink cabinets see over years of use. Sealed edges matter just as much as the plywood itself: an unsealed cut edge absorbs water almost as readily as particleboard, even on an otherwise solid plywood box.

Containment products buy time, but they are not a permanent fix once a cabinet floor has already swelled, softened, or started to delaminate. At that point, no mat or liner restores the structure underneath it.
A few signs tell you it is time to stop patching and start planning a replacement:
- The cabinet floor flexes or feels soft underfoot when you press on it.
- Doors or drawers near the sink base have started sticking or warping.
- You can see visible swelling or separation at any seam or cut edge.
- The cabinet has needed liner or mat replacement more than once in a year.
If you are at that stage, our guides on MDF versus plywood for kitchen cabinets and the 36 inch sink base cabinet fit guide walk through measurement and material choices for a replacement that will not have the same vulnerability.
What most advice on this topic gets wrong
Most guides treat a sink base cabinet like a problem that gets solved once, with one mat or one tube of caulk. That framing misses the real issue: the damage that actually ruins a cabinet is almost never the dramatic burst pipe. It is the small, slow leak nobody notices for weeks, quietly swelling a particleboard floor from underneath while the cabinet looks fine from the outside.
That changes what should come first. A mat without an inspection habit is just delaying the discovery of a problem, not preventing one. The inspection schedule matters as much as the product you buy, maybe more, because it is the only thing that catches a failure while it is still cheap to fix.
The other thing worth saying plainly: containment and construction quality are not competing choices. A mat protects a healthy cabinet. It does nothing to restore one that has already swollen or delaminated. Knowing which situation you are in, before you spend money, is the first decision, not an afterthought.
— Nathan
How Best Cabinet Specialist can help when containment isn't enough
When a sink base cabinet has already swollen, softened, or delaminated, a mat or liner will not bring back the structure underneath it. That is where we come in. We build our cabinet boxes from plywood with sealed cut edges, which holds up far better than particleboard or MDF against the slow, repeated moisture exposure that sink bases deal with over the years.

We offer both RTA Cabinets, including our Shaker, Classic, and Slim Series, and fully Assembled Cabinets for homeowners who want a plywood box installed and ready to go. Fast shipping means you are not stuck living with a damaged cabinet for weeks while you wait.
A few things worth doing before you decide:
- Measure your cabinet opening and compare it against our RTA and assembled options to see what fits.
- Decide whether you want to assemble the box yourself (RTA) or have it arrive ready to install.
- Check our kitchen and bathroom cabinet lines for finishes and styles that match the rest of your space.
If your current cabinet is still sound, a mat and regular inspections will serve you well. If it is not, we build the kind of plywood construction that is designed to outlast the next leak.
FAQ
What should you put under the sink to protect a cabinet?
A removable waterproof mat or tray, like the FLATO Waterproof Under Sink Mat, is the simplest option for catching drips and small leaks. For heavier protection, a molded rigid tray holds standing water better during a larger plumbing failure.
How do you waterproof an under-sink cabinet?
Combine a removable mat or peel-and-stick liner on the cabinet floor with a bead of neutral-cure silicone sealant around seams, back corners, and pipe penetrations. This dual approach stops both surface spills and slow moisture seeping into seams over time.
How do you protect the bottom of kitchen cabinets?
Measure the interior floor, fit a waterproof mat or liner sized to that space, and seal any gaps at the edges and around pipes with silicone. Checking the cabinet every 6 to 12 months, as building maintenance guidance recommends, helps catch problems before the cabinet floor is affected.
Are sink protectors worth it?
Yes, for the cost and effort involved, a mat or liner is one of the cheaper ways to prevent moisture damage that would otherwise mean replacing a swollen or delaminated cabinet floor. They work best as routine protection, paired with regular inspection, rather than a one-time fix after damage has already started.
When should you call a plumber instead of just adding a protector?
Call a plumber when you find active moisture with a moisture meter, cannot identify where a leak is coming from, or notice recurring dampness despite having a mat or liner in place. Professional leak detection and repair addresses the root cause, which a mat alone cannot fix.
Sources
- Moisture Control Guidance for Building Design, Construction and Maintenance
- NYCHA leak and moisture control standard procedure
- FLATO Waterproof Under Sink Mat, 31" x 22", Beige — Amazon product page
- Moisture problems in manufactured homes: understanding their causes and finding solutions