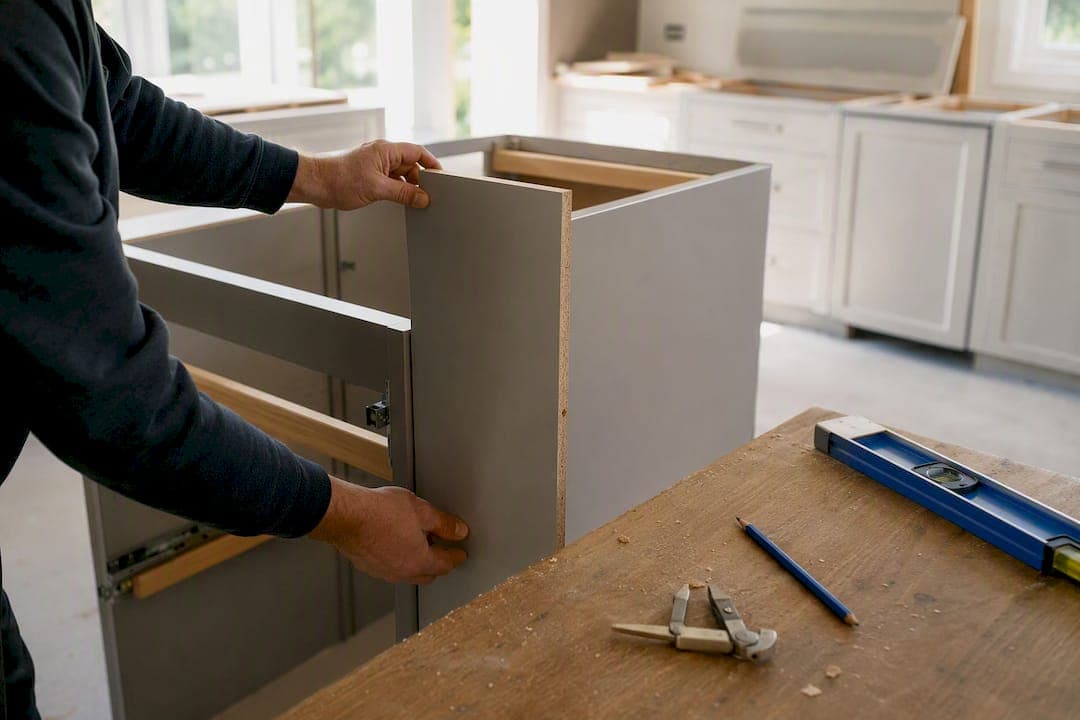
A cabinet end panel is a finished piece that covers the exposed side of a cabinet run, matching your doors so it looks built-in rather than boxed off. If a cabinet side will show, order a matched finished end panel. If you're closing a gap next to a wall, appliance, or corner, you need a filler strip with room to scribe. Either way, get the finish code from your cabinet's manufacturer before you order.
- Exposed cabinet side, fully visible: order a finished end panel
- Narrow gap between cabinet and wall or appliance: order a filler strip
- Wall isn't perfectly straight: order scribe-ready material, not finished-to-size
Key Takeaways
Cabinet end panels solve a finish problem, filler strips solve a clearance problem, and confusing the two is the most common ordering mistake DIY renovators make.
| Point | Details |
|---|---|
| Know your part | Order a finished end panel for exposed cabinet sides, a filler for clearance gaps near walls or appliances. |
| Measure at three points | Check the opening at top, middle, and bottom, then measure from the face frame, not the box. |
| Build in scribe allowance | Add a quarter inch to a half inch of extra material when the wall isn't perfectly straight. |
| Fasten from the inside | Attach through the cabinet's interior face frame and pre-drill every 12 to 18 inches to avoid splitting. |
| Order with full specs | Best Cabinet Specialist can match plywood-box construction and finish codes into one project-ready panel order. |
Table of Contents
- Cabinet End Panels vs. Filler Strips vs. Skin Panels
- Common Sizes, Materials, and Finishes to Know
- How to Measure and Order the Right Panel
- Installing an End Panel: Dry Fit, Scribe, Fasten
- Why Best Cabinet Specialist Makes Matched Panels Easier to Source
- Buying Checklist: What to Confirm Before You Order
- How to Maintain and Clean Cabinet End Panels
- Customizing and Modifying End Panels
- Handling Uneven Walls and Tight Installation Spaces
- Sustainability of End Panel Materials
- An Honest Take on the End Panel Rabbit Hole
- Get a Matched End Panel Without the Back-and-Forth
- Sources
Cabinet End Panels vs. Filler Strips vs. Skin Panels
These three parts get confused constantly, and mixing them up is the number one reason DIY orders arrive wrong.
- End panels are full-size finished pieces that cover the exposed outer side of a cabinet box, matching the door finish so the cabinet looks complete from every angle.
- Filler strips are narrow pieces, typically a quarter inch to six inches wide, installed between a cabinet and a wall, corner, or appliance to give doors and drawers room to swing and slide without hitting an obstruction. Design guidance recommends listing fillers separately from end panels when planning a job, since they serve a clearance function rather than a cosmetic one.
- Skin panels are thin overlay pieces, usually a quarter inch or less, applied over an existing unfinished or damaged cabinet side to refresh it without replacing the whole box.
Pick wrong and you'll end up with a door that can't open fully or a finished side that still shows raw plywood edges. Get it right and both function and finish hold up for years.
Common Sizes, Materials, and Finishes to Know
Most kitchens use a handful of standard dimensions. Stock end panels commonly run 12 by 30 inches or 12 by 42 inches for wall cabinets, and 24 by 36 inches for base cabinets, though full-height panels for tall units run longer.
Materials you'll encounter:
- Plywood-faced panels with a veneer skin, the closest match to plywood-box cabinet construction
- MDF with veneer, smoother for painted finishes but less impact-resistant than plywood
- Solid veneer panels for a natural wood look with visible grain
- Thermofoil, a vinyl wrap over MDF, common on budget lines and easy to wipe clean
Grain direction matters as much as color. A panel with horizontal grain next to vertical-grain doors looks off even if the stain matches perfectly. Painted finishes are more forgiving than stained ones because there's no grain pattern to align.
Lead times for a matched panel typically run anywhere from a few days for in-stock sizes to a few weeks for a custom color match, and pricing varies widely by material and finish complexity, so treat any number you see online as a starting estimate rather than a quote.
How to Measure and Order the Right Panel
Get the measurements wrong and you'll be waiting on a second shipment before the job is done. Take these steps before you place any order.
Measurement checklist:
- Measure the opening at the top, middle, and bottom. Walls and cabinet runs are rarely perfectly square.
- Measure from the face frame, not the cabinet box itself. The box is often set back slightly from the frame.
- Add a quarter inch to a half inch of extra material for scribing if the wall is out of plumb, which gives you room to trim the panel to match the wall's actual contour rather than the theoretical straight line.
- Check appliance swing and handle projection before settling on filler width. A dishwasher door or fridge handle that needs three inches of clearance won't work with a two-inch filler.
- Note the finished thickness you need. Three-quarter inch is standard, but some cabinet lines run thinner.
Pro Tip: When you place the order, write down four things: finished size, thickness, finish code, and whether you want the piece "scribe-ready" or "finished-to-size." That one line of notes prevents most of the return requests we see on custom panel orders.
Filler and end panel specifications should always be listed separately from the rest of your cabinet order, with the finished size, thickness, and finish code spelled out. A supplier can't guess what "the usual" means when every cabinet line has different standard dimensions.
Installing an End Panel: Dry Fit, Scribe, Fasten
Installation isn't complicated, but skipping a step is how a straightforward Saturday project turns into a weekend one.
- Measure the opening one more time right before installation. Framing shifts slightly during a renovation, and a measurement from three weeks ago may no longer be accurate.
- Dry fit the panel against the cabinet run without any fasteners. Check that it sits square, flush with the face frame, and doesn't bind against the floor or wall.
- Scribe and trim if the wall isn't straight. Run a compass or scribing tool along the wall's contour, transfer the line to the panel, and trim with a jigsaw or table saw.
- Attach from the inside through the cabinet's interior face frame whenever possible, rather than driving screws through the visible front face; see this guide to interior panel doors for helpful retail and installation tips on protecting finished faces.
- Pre-drill pilot holes every 12 to 18 inches to prevent the wood from splitting, then countersink and use finish-matched screws or trim nails if a fastener needs to show.
- Caulk the seams with a paintable caulk to hide minor gaps, fill any visible screw holes with matching putty, and touch up the finish where needed.
Pro Tip: If you're not confident about hiding fasteners cleanly, attach through the face frame and use pocket screws where the geometry allows. It's a small technique change that makes the difference between a panel that looks factory-installed and one that clearly shows DIY hardware.
The three mistakes that show up most often: skipping the dry fit and finding out the panel doesn't sit flush after it's already fastened, driving screws through the visible face because it was faster, and cutting the scribe allowance too tight and leaving a visible gap at the wall.
Why Best Cabinet Specialist Makes Matched Panels Easier to Source
Getting a finish-matched panel usually means going back to whoever supplied your cabinets, since off-the-shelf options rarely align with a specific door style or stain.
- Matched finished panels and fillers ordered alongside your original cabinet line, not guessed at from a generic catalog
- Plywood box construction with solid wood doors, the same materials used across the cabinet run, so a new panel's grain and material behavior match rather than clash over time
- Project-ready packages that bundle panels, fillers, and accessories into one order instead of piecing together parts from multiple vendors
- Fast shipping that cuts down the dead time between discovering you need a panel and having it installed
When you reach out, include your original finish code, the cabinet series if you know it, and whether you need scribe-ready or finished-to-size material. That one detail eliminates most of the back-and-forth.
Buying Checklist: What to Confirm Before You Order
Run through this before you hit submit on any panel or filler order.
- Confirm the finished dimensions, material thickness, and edge treatment match what your cabinet run actually needs
- Provide the finish code and grain direction, and state clearly whether you want scribe-ready or finished-to-size material
- Ask about lead time and shipping coverage. Some vendors ship only to contiguous states and list specific ship windows, so confirm this before you count on a delivery date
- Check the return and damage policy in case the panel arrives with a shipping ding or the finish is off
- If an exact match isn't available in stock, consider ordering an unfinished panel and finishing it on-site to guarantee the color lines up
How to Maintain and Clean Cabinet End Panels
End panels take more abuse than most people expect, especially the ones facing a walkway or sitting next to a dishwasher where steam and splashes hit constantly.
For everyday cleaning, a soft cloth with warm water and a mild dish soap handles most grime without stripping the finish. Avoid abrasive scrubbers or anything with bleach on painted or stained wood panels, since they can dull the sheen or lighten the color over time. Thermofoil panels tolerate a bit more scrubbing but still don't hold up well against harsh solvents, which can lift the vinyl wrap at the edges.
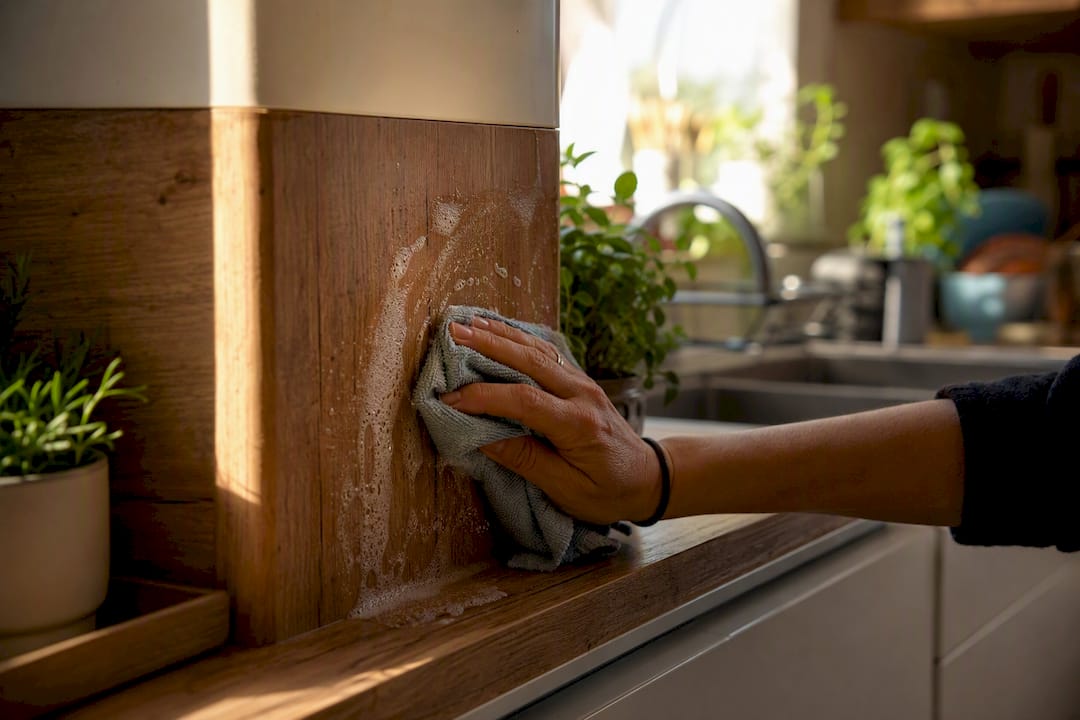
Wipe up water immediately where a panel sits near a sink, dishwasher, or exterior door. Standing moisture is the fastest way to swell plywood-faced panels at the seams or cause veneer to lift. If you notice the finish starting to look dry or chalky after a few years, a matched touch-up product from your cabinet's finish line will refresh it without a full refinish.
Check fastener points once a year, particularly in humid climates. Wood expands and contracts with seasonal humidity, and a panel that was flush in winter can develop a slight gap by summer. A quarter turn on a loose screw and a fresh bead of caulk at the seam usually solves it before it becomes a bigger repair.
Customizing and Modifying End Panels
Stock finishes don't always match, and sometimes the fix is changing the panel rather than chasing an exact factory match.
Painting is the most accessible option for MDF or plywood-faced panels. Sand lightly to scuff the existing finish, prime with a bonding primer made for cabinetry, and apply two thin coats of cabinet-grade enamel. This works especially well when you're updating an entire kitchen to a new color scheme rather than trying to match an aging original finish.
Laminating an existing panel with a new veneer sheet is a common fix when the substrate is sound but the surface finish is damaged or outdated. This costs less than full replacement and works well for skin panels covering an exposed side that was never finished to begin with.
Adding trim or molding to a plain panel edge can dress up a builder-grade end panel to look closer to a furniture-style cabinet run. A simple applied molding strip along the vertical edge changes the whole profile for relatively little material cost. For ideas on how trim details tie into the rest of a cabinet run, see this guide on cabinet crown molding profiles and installation.
Whatever modification you choose, test stain or paint on an offcut or hidden section first. Panel substrates absorb finish differently than the actual cabinet doors, even when both are labeled the same wood species.
Handling Uneven Walls and Tight Installation Spaces
Few kitchen walls are perfectly straight, and that single fact causes more panel-fitting headaches than any other part of the job.
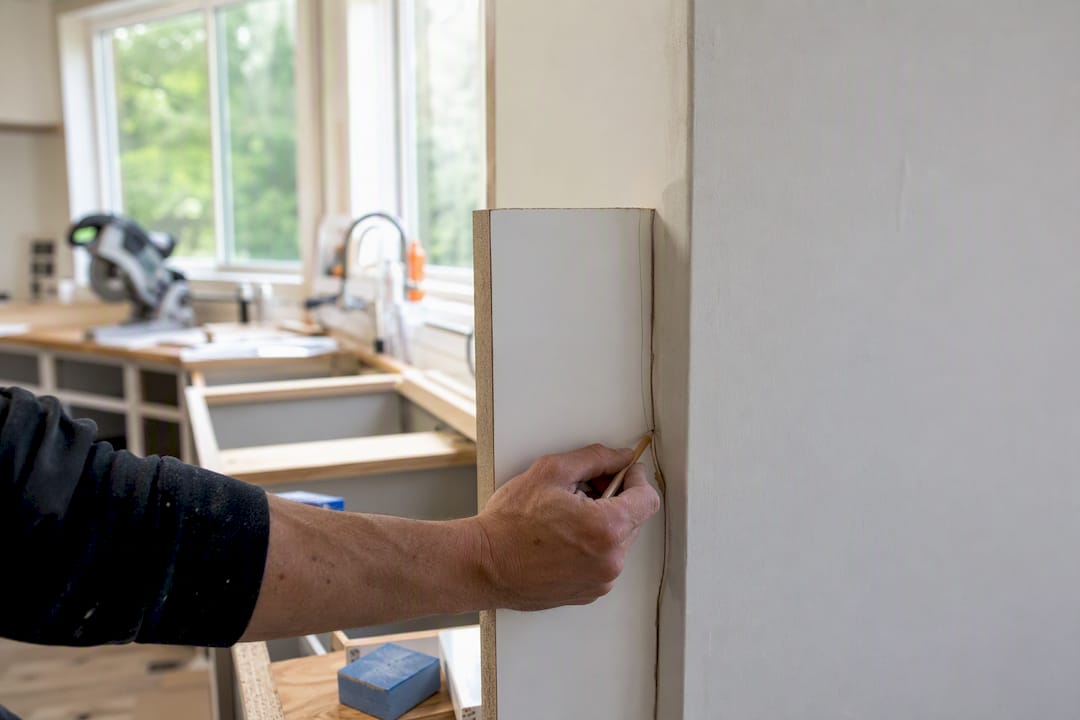
When a wall bows or leans, scribing is the fix, not a bigger filler. Hold the panel in place, run a scribing tool or compass along the wall's actual contour with the point tracing the surface and the pencil marking the panel, then trim to that line with a jigsaw. This is why ordering scribe-ready material with extra width matters. A finished-to-size panel gives you no room to correct for a wall that isn't flat.
Tight spaces next to appliances present a different problem. If a refrigerator or dishwasher needs clearance for its door swing, don't guess at filler width. Open the appliance fully and measure the actual swing radius, then add a small buffer, generally an extra half inch, so the door doesn't bind against the panel over years of use.
Corners create their own challenge, since two out-of-plumb walls meeting at an angle can throw off a panel from both directions at once. In that case, dry fit before any cutting, mark both edges, and trim incrementally rather than cutting the full scribe allowance in one pass. It's slower, but it prevents cutting away material you can't put back. For a broader look at how these spacing issues get planned before installation day, this cabinet layout planning guide covers how professionals account for wall irregularities early.
Sustainability of End Panel Materials
Material choice affects more than finish and price. Plywood-faced panels generally use less resin per board foot than MDF, which is made by binding wood fibers with adhesive under heat and pressure, and plywood's layered construction also tends to hold up longer, which means fewer replacements over a kitchen's lifespan. A panel that lasts twenty years instead of ten is inherently the lower-impact choice regardless of what it's made from.
Look for panels made with FSC-certified wood veneer if sourcing matters to your project, since that certification tracks the wood back to responsibly managed forests. Low-VOC finishes are worth asking about too, particularly for painted panels, since some cabinet-grade enamels and primers now come in formulations with significantly reduced off-gassing compared to older solvent-based products.
Choosing a panel that matches your existing cabinets, rather than replacing an entire run because one side panel is damaged, is itself a sustainability decision. It's why getting the measurement and finish-matching process right on the first order matters. A correctly ordered panel means one shipment and one installation, not a mismatched piece heading to a landfill and a second order placed to fix it.
An Honest Take on the End Panel Rabbit Hole
Most advice on this topic treats end panels like a simple swap: measure, buy, screw it on. That undersells the part that actually causes callbacks and returns, which is the assumption that walls, cabinets, and factory finishes are all perfectly consistent. They aren't. A cabinet run installed five years apart from a panel order will almost never match on grain and sheen unless you go back to the original supplier and specify the finish code exactly.
Where I'd push back on the conventional wisdom is the emphasis on finding the "right size" as the hard part. Sizing is the easy half. The scribe allowance and finish match are where projects go sideways, because both require admitting your wall isn't straight and your cabinet color has likely shifted slightly with age and sunlight.
If you take one thing from this guide, prioritize the finish code and scribe-ready material over speed. A panel that arrives fast but doesn't match, or fits so tight it can't be trimmed to the wall, costs you more time than waiting an extra few days for the right one. Measure twice, order with the exact specs, and treat the wall as crooked until proven otherwise.
— Nathan
Get a Matched End Panel Without the Back-and-Forth
Ordering a finish-matched end panel from a random supplier usually means emailing a swatch photo and hoping for the best. Best Cabinet Specialist skips that guesswork by building end panels and fillers from the same plywood-box, solid-wood-door construction used across its full cabinet lines, so the piece you order actually matches the cabinets you already have.

That matters most for anyone finishing a renovation where the original cabinets came from a different job or a different year. Instead of piecing together specs from a big-box aisle, you get a project-ready order built around your finish code, with fast shipping that keeps a single missing panel from holding up an entire kitchen. If you're not sure which finish code your cabinets use, reach out with your project details and get matched to the right panel, filler, or full package before you commit to a purchase.
Sources
- Filler Panel: A Simple Guide for Kitchen and Bath
- Kitchen cabinet filler strips: sizes, placement and installation guide
- Replacement Cabinet End Panels | Cabinet Doors 'N' More