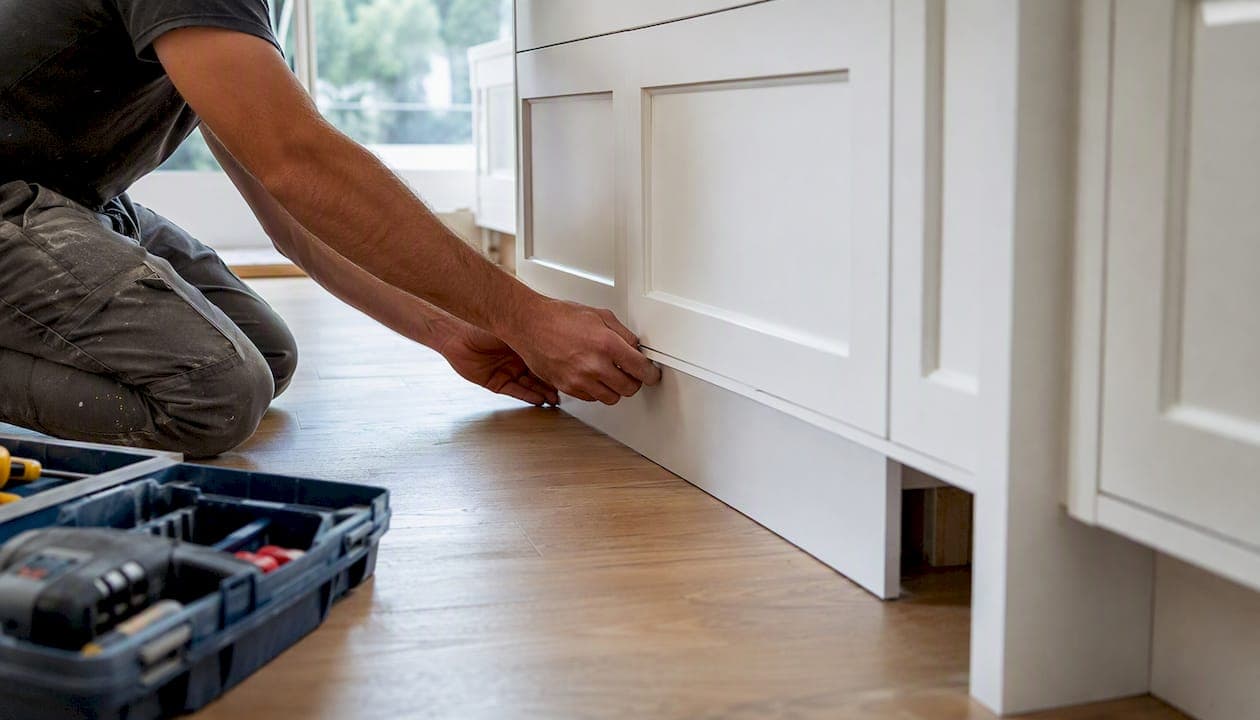
For most U.S. kitchens, a 3.5" recessed toe kick is the right call — it keeps countertops at the standard 36" height, fits standard appliances, and gives you the most comfortable standing position at the counter. When a specific design or functional goal calls for something different, you have solid alternatives: flush panels for a modern minimalist look, decorative valances or furniture feet for a furniture-style finish, toe-kick drawers for hidden storage, and metal or LED kick plates for a contemporary edge.
- Best for practicality: Standard recessed toe kick (3.5" tall, ~3" deep)
- Best for a modern look: Flush toe kick or metal kick plate
- Best for added storage: Toe-kick drawer system
Appliance-fit warning: Before changing any toe-kick height, confirm your base cabinet box will still sit at 34.5" — the opening standard dishwashers and most built-in appliances require. Changing the toe-kick height changes the cabinet box height, and that can lock you out of standard appliance replacements down the road.
Key Takeaways
The most reliable toe-kick choice for a standard U.S. kitchen is a 3.5" recessed panel — it preserves appliance fit, maximizes ergonomic comfort, and works with every cabinet style.
| Point | Details |
|---|---|
| Standard height is 3.5" | A 3.5" toe kick keeps the cabinet box at 34.5" and the counter at the 36" industry standard. |
| Appliance fit depends on it | Changing toe-kick height changes the cabinet box height and can prevent standard dishwashers from fitting. |
| Seal the bottom edge | Apply waterproof sealant or edge banding to MDF or plywood panels before installation to prevent swelling. |
| Order samples and add 10% | Confirm finish match with a physical sample and add 10% to your measured run for cutting waste. |
| Best Cabinet Specialist | Offers project-ready cabinets and matching trim components with fast shipping and consistent finish codes. |
Table of Contents
- What is a toe kick and why does it matter for your kitchen?
- What are the main toe kick options for kitchen cabinets?
- Which materials work best for toe kicks and valances?
- How do you add or modify a toe kick on existing cabinets?
- What are the standard measurements and ADA rules for toe kicks?
- Where can you buy premade toe-kick components?
- How much does toe-kick work cost and how long does it take?
- How do you clean and maintain toe kicks — and use them as a design element?
- Ready to source cabinets and matching toe-kick components?
- Sources
What is a toe kick and why does it matter for your kitchen?
A toe kick is the recessed notch cut into the base of kitchen cabinets at floor level. It sits beneath the cabinet box and pulls back from the face of the doors, typically about 3" deep, so your feet can slide under the cabinet while you stand at the counter. Without it, you'd be forced to stand with your toes pressed against a flat vertical surface — uncomfortable over any stretch of time.
The toe kick is not just a cosmetic detail. It is a structural component of your cabinet's total height. The standard stack runs: toe kick (3.5") + cabinet box (34.5") = 36" finished counter height. Change the toe kick, and you change the whole equation.
That 36" counter height is the U.S. industry standard for kitchen work surfaces, and it also aligns with the rough-in height most standard appliances — dishwashers especially — are built around. For a deeper look at how base cabinet dimensions work together, the base cabinet depth guide from Best Cabinet Specialist covers the full stack clearly.
Pro Tip: If you're installing new flooring before cabinets, account for the finished floor thickness when planning your toe-kick height. A thicker tile floor can eat into your toe-kick clearance and push your countertop above 36".
What are the main toe kick options for kitchen cabinets?
The six styles below cover the full range of kitchen toe kick styles you'll encounter in U.S. kitchens, from the most practical to the most decorative.
-
Standard recessed toe kick: A flat panel set back ~3" from the cabinet face. Clean, simple, and the most ergonomic choice. Works with nearly every cabinet style.
- Best for: Everyday kitchens, families, anyone who spends real time cooking
- Pros: Maximum comfort, easy to clean, compatible with toe-kick drawers and vents
- Cons: Less visually distinctive; plain painted MDF can look utilitarian
- Install: DIY-friendly when cabinets use snap-on leveling legs
-
Flush toe kick: The panel sits flush with the cabinet face, creating a continuous flat surface from counter to floor.
- Best for: Modern, minimalist, or handleless kitchen designs
- Pros: Sleek, uninterrupted look; works well with slab-door styles
- Cons: Reduces standing comfort; harder to keep clean since there's no recess to catch debris away from the cabinet face
- Install: Straightforward, but scribing to an uneven floor is more visible here
-
Shaped bottom rail (SBR) / arched valance: A decorative curved or shaped board that replaces the flat kick panel, often used on traditional or transitional cabinetry.
- Best for: Traditional, Shaker, or cottage-style kitchens
- Pros: Adds visual interest; elevates the look of stock cabinets
- Cons: Harder to clean around curves; limits toe-kick drawer compatibility
- Install: Often a pro or skilled DIY job; requires a jigsaw and finish carpentry skills
-
Furniture feet / legs: Individual turned or tapered legs replace the continuous toe-kick panel, giving base cabinets a freestanding furniture look.
- Best for: Islands, furniture-style kitchens, or accent pieces
- Pros: High-end appearance; easy floor cleaning underneath
- Cons: Reduced ergonomic comfort; floor transitions and cleaning under the cabinet can be tricky; omitting a continuous toe kick reduces standing comfort for everyday work
- Install: DIY-possible with careful measuring; decorative furniture feet and valances can be added to existing overlay cabinets using matched wood, glue, and clamps
-
Toe-kick drawer: A shallow pull-out drawer built into the toe-kick space, typically 3"–4" tall and the full width of a cabinet run.
- Best for: Kitchens short on storage; great for baking sheets, pet bowls, or cleaning supplies
- Pros: Reclaims otherwise dead space; invisible when closed
- Cons: Requires compatible cabinet construction; adds hardware cost
- Install: Usually a pro install or advanced DIY; requires drawer slides rated for the shallow opening
-
Metal kick plate / LED panel: A stainless steel, brushed aluminum, or illuminated panel at the toe-kick level.
- Best for: Contemporary kitchens; LED versions add nighttime navigation lighting
- Pros: Durable, moisture-resistant, easy to wipe clean
- Cons: Higher material cost; LED versions need an electrical connection
- Install: Metal plates are DIY-friendly; LED strips require basic wiring or a plug-in kit
Pro Tip: Toe-kick drawers and HVAC vents are not mutually exclusive — you can alternate them along a run, placing drawers under wide cabinets and vent registers under shorter ones.
Which materials work best for toe kicks and valances?
Choosing the right material comes down to three factors: moisture exposure, finish match to your cabinet doors, and how much abuse the floor-level panel will take from mopping, foot traffic, and the occasional appliance leak.
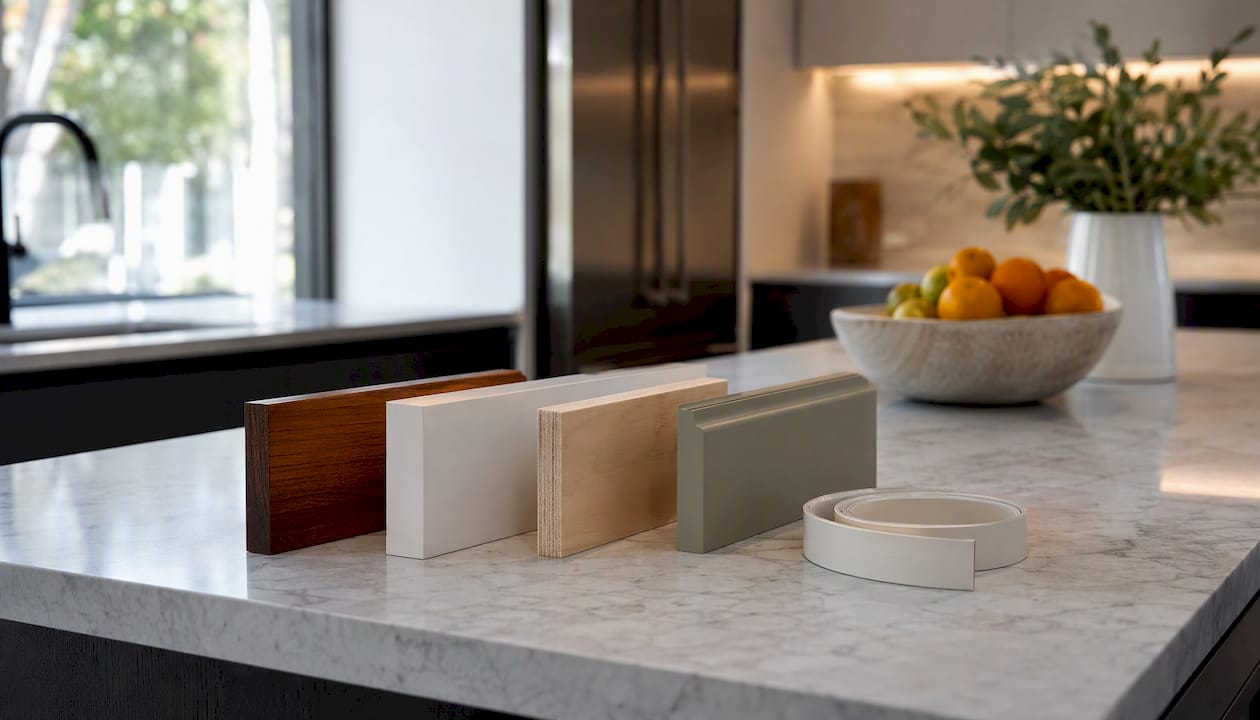
| Material | Pros | Cons | Typical Finish | Durability Notes |
|---|---|---|---|---|
| Solid wood | Matches door finish exactly; can be stained or painted | Higher cost; can warp if unsealed | Paint, stain, or clear coat | Long-lasting when sealed; refinishable |
| MDF | Smooth paint surface; affordable | Swells badly if bottom edge is unsealed; not moisture-resistant | Painted only | Moderate; must seal bottom edge |
| Plywood | More moisture-resistant than MDF; stable | Visible edge grain needs banding | Paint or veneer | Good; better than MDF in wet kitchens |
| Vinyl / PVC | Fully waterproof; easy to cut and snap on | Limited finish options; can look plastic | Factory color | Excellent in wet areas |
| Stainless steel / aluminum | Extremely durable; wipe-clean | Industrial look; higher cost | Brushed or polished metal | Excellent; no sealing needed |
| Tile | Matches floor tile for a seamless look | Difficult to replace; grout lines trap dirt | Grout and tile finish | Very durable when properly set |
MDF is the most common material in stock cabinets, but it carries a real vulnerability: the bottom edge sits at floor level and absorbs water from mopping and spills. Sealing the bottom edge with a waterproof sealant or applying moisture-resistant edge banding before installation is the single most effective step you can take to extend the panel's life.
Pro Tip: Before ordering toe-kick panels in a painted finish, request a physical sample and hold it next to your cabinet doors in your kitchen's actual lighting. Paint colors shift significantly between a screen, a catalog photo, and a real room.
How do you add or modify a toe kick on existing cabinets?
Whether you're replacing a damaged panel or upgrading to a decorative style, the process is manageable for most homeowners — as long as your cabinets sit on adjustable leveling legs with a separate snap-on toe-kick board. Cabinets with an integral notched base are more involved and may require a carpenter.
Before you start: measure your current toe-kick height and confirm the cabinet box sits at 34.5". Changing the toe-kick height to anything other than the standard 3.5" risks creating an appliance-fit conflict — particularly with dishwashers, which need that precise opening.
Step-by-step overview:
- Measure the run. Measure the total linear footage of toe-kick area, then add about 10% for cutting allowance. Plan seams at cabinet joints where they'll be least visible.
- Remove the existing panel. Snap-on boards typically pull free from plastic clips. Screwed or nailed panels need a pry bar and patience to avoid damaging the cabinet base.
- Check the floor for level. Use a level across the full run. Any dip or rise greater than 1/4" needs to be scribed into the panel rather than caulked over.
- Scribe to the floor profile. Set a compass or scribe tool to the largest gap between panel and floor. Run it along the floor while marking the panel, then cut along the scribe line with a jigsaw. Caulk alone won't hide an uneven gap — and trapped dirt will show within weeks.
- Cut panels to length. Use a miter saw for straight cuts. For arched valances or shaped profiles, a jigsaw with a fine-tooth blade gives the cleanest result.
- Attach the panel. Snap-on clip systems are the easiest and most reversible method. For a fixed install, use a brad nailer or construction adhesive with finish nails at the top edge.
- Seal and finish. Apply waterproof sealant to the bottom edge before the panel goes in. Touch up paint or stain after installation, and caulk the top seam where the panel meets the cabinet base.
Tools and materials checklist:
- Tape measure and pencil
- Miter saw and jigsaw
- Level (4-foot minimum)
- Scribe tool or compass
- Brad nailer or finish nails
- Waterproof sealant and caulk gun
- Paint or stain for touch-ups
- Snap-on clips (if replacing a clip-mount system)
For decorative builds like furniture feet or valances, the process adds a few steps: cutting feet to double thickness so they align with the door plane, connecting a valance board between feet, and clamping glued joints overnight. A full walkthrough of that approach is covered in this DIY cabinet guide.
When to hire a pro: Call a carpenter when the job involves changing the base cabinet height, custom furniture-style bases, flooring sequence problems (cabinets already installed over finished floor), or any work that affects appliance openings.
What are the standard measurements and ADA rules for toe kicks?
Getting the dimensions right from the start prevents the most common and costly renovation mistakes.
| Dimension | Standard | Acceptable Custom Range |
|---|---|---|
| Toe-kick height | 3.5" | 3"–4" |
| Toe-kick depth (recess) | 3" | 3"–3.5" |
| Cabinet box height | 34.5" | Fixed for standard appliance fit |
| Finished counter height | 36" | 34.5" for custom/ADA |
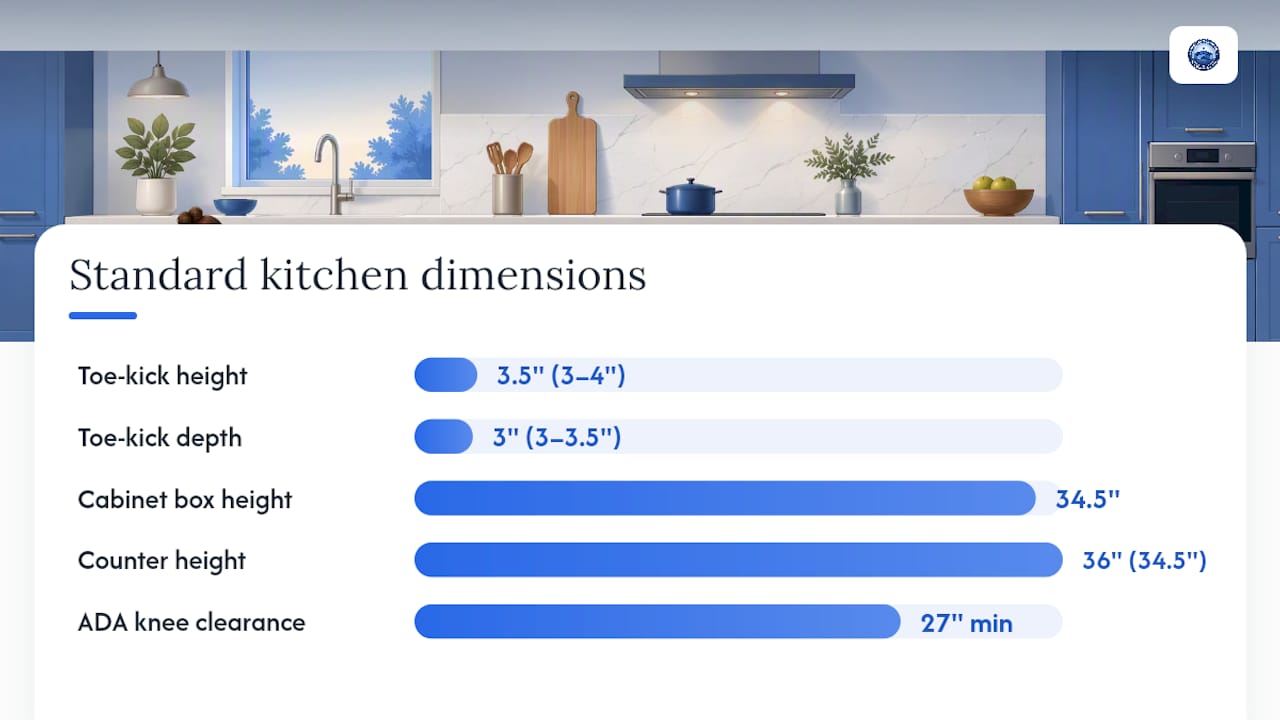
The 3.5" standard height is not arbitrary — it's the result of the cabinet box sitting at 34.5" and the countertop adding roughly 1.5" to reach the 36" work surface most adults find comfortable. Altering the toe-kick height shifts the entire stack.
For ADA-compliant kitchens, the requirements are more specific. The ADA Standards for Accessible Design require a larger toe clearance height and depth than standard cabinets at accessible work surfaces, with knee clearance of at least 27" high, 30" wide, and 19" deep under accessible counters. These figures apply to wheelchair-accessible sections of a kitchen, not the entire run, and they typically require custom cabinet configurations rather than standard base cabinets.
Flooring sequence matters. Always finish the floor up to the toe-kick space first, then install the toe-kick panel last so you can scribe it tightly to the actual finished floor surface. Installing the panel before the floor means you'll have a visible gap at the bottom once the flooring goes in.
For a full measurement checklist before ordering cabinets, the kitchen measurement guide from Best Cabinet Specialist walks through every dimension you need to confirm.
Where can you buy premade toe-kick components?
Most home improvement retailers and cabinet suppliers stock the basics: snap-on toe-kick boards in painted MDF or vinyl, metal kick plates, and basic clip systems. For decorative valances, furniture feet kits, and toe-kick drawer hardware, you'll typically need a specialty cabinet supplier or millwork shop.
Common premade product types:
- Snap-on toe-kick boards (MDF, vinyl, or wood veneer)
- Stainless steel and brushed aluminum kick plates
- Decorative arched or shaped valances (often sold as trim kits)
- Furniture feet kits (turned wood, tapered, or bracket-style)
- Toe-kick drawer systems with shallow slides and face panels
- Plastic snap-on clip systems for leveling-leg cabinets
Buying checklist:
- Measure total linear run and add 10% for cutting waste
- Confirm finish codes match your cabinet doors (request a physical sample)
- Check the attachment method — clips, screws, or adhesive — and order matching hardware
- Verify the return policy before ordering custom-cut or painted panels
- For toe-kick drawers, confirm the drawer slide fits your cabinet's interior depth
Best Cabinet Specialist offers project-ready cabinets with matching trim components, so you can source cabinet boxes and toe-kick panels in the same finish from one supplier. That finish-code consistency is harder to achieve when you mix suppliers.
Pro Tip: Always order at least one spare panel beyond your measured run. A matching spare is invaluable for future repairs — and finish colors can be discontinued or reformulated between production runs.
How much does toe-kick work cost and how long does it take?
The honest answer: a simple panel swap is a Saturday morning job, while custom millwork can stretch into a week-long project with finishing time.
Time estimates:
- Simple panel replacement (snap-on boards, one run): 1–3 hours
- Decorative valance or furniture-feet build: 1–2 days including drying/clamping time
- Custom millwork with shaped profiles and finishing: 1 week or more
Broad cost ranges:
- Premade MDF or vinyl snap-on panels: low cost per linear foot; most homeowners spend under $100 for a standard kitchen run on materials alone
- Metal kick plates (stainless or aluminum): mid-range; typically $15–$40 per linear foot depending on gauge and finish
- Custom wood valances or furniture feet: mid-to-high; material and labor costs vary significantly by region and complexity
- Toe-kick drawer systems: higher cost due to drawer hardware; budget for slides, face panels, and installation time on top of the cabinet modification
Hidden costs to plan for:
- Scribing to an uneven floor adds time and sometimes material waste
- Painting or staining after installation adds a day of drying time
- Appliance adjustments or filler panels if you change base height
- Shipping lead times for custom-finished or color-matched pieces from specialty suppliers
For any job that involves changing the base cabinet height or modifying appliance openings, get at least one local pro quote before committing to a DIY approach. The cost of a carpenter's time is usually far less than the cost of a dishwasher that no longer fits.
How do you clean and maintain toe kicks — and use them as a design element?
Toe kicks take more abuse than any other part of your cabinetry. They're at floor level, which means foot scuffs, mop water, pet bowls, and the occasional appliance leak are all part of daily life.
Routine cleaning by material:
- Wood and MDF (painted): Wipe with a damp cloth and mild dish soap. Avoid soaking — standing water at the bottom edge is the enemy. Dry immediately after mopping.
- Vinyl / PVC: Wipe clean with any household cleaner. Fully waterproof, so mopping is not a concern.
- Metal kick plates: Wipe with a damp microfiber cloth. For stainless steel, wipe in the direction of the grain to avoid scratching.
- Tile: Clean grout lines with a stiff brush and a diluted white vinegar solution. Avoid acidic cleaners on natural stone tile.
Maintenance steps worth doing annually:
- Reseal the bottom edge of wood or MDF panels with waterproof sealant
- Touch up paint chips before moisture gets into the substrate
- Replace swollen MDF panels promptly — once the core swells, it won't compress back
- Refinish solid wood toe kicks every few years if they show wear
Design ideas worth considering:
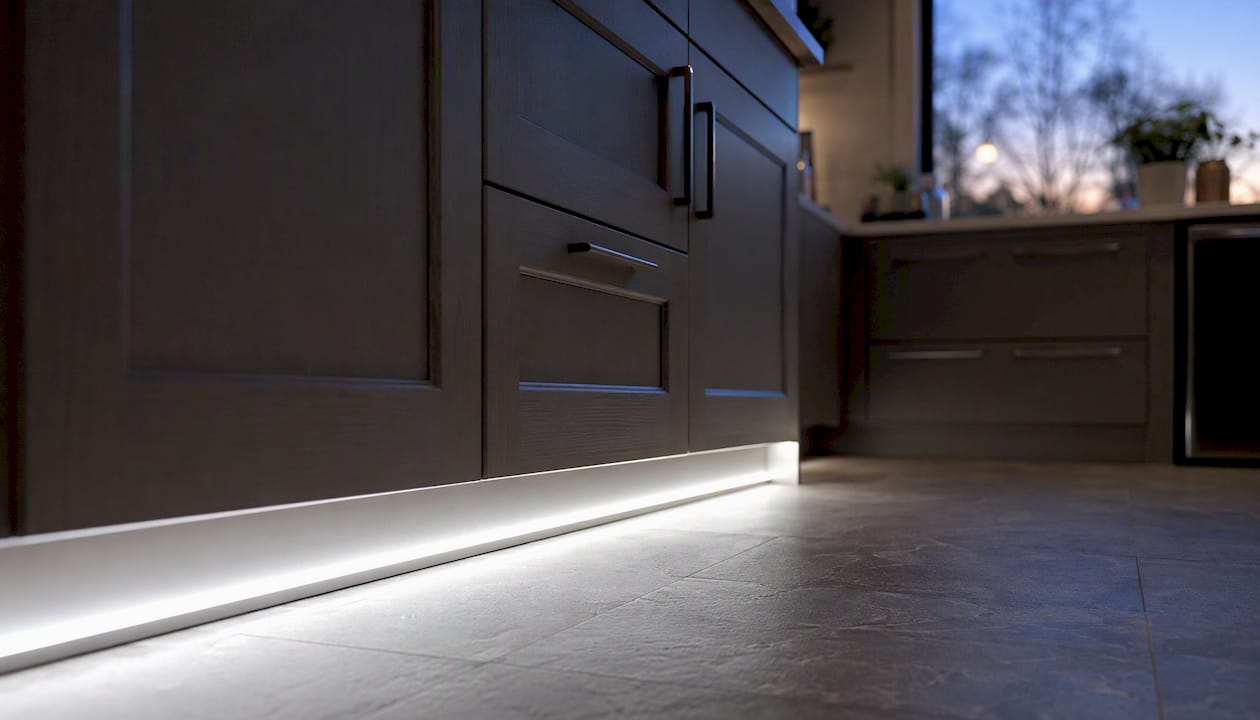
Toe-kick lighting is one of the most underused design moves in residential kitchens. A continuous LED strip tucked into the recess casts a soft glow along the floor, which makes nighttime navigation safer and gives the kitchen a floating, high-end appearance without a major renovation. Plug-in LED strip kits make this a one-hour DIY project.
HVAC toe-kick registers are another practical upgrade. Replacing one or two panels with floor-level vent covers improves air circulation in kitchens where overhead vents don't reach the cooking zone effectively.
For a bolder design statement, consider a contrasting toe-kick color. Painting the toe kick a shade darker than the cabinet doors grounds the cabinetry visually and draws the eye down, making the room feel more anchored. This works especially well in white or light-gray kitchens where a black or charcoal toe kick adds definition without competing with the upper cabinets.
Pro Tip: If you're adding LED strips to a toe kick, use a warm white (2700K–3000K) rather than cool white. Cool white at floor level reads as clinical rather than ambient, and it washes out warm wood or stone flooring.
The case for getting the basics right before going decorative
Toe-kick decisions get treated as an afterthought in most kitchen renovations, and that's where the expensive mistakes happen. The height gets changed to accommodate a thicker floor, the appliance opening shrinks, and suddenly a new dishwasher doesn't fit. Or a homeowner installs a beautiful arched valance before the flooring goes in, then discovers a 3/8" gap at the bottom that no amount of caulk will hide cleanly.
The functional rules here are genuinely simple: keep the height at 3.5", scribe to the actual finished floor, seal the bottom edge, and plan the flooring sequence before the toe kick goes in. Once those boxes are checked, the decorative choices — furniture feet, LED lighting, contrasting colors, metal plates — are low-risk and high-reward. Skipping the basics to get to the decorative part faster is what creates the problems.
The other thing worth saying plainly: the toe kick is one of the few places in a kitchen where a modest upgrade has a disproportionate visual impact. A painted MDF panel costs almost nothing and takes an afternoon. A set of furniture feet on an island transforms how the whole room reads. The return on effort is real, and it doesn't require a full renovation to capture.
Ready to source cabinets and matching toe-kick components?
Best Cabinet Specialist makes it straightforward to get cabinets and matching trim from a single source, so finish codes align from the start. Their project-ready cabinet line is built with plywood boxes and solid wood doors, ships fast, and comes in modern, traditional, and transitional styles to fit most kitchen designs.

Whether you're replacing a single run of toe-kick panels or planning a full kitchen build, Best Cabinet Specialist offers bulk pricing for contractors and trade professionals alongside direct-to-consumer options for homeowners. Samples are available so you can confirm the finish match before ordering the full run. Browse the full cabinet selection at Cabinet-specialist and get your project moving with reliable materials and quick shipping.
Sources
- Kitchen Cabinet Toe Kick: Height and How-To
- How to Add Decorative Toe Kicks to your Kitchen Cabinets
- Kitchen Toe Kick: What It Is, Standard Dimensions, And Why It Matters - America's Advantage Remodeling
- Top Kitchen Remodeling Essentials: Cabinet Toe Kick Guide