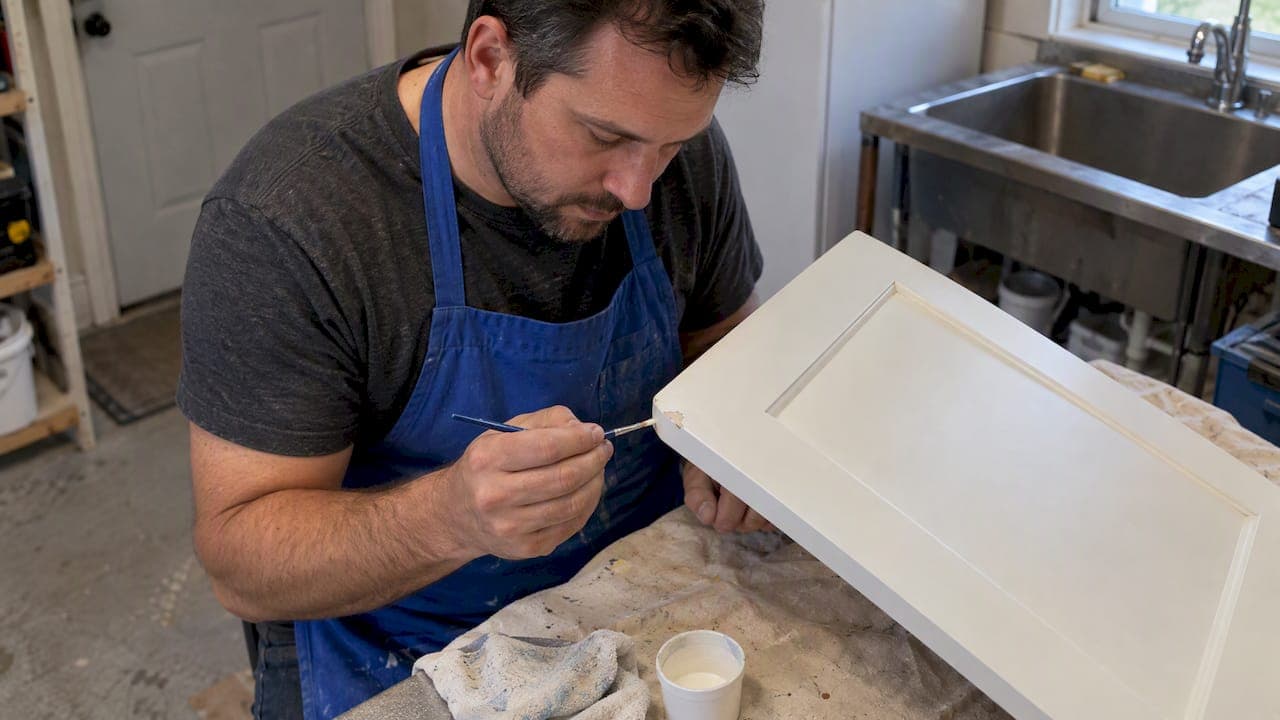
Small scratches and scuffs can usually be repaired with a touch-up pen or tiny brush if you match color and sheen, while large chips typically need filling, sanding, and a feathered repaint. Before anything else, clean the area, test your paint on a hidden spot, and use the same applicator type and direction as the original finish. Get those three steps right and most repairs blend in within minutes.
TL;DR:
- Touch-up paint and pens work well for small scratches on matte or satin cabinets but are less effective on high-gloss or sprayed finishes due to sheen differences.
- Larger chips exposing bare wood require filling, sanding, priming, and feathered painting with matching sheen for a seamless repair.
- Accurate color matching involves testing a custom-tinted sample in the actual lighting and accepting slight mismatches on rarely visible cabinet areas.
- Complete cabinet replacement with factory-finished doors offers the best long-term consistency when damage or mismatched patches becomes widespread.
- Proper repair depends on consistent applicator use, testing on hidden spots, and realistic judgment of when a full refinish or replacement is more practical than spot touch-ups.
Table of Contents
- Painted vs. Stained Cabinets: Pick the Right Repair Path
- Small Scratches and Scuffs: Pens, Markers, and Spot-Paint Technique
- Larger Chips and Edge Damage: Fill, Sand, and Blend Like a Pro
- How to Color-Match Paint and Match Sheen for Cabinets
- Supplies and Touch-Up Kits: What to Buy and When
- Timing, Drying, and When to Refinish Instead of Touch-Up
- Expert Tips and Trade-Tested Shortcuts From a Cabinetry Specialist
- The Real Limits of DIY Touch-Ups
- If Touch-Ups Won't Do: Consider Replacement Doors or New Cabinets
- FAQ
- Sources
Painted vs. Stained Cabinets: Pick the Right Repair Path
Painted cabinets hide touch-ups more easily than stained or clear-coated wood, because paint sits as an opaque layer while stain reveals the wood grain underneath. A patch on a stained door often looks like a patch no matter how careful you are, since grain direction and depth vary piece to piece.
Sheen also changes your odds. Matte and satin finishes forgive small texture differences, but semi-gloss and high-gloss surfaces catch light at an angle and expose even a slightly uneven brush stroke, a point paint manufacturers emphasize in their own touch-up guidance.
Before grabbing a brush, run through this checklist:
- Surface type: painted (touch-up friendly) or stained/clear-coated (harder to hide)
- Damage size: hairline scratch versus a chip larger than a fingertip
- Lighting: cabinets near windows or under bright task lighting show flaws more easily
Small Scratches and Scuffs: Pens, Markers, and Spot-Paint Technique
Hairline scratches and light scuffs are the easiest repairs in the kitchen, and most take only a short time once you're set up. Clean first: grease and cooking residue sit on cabinet surfaces even when they look fine, and paint won't bond well over them.
- Wipe the area with a degreaser or mild dish soap solution, then dry it completely.
- Test your touch-up paint on a hidden spot, like the top edge of a door, and compare the color under the same light you'll be working in.
- Choose your tool: a touch-up pen or marker works well for fine scratches, while a 1/4-inch or 1/2-inch angled brush gives better control on small chips.
- Apply thin layers rather than one heavy coat, following the same brush direction as the original finish.
- Let each layer dry before deciding whether another coat is needed.
Matching the original applicator and stroke direction matters more than people expect. Benjamin Moore's guidance notes that using the same applicator type and painting direction as the original finish helps the texture blend, which is often what separates an invisible touch-up from an obvious one.
If a chip keeps soaking up paint without filling in, or if it has exposed bare wood, stop. That's your signal to move to the next repair level.
Pro Tip: Dab, don't drag, when filling a pinpoint chip. Dragging a brush pulls paint outside the damaged area and widens the visible patch.

Larger Chips and Edge Damage: Fill, Sand, and Blend Like a Pro
Chips that expose wood or go deeper than the paint layer need filling before any paint goes on. A lightweight wood filler or putty made for cabinetry works for most jobs. Choose one that matches your wood tone if you're working on a stained piece, or any paintable filler if you're covering it with paint.
Once the filler cures, sand it smooth with the grain, starting around 220-grit and finishing closer to 320-grit to avoid leaving visible scratch marks that paint will only highlight. Wipe away dust with a tack cloth before moving forward.

Priming isn't always necessary, but bare wood, filled areas, and glossy factory finishes usually need it for good adhesion. A quality bonding primer gives your topcoat something to grip, which matters on cabinets that see daily contact.
For the paint itself:
- Use the same sheen as the surrounding finish, not just a close color match.
- Apply thin coats and feather the edges outward so the repair fades into the original paint rather than stopping at a hard line.
- A mini foam roller suits flat door panels, while a small angled brush handles edges and recessed details.
Once dry, check your work by viewing the door from a few angles and under different light. The Sherwin-Williams repaint process recommends two thin coats of enamel with full drying time between them for exactly this reason: thin layers dry evenly and reduce the ridge lines that give touch-ups away.
High-quality, durable enamels require fewer repeat touch-ups over time, which Benjamin Moore points out as one of the clearest reasons to invest in better paint from the start.
How to Color-Match Paint and Match Sheen for Cabinets
Getting the color right starts with a physical sample, not a guess from memory. Bring a paint chip, a cabinet door, or even a small cutout to a paint counter and have them tint a custom match. Some cabinet brands also offer matched touch-up kits tied to specific finishes, which removes the guesswork entirely.

Sheen is just as important as color, and it's the piece people overlook most. Matte, satin, semi-gloss, and gloss all reflect light differently, so a perfect color match in the wrong sheen still looks off under kitchen lighting. One resource on interior door finishes breaks down how sheen level affects how forgiving (or unforgiving) a surface is to repair, which is worth a look before you buy paint.
Once you have a candidate match:
- Test it on a hidden area first, like inside a cabinet or the back of a door.
- View the dried test patch under your kitchen's actual lighting, not just daylight from a window.
- If the match still looks off, consider repainting the whole door, or even the full run, rather than leaving one mismatched touch-up.
- Accepting a slightly visible patch is sometimes the practical choice on a rarely seen cabinet, like one above the fridge.
Supplies and Touch-Up Kits: What to Buy and When
For quick fixes, small brush-in-bottle paints and touch-up pens handle most hairline scratches and scuffs without any extra tools. These come premixed and ready to use, which makes them a reasonable first purchase for minor repairs.
Larger repairs call for a slightly bigger kit:
- A 1-inch to 1.5-inch angled brush for edges and panel detail
- A mini foam roller for flat door faces
- Sandpaper in 220 and 320 grit, plus tack cloths for dust removal
- Wood filler or putty for chips, and a small tube of wood glue if a sliver of wood has come loose
- A bonding primer for bare wood or glossy surfaces
A matched touch-up kit, where the tint and applicator are packaged together, saves time compared to mixing and testing your own color, especially for a first-time repair.
Timing, Drying, and When to Refinish Instead of Touch-Up
Drying times vary by product, so check the label, but most enamels need a few hours between coats and longer before the door sees regular use. Rushing this step is one of the most common reasons a touch-up looks fine at first and then shows a dull patch or fingerprint marks a week later.
Spot repairs also tend to age differently than the surrounding paint, especially on doors that get frequent hand contact. A repair that blended perfectly on day one can stand out months later under different lighting or after a few more scuffs nearby.
Consider a full refinish or door replacement when:
- The damage sits in a highly visible spot, like eye-level upper cabinets
- A chip is larger than a fingertip or has spread
- You already have two or more mismatched touch-ups on the same door
Expert Tips and Trade-Tested Shortcuts From a Cabinetry Specialist
Pros lean on a few habits that make a real difference in how a repair looks once it's dry. Using a quality angled brush instead of a cheap one cuts down on visible brush marks, and lightly tipping off a wet edge (dragging an almost-dry brush over the fresh paint) smooths texture differences before they set.
Cabinet construction matters too. Durable cabinets with well-made doors hold paint more evenly, since quality materials resist swelling and surface unevenness that can make touch-ups harder to blend over time. That's part of why we built our own cabinet finish guide around durability as much as appearance.
A few habits worth adopting:
- Keep leftover paint from your original cabinet order labeled with the sheen and date purchased.
- Test every touch-up on a hidden spot first, even for a tool you've used before.
- Review our finish durability guide if you're choosing new paint and want fewer repairs down the road.
The Real Limits of DIY Touch-Ups
Most cabinet touch-up advice focuses on technique, and technique matters, but the bigger issue is honesty about when a touch-up is the wrong tool for the job. A factory spray finish and a hand-brushed touch-up are two different processes, and no amount of careful blending erases that gap on a glossy, sprayed surface.
The advice to "just match the color" undersells how much sheen and applicator choice affect the result. We'd argue sheen mismatch causes more failed touch-ups than color mismatch ever does, yet it gets a fraction of the attention in most guides.
Here's what we think matters most: test on a hidden spot every single time, even for a repair you've done before, and accept early that some damage, especially on glossy or sprayed finishes, is a refinish job, not a touch-up job. Trying to force a touch-up past its limits usually costs more time than just doing the bigger repair right the first time.
— Nathan
If Touch-Ups Won't Do: Consider Replacement Doors or New Cabinets
Once you're dealing with widespread wear, several mismatched touch-ups on the same run, or a finish that's simply past its best years, repeated spot repairs stop making sense. New assembled or RTA cabinets give you a consistent factory finish across every door, with color and sheen that match from box to box, something no amount of touch-up paint can fully replicate.

Our cabinets are designed for quality and fast shipping to help keep your kitchen refresh on schedule.
- Consistent factory color and sheen across your whole kitchen
- Durable plywood construction built to handle daily use
- Fast shipping to keep your project on schedule
| Option | Best for | Finish consistency |
|---|---|---|
| Touch-up paint | Small, isolated scratches | Varies by skill and match |
| Full repaint | Moderate wear, one finish type | Good with careful prep |
| New RTA or assembled cabinets | Widespread wear or mismatched repairs | Factory-consistent |
Browse our full cabinet lineup to compare styles and request a quote for your kitchen.
FAQ
Can you touch up cabinet paint?
Yes, small scratches, scuffs, and tiny chips can usually be touched up successfully with a matching paint and the same applicator type used on the original finish. Larger chips or damage on glossy, sprayed surfaces often need filling, sanding, and a feathered repaint for a clean result.
What is the best touch-up paint for cabinets?
The best touch-up paint matches both the color and the sheen of your existing cabinets, whether that's a tinted sample from a paint counter or a prepackaged brush-in-bottle touch-up paint made for furniture and cabinetry. Always test it on a hidden spot before applying it to a visible area.
How can I fix chipped paint on my cabinets?
Clean the area, fill any exposed wood with a paintable wood filler, sand it smooth once cured, and prime if the spot is bare wood or glossy. Finish with thin coats of matching paint, feathering the edges so the repair blends into the surrounding finish.
How do I color match cabinet paint?
Bring a paint chip or a small piece of your cabinet to a paint counter for a custom tint match, and check it against the sheen of your current finish, not just the color. Test the match on a hidden area under your kitchen's actual lighting before committing to the full repair.
Sources
- How to touch up and match paint | Benjamin Moore
- How To Paint Your Kitchen Cabinets in 5 Easy Steps | Sherwin-Williams