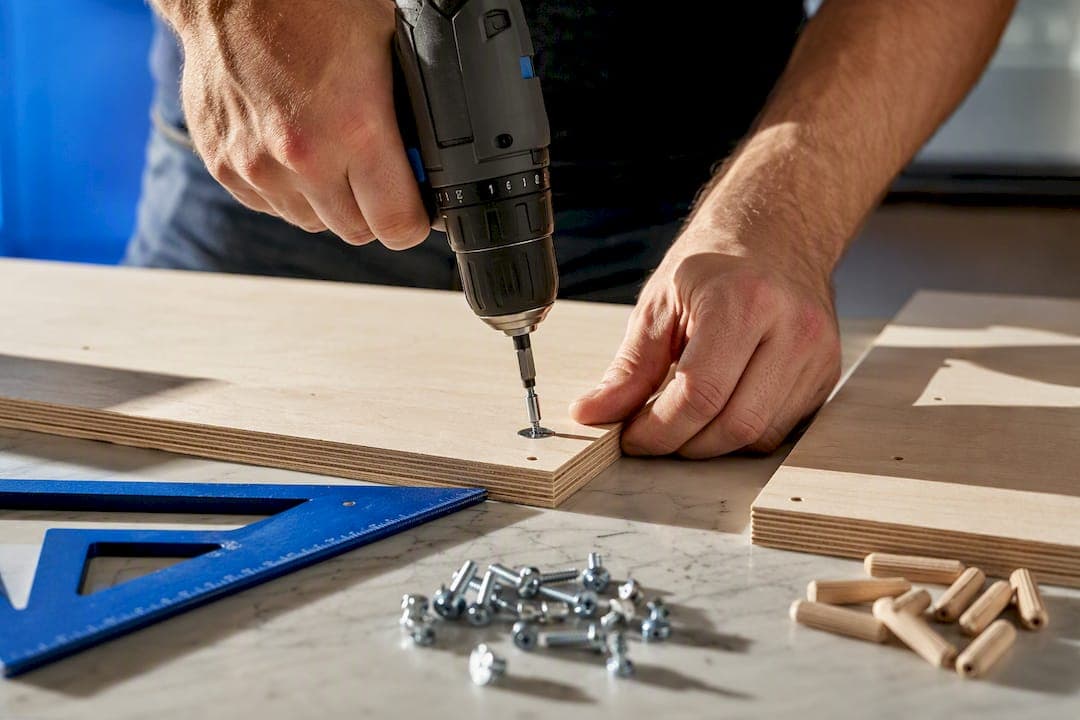
Yes, homeowners can assemble RTA kitchen cabinets themselves if they prepare properly, use the right tools, and follow manufacturer instructions closely. Most cabinets take a moderate amount of time each once you find a rhythm. The biggest risks are stripped screws from rushed power tool use and glue applied where it isn't needed. Watch the model-specific video before you start, and you'll avoid most rookie mistakes.
TL;DR:
- Proper workspace setup and careful inspection upon delivery are crucial to avoid delays caused by missing or damaged parts.
- Dry-fitting panels and using low clutch settings on drills prevent common assembly mistakes like out-of-square boxes and stripped screws.
- Leveling cabinets relative to the highest point on the floor ensures even doors and countertops, with shimming being more effective than adjusting for uneven floors.
- Full assembly times range from 30 to 90 minutes per cabinet, totaling 12 to 20 hours for a typical 10 to 15 cabinet kitchen; fatigue and missing hardware can extend this.
- Safe handling practices, adequate support, and protecting finished surfaces during movement help prevent injuries and surface damage during installation.
Table of Contents
- Tools, Materials, and Workspace Setup for RTA Cabinet Assembly
- Unboxing, Inventory, and Preparation Before You Build
- How Do You Assemble RTA Cabinets Step by Step?
- Installing, Leveling, and Aligning Your Cabinet Run
- Common RTA Assembly Mistakes and How to Fix Them
- How Long Does RTA Cabinet Assembly Actually Take?
- Why Best Cabinet Specialist Fits the RTA Buyer's Needs
- Safety Precautions to Prevent Injuries During Assembly
- Handling and Moving Heavy or Bulky Cabinet Parts
- Cleaning and Maintenance Tips to Keep Your Cabinets Looking New
- What I'd Prioritize If I Were Doing This Myself
- Get Project-Ready Cabinets from Best Cabinet Specialist
- Sources
Tools, Materials, and Workspace Setup for RTA Cabinet Assembly
Before your cabinets arrive, get your workspace ready. RTA cabinet assembly goes faster and produces cleaner results when you're not hunting for a missing tool mid-project.
You'll need:
- A cordless drill/driver with adjustable clutch settings
- Rubber mallet, wood glue, and bar or pipe clamps
- Shims, a pin nailer (optional), and a stable, waist-high work surface
- Furniture blankets or moving pads to protect finished panels
- Safety glasses and work gloves
Set up on sawhorses or a folding table rather than the floor. Working at a raised, waist-high surface reduces back strain significantly and lets you see joints square up as you go.
Pro Tip: Set your drill's clutch to its lowest setting first, then increase it gradually until the screw seats snugly. This one habit prevents most stripped screws and cracked panels on RTA hardware.
Unboxing, Inventory, and Preparation Before You Build
Every delivery deserves a full inspection before boxes get moved to the garage. Skipping this step is how homeowners end up assembling a cabinet, then discovering a cracked side panel with no replacement window left to claim it.
- Photograph every box for shipping damage before you cut a single strap, and note dents, moisture stains, or crushed corners immediately.
- Open each box and check contents against the packing slip. Missing hardware packs and mislabeled panels are common with flat-pack shipments.
- Sort parts by cabinet model and location (base, wall, sink, corner) and label them with tape and a marker so nothing gets mixed up.
- Store hardware bags inside their matching cabinet's panel stack, not in one shared bin.
- Begin assembly only once every cabinet for a given wall run is inventoried. Building out of sequence often means redoing filler calculations later.
How Do You Assemble RTA Cabinets Step by Step?
Every RTA cabinet, regardless of type, follows the same basic sequence: dry-fit the panels first, glue only where the manufacturer specifies, clamp to hold square, then fasten. Skipping the dry-fit is the single most common reason boxes end up racked or out of square.
Base cabinets go together in this order:
- Join the two side panels to the back panel using cam locks or included fasteners, checking the fit before tightening anything.
- Attach the bottom panel, then add the face frame, confirming it's flush and square using a framing square before fastening.
- Secure the toe kick and stretcher rails last.
- Install drawer slides and hardware once the box is fully square and fastened.
Wall cabinets follow the same panel sequence but skip the toe kick. Since you'll hang uppers before setting base cabinets in most workflows, finish these boxes completely, including doors, before moving to installation.
Drawer boxes need slide hardware mounted before the drawer front attaches. Test the slide action empty before loading it, since a binding slide is far easier to fix before the front panel is on.
Sink and corner cabinets carry model-specific quirks. Sink bases often skip a center stretcher for plumbing clearance, and corner cabinets with a lazy Susan require the turntable hardware installed at a precise stage of assembly. Watch the exact model's video before cutting anything or mounting specialty hardware, since sequences vary between manufacturers.
On fasteners: always drill pilot holes in hardwood face frames, keep your drill on a low clutch setting, and never use an impact driver on cam lock fittings. The sudden torque snaps the plastic locks before you feel resistance.
Pro Tip: Dry-fit the entire face frame before reaching for glue. Once you're confident it's square, use a fast-setting wood glue and clamp for a few minutes rather than relying on pin nails alone, which can leave visible holes on finished faces.
Installing, Leveling, and Aligning Your Cabinet Run
Hang your wall cabinets before setting base cabinets. It clears floor space to work and helps you calculate filler strips accurately once the uppers are fixed in place. A cabinet jack or a helper with clamps makes holding a wall cabinet steady while you drive screws into studs far easier than trying to do it solo.
For base runs, clamp adjacent cabinets face-to-face before tipping the whole assembly upright. This creates one rigid unit instead of several wobbly boxes, which makes the entire run easier to level at once.
- Find the highest point on the floor along the run using a long level or laser level and a stringline.
- Shim from that high point outward so every cabinet sits level relative to it, not the floor itself.
- Screw through the top and bottom rails into wall studs wherever possible, adding cabinet screws long enough to bite solid framing.
- Check that adjoining cabinet faces are coplanar (flush front to front) before finishing screws, adjusting shims as needed.
Getting this stage right matters more than any other step, since crooked cabinets telegraph straight through to countertops and doors that won't close evenly.
Common RTA Assembly Mistakes and How to Fix Them
Most assembly problems trace back to rushing the fastening stage. Stripped screws and cracked panels happen almost exclusively when drills run at full torque instead of a controlled, low clutch setting.
Watch for these issues:
- Out-of-square boxes: catch this during the dry-fit, before any glue goes on. Measure diagonals corner to corner. Equal measurements mean square.
- Stripped cam locks: stop immediately and back the fastener out. Reinserting at a slightly different angle usually salvages the fitting.
- Drawer binding: recheck slide alignment; a slide mounted even a few millimeters off will bind under load.
- Visible gaps between face frames: usually a shimming issue at installation, not an assembly defect.
Cosmetic scratches on hidden interior panels rarely justify a replacement request. Cracked face frames, warped doors, or missing hardware packs do.
How Long Does RTA Cabinet Assembly Actually Take?
Plan on 30 to 60 minutes for a simple base or wall cabinet once you're past the first one, and closer to an hour or more for drawer banks, sink bases, or corner units with lazy Susans. A full 10 to 15 cabinet kitchen typically runs 12 to 20 hours of assembly time for one person, less with a second set of hands.
- Simple base/wall cabinet: 30 to 60 minutes
- Drawer bank or sink base: 60 to 90 minutes
- Corner cabinet with lazy Susan: 90+ minutes
Fatigue, missing hardware, and skipped dry-fits are what usually blow past these estimates. Paid assembly services generally charge per cabinet, which adds up fast on a full kitchen, making DIY assembly one of the more meaningful savings in a renovation budget.
Why Best Cabinet Specialist Fits the RTA Buyer's Needs
Best Cabinet Specialist builds cabinets around plywood boxes, solid wood doors, and soft-close hardware, with fast shipping to keep your project on schedule. As a women-owned and veteran-owned business, the company backs its cabinets with real support if you need replacement parts or have assembly questions. Browse model options and configurations before you order.
Safety Precautions to Prevent Injuries During Assembly
Cabinet panels are heavier and more awkward than they look, and most assembly injuries come from predictable moments: a dropped panel, a slipped drill bit, or a strained back from lifting wrong. A little discipline up front prevents most of it.
Wear safety glasses any time you're driving screws or using a pin nailer. Wood splinters and metal shavings from cam lock hardware travel farther than you'd expect. Work gloves help when handling raw plywood edges, which can carry sharp burrs straight from the factory cut.
Keep your drill on a low clutch setting, not just to protect the cabinet but to protect your wrist. A bit that catches unexpectedly on a stripped screw can twist a driver hard enough to cause a sprain.
Never assemble cabinets on an unstable surface. A wobbling table under a half-built cabinet is how panels tip and fingers get pinched. Clear your workspace of tripping hazards, especially loose packaging material and empty boxes, before you start driving screws.
If you're using a pin nailer, treat it like the power tool it is. Keep fingers clear of the discharge point and never bypass the safety tip that prevents accidental firing. Disconnect it from air or battery power whenever you set it down.
Finally, pace yourself. Rushing the last few cabinets at the end of a long day is when clutch settings get ignored and fasteners get overtightened, which is exactly when cracked panels and stripped screws happen.
Handling and Moving Heavy or Bulky Cabinet Parts
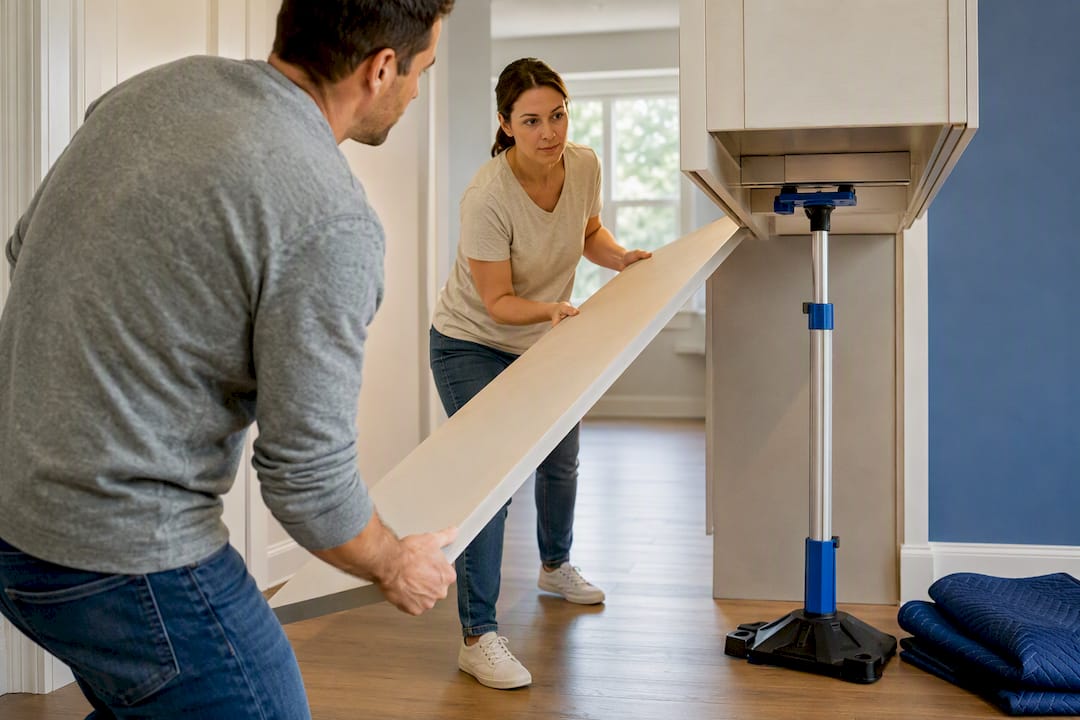
Base cabinet sides and large wall cabinet panels are lighter than solid wood furniture, but their size makes them awkward rather than heavy. Two people moving a panel flat and controlled beats one person wrestling it through a doorway every time.
Carry panels vertically when possible, gripping from underneath rather than by an edge, since edges flex and can crack under uneven pressure. For longer panels like base cabinet sides or countertop-height fillers, one person should lead and call out turns, especially navigating stairs or narrow hallways.
Use furniture blankets or moving pads on any surface where you'll set a finished panel down, including your assembly table. A scratch on a solid wood door face is far harder to fix than the ten seconds it takes to lay down protection first.
When moving fully assembled cabinets into position, empty them of any loose hardware or shelving first. An assembled base cabinet with drawers still loaded is heavier and less stable than the same box empty, and shifting weight inside can throw off your balance mid-carry.
For heavier upper cabinet runs or anything above shoulder height, a cabinet jack or a second set of hands isn't optional. Holding a wall cabinet overhead while also trying to drive screws into studs is how backs get strained and cabinets get dropped. If you're working alone regularly, a jack pays for itself after the first cabinet it saves you from muscling into place solo.
Cleaning and Maintenance Tips to Keep Your Cabinets Looking New
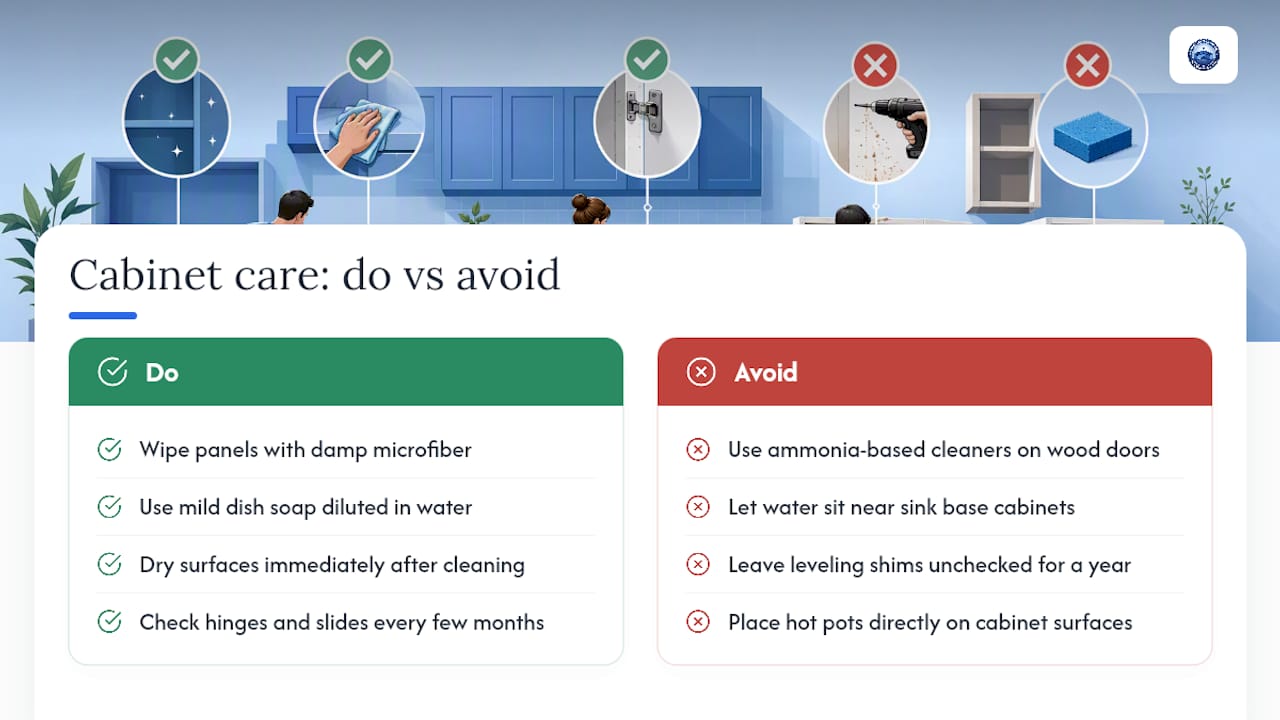
Assembled cabinets need a light cleaning pass before you call the project finished. Wipe down every panel with a slightly damp microfiber cloth to remove dust and handling residue from the assembly process, particularly around cam lock fittings and hinge mounting points where fine sawdust tends to collect.
For solid wood doors, avoid harsh ammonia-based cleaners, which can dull the finish over time. A mild dish soap diluted in water handles most kitchen grime without stripping the protective coating. Dry surfaces immediately rather than letting water sit, especially near sink base cabinets where moisture exposure is highest.
Check soft-close hinges and drawer slides every few months once the kitchen is in daily use. Hardware that feels sluggish or sticky usually just needs the mounting screws snugged slightly, since RTA hardware can settle a bit after the first weeks of regular use.
Keep an eye on shims left under base cabinets during leveling. If a floor settles slightly over the first year, a cabinet run can develop a small gap at the toe kick. Catching this early with a quick shim adjustment is far easier than dealing with a larger alignment problem later.
Avoid setting hot pots or trays directly on cabinet surfaces near the stove, and use cabinet liners in drawers that see heavy daily use. These small habits, more than any specific product, are what keep RTA cabinets looking assembled yesterday for years down the road.
What I'd Prioritize If I Were Doing This Myself
Prep beats speed every time. Protect finished faces with blankets before you touch a drill, and never force a fastener that's fighting you. If leveling a long run or templating for countertops feels beyond your comfort zone, hiring a pro for that one stage is smart, not a failure. Use the site's model videos and product pages before assembly day.
— Nathan
Get Project-Ready Cabinets from Best Cabinet Specialist
If you're weighing RTA against paid assembly services like TaskRabbit taskers, or comparing box construction before you buy, the build quality behind the panels matters as much as the price tag. Best Cabinet Specialist builds every cabinet with plywood boxes, solid wood doors, and soft-close hardware, then ships fast so your project doesn't stall waiting on parts.

If a piece arrives damaged or you're missing a hardware pack, the team is easy to reach and ready to help, a benefit of working with a women-owned and veteran-owned business that treats support as part of the product. Prefer not to assemble everything yourself? Assembled options are available too. Browse current cabinet styles and pricing to start planning your kitchen.
Sources
For hands-on technique validation, see This Old House's RTA installation guide, Fine Homebuilding's flat-pack cabinet walkthrough, and Lowe's assembly how-to page. For model comparisons, browse Best Cabinet Specialist's RTA options.
- How To Install RTA Cabinets - This Old House
- How to Install Flat-Pack Kitchen Cabinets - Fine Homebuilding