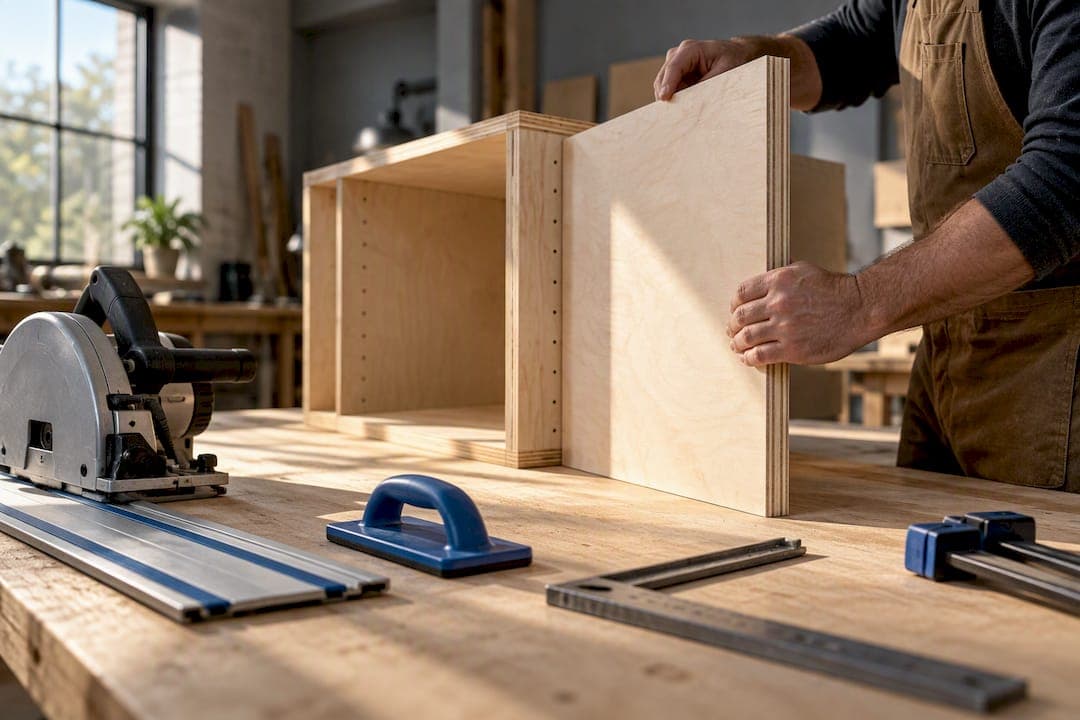
Build plywood cabinet boxes with 3/4-inch cabinet-grade plywood for the carcass, a 1/4-inch back panel, and pocket-screw assembly for a strong, square result. Choose face-frame construction if you want more forgiveness on imperfect cuts, or frameless if you want maximum interior storage space. A 24-inch base cabinet, the standard example used throughout this guide, needs roughly one full sheet of 3/4-inch plywood and part of a 1/4-inch sheet for the back.
TL;DR:
- Using a 24-inch wide, 34.5-inch tall cabinet as a template, a standard build requires one full sheet of 3/4-inch plywood and part of a 1/4-inch sheet for the back.
- Birch plywood is the typical choice for carcasses, with Baltic birch offering better edge strength and warping resistance despite higher cost.
- Face-frame construction tolerates imperfect cuts and is more beginner-friendly, while frameless maximizes interior space but demands precise workmanship.
- A simple tool set including a circular saw, drill, pocket-hole jig, clamps, and measuring tools suffices for initial builds, with upgrades like a track saw speeding future projects.
- Ensuring the back panel is cut to outside dimensions and attached early is critical for keeping the cabinet square, especially for beginners.
Table of Contents
- Which plywood should you choose for cabinet construction?
- Should you build frameless or face-frame cabinets?
- What tools do you need to build cabinets in a home shop?
- What's a standard cut list for a 24-inch base cabinet?
- How do you cut and prepare plywood without tear-out?
- What's the best way to assemble a square, rigid cabinet box?
- How do you choose doors, drawers, and hardware for plywood cabinets?
- How should you finish and protect plywood cabinet edges?
- How do you install and level finished plywood cabinets?
- What should you double-check before you call the cabinet finished?
- Is building your own cabinets actually worth the effort?
- Where plywood cabinets from Best Cabinet Specialist fit into this project
- Sources
- FAQ
Which plywood should you choose for cabinet construction?
Cabinet carcasses, shelves, and stretchers should be built from 3/4-inch veneer-core plywood, while backs typically use 1/4-inch material. Birch plywood is the standard choice for its stable core and smooth face, though any hardwood-veneer sheet with an A or B face grade works well for cabinets that will be painted or stained.

Face grade matters more than most first-time builders expect. A/B grade plywood gives you one clean face for painting and a slightly rougher backside that hides inside the cabinet. If you're staining instead of painting, look for a hardwood veneer, like birch or maple, with consistent color and minimal patching. Baltic birch plywood, prized for its void-free core and multiple thin plies, holds screws better at the edges and resists warping, which makes it worth the extra cost for face frames or exposed sides. Some suppliers also sell prefinished plywood with a factory coat already applied, which can cut your finishing time significantly since you skip sanding and sealing the interior faces.
Before you buy, confirm the panels meet composite wood emission standards. TSCA Title VI sets formaldehyde emission limits at 0.05 parts per million for hardwood plywood, 0.09 ppm for particleboard, and 0.11 ppm for MDF. Kitchen cabinets sit in a room with heat, moisture, and food, so low-emission panels aren't a detail to skip. Ask your supplier for compliance documentation if you don't see a stamp on the sheet itself.
One 3/4-inch sheet of birch plywood typically runs $60 to $90, and a standard 24-inch base cabinet consumes about one full sheet plus part of a 1/4-inch back sheet. Buying an extra sheet of each thickness covers mistakes and lets you batch cuts for a full run of cabinets.
- 3/4-inch birch plywood: sides, bottom, shelves, stretchers, and toe kick.
- 1/4-inch plywood: back panel and drawer bottoms.
- A/B grade: best for painted finishes where one smooth face is enough.
- Baltic birch: worth the upgrade for face frames and visible edges.
For a deeper breakdown of thickness trade-offs, our guide on choosing 3/4-inch versus 1/2-inch plywood covers strength and weight differences in more detail, and our CARB 2 compliance guide explains how to verify low-formaldehyde panels before you buy.
Should you build frameless or face-frame cabinets?
This decision shapes your entire cut list, so make it before you touch a saw. Frameless construction uses nearly the full width of the box and relies on 35mm cup hinges mounted directly to the cabinet side. Face-frame construction adds a solid wood frame across the front opening, which costs you about 1.5 inches of interior depth but hides slightly uneven cuts and gives you a sturdier surface for mounting hinges.
If you're new to cabinet building, face-frame is the more patient teacher. Small gaps or a cut that's off by a sixteenth of an inch disappear behind the frame. Frameless construction demands tighter tolerances since every edge is visible and every hinge bores directly into the plywood side panel.
- Face-frame: more forgiving, better for painted cabinets, loses interior depth.
- Frameless: maximizes storage space, suits prefinished carcasses, needs precise cuts.
- Hinges: frameless uses concealed 35mm cup hinges; face-frame uses frame-mounted hinges.
Your choice also changes drilling locations. Frameless boxes need hinge cup holes bored into the side panels at set heights, while face-frame boxes mount hinges to the frame itself, which means your side panel dimensions can be slightly less exact.
What tools do you need to build cabinets in a home shop?
You don't need a full cabinet shop to build solid plywood boxes. A circular saw with a straightedge guide, a drill/driver, a pocket-hole jig, clamps, and basic measuring tools are enough to complete a first cabinet build from start to finish.
- Circular saw and straightedge guide: breaks down full sheets into manageable parts.
- Drill/driver and pocket-hole jig: creates strong, hidden joints without a table saw.
- Bar or pipe clamps: hold parts square while screws and glue set.
- Tape measure, combination square, and pencil: keep every cut consistent.
Once you've built a cabinet or two, a few upgrades start paying for themselves. A track saw gives cleaner, straighter cuts than a circular saw and guide combination, typically for $200 to $400. A table saw speeds up ripping repeated widths, a router cleans up edges and cuts hinge mortises, and a brad nailer secures back panels and trim without clamps tying up your hands. None of these are required for a first build, but they shorten the time between cutting and assembly on future projects.
Pro Tip: Set up a dedicated cutting station with a rigid, flat surface, and keep a shop vacuum or dust collector running near your saw. Plywood dust is fine and irritating, so eye protection and a dust mask are worth wearing even for a single cabinet.

What's a standard cut list for a 24-inch base cabinet?
A 24-inch wide, 34.5-inch tall, 24-inch deep base cabinet is the benchmark most DIY guides build around, and it's a useful template whether you're making one cabinet or a full run. Here's a standard cut list for a face-frame version:
| Part | Quantity | Dimensions | Material |
|---|---|---|---|
| Sides | 2 | 24" x 34.5" | 3/4" plywood |
| Bottom | 1 | 24" x 23" | 3/4" plywood |
| Stretchers (top rails) | 2 | 24" x 3" | 3/4" plywood |
| Back panel | 1 | 24" x 34.5" | 1/4" plywood |
| Toe kick | 1 | 24" x 4" | 3/4" plywood |
| Face frame stiles | 2 | 1.5" x 34.5" | Solid wood |
| Face frame rails | 2 | 1.5" x 24" | Solid wood |
Adjust the back panel and bottom width by an inch or so if you're building frameless, since the face frame won't be there to cover the front edge.
- Cut both side panels first, since they set the height and depth for everything else.
- Cut the bottom and stretchers to match the width between the two sides.
- Cut the back panel to the outside dimensions of the assembled box, not the inside opening.
- Cut the toe kick and face frame parts last, since they're the most forgiving on minor sizing.
A single 24-inch base cabinet typically consumes one full 3/4-inch sheet plus a partial 1/4-inch sheet for the back. If you're building more than one cabinet, buy an extra sheet of each thickness before you start. Batch your cuts by dimension across all cabinets rather than cutting one cabinet completely before starting the next, since this reduces the number of times you reset your saw guide and cuts down on wasted offcuts.
How do you cut and prepare plywood without tear-out?
Clean cuts start with a straight reference edge. Clamp a straightedge or track guide along your cut line and let the saw's base ride against it rather than trying to follow a pencil line freehand. A blade with a high tooth count, 60 teeth or more for a 7.25-inch circular saw blade, reduces splintering on the visible face.
- Score your cut line with a utility knife before sawing, or apply painter's tape along the line, to keep the top veneer from chipping as the blade exits.
- Always cut with the good face up when using a circular saw, since the blade tends to splinter the top surface on the exit stroke.
- Keep one factory edge on each sheet as a reference for square, and measure all other cuts from that edge rather than from a cut you made yourself.
- Label every part as you cut it, marking cabinet number, part name, and orientation directly on the plywood in pencil.
- Rout or sand the front edges of door and drawer blanks now, before assembly, so you get a clean, even reveal once the doors are hung.
Working this way turns a stack of identical rectangles into an organized kit. It also catches measurement errors early, since a mislabeled part shows up during the dry fit rather than after the glue is down.
What's the best way to assemble a square, rigid cabinet box?
Pocket screws are the fastest and most beginner-friendly joinery method for plywood cabinets, and they hold up well when combined with wood glue. Dados, cut with a router or table saw, add mechanical strength and hide the joint line, but they require more precise setup. Biscuits split the difference: stronger alignment than screws alone, less demanding than dados, but they need a biscuit joiner most home shops don't have.
- Pre-drill pocket holes in the bottom and stretcher panels where they'll meet the side panels.
- Dry-fit the entire box without glue to confirm every part lines up before you commit.
- Apply wood glue to the joint faces, then screw the bottom and sides together using 1.25-inch coarse-thread pocket screws.
- Attach the stretchers at the top of the box the same way, checking that the top stays flush with the sides.
- Clamp the assembly and measure both diagonals corner to corner. Equal diagonals mean a square box; if they're off, apply gentle pressure to the longer diagonal until the numbers match.
- Cut the back panel to the outside dimensions of the box and screw it on last. Attaching the back while the box is still slightly adjustable pulls the whole assembly square and locks it there, which makes it one of the most reliable steps in the entire build.
Use a polyurethane or PVA wood glue rated for interior use, and stick with coarse-thread pocket screws sized for 3/4-inch plywood, generally 1.25 inches for face joints. If you're using dados instead, a 3/4-inch straight bit cut to a quarter of the panel thickness gives a snug fit without weakening the plywood too much.
Pro Tip: Don't skip the diagonal check. A box that looks square by eye can be off by a quarter inch corner to corner, and that error compounds once you start hanging doors or setting the cabinet next to its neighbor.
How do you choose doors, drawers, and hardware for plywood cabinets?
Slab doors, cut from a single piece of plywood with edge banding applied, are the simplest option and pair naturally with frameless or modern cabinet styles. Shaker-style frame-and-panel doors take more time, since they require a router or table saw to cut grooves for a floating center panel, but they give a more traditional look. The center panel should float rather than glue into the frame, since a fixed panel will crack as the wood expands and contracts with humidity, though a plywood panel glued into a rabbeted frame avoids this problem since plywood doesn't move the way solid wood does.
Drawer boxes are usually built from 1/2-inch plywood sides with a 1/4-inch plywood bottom set into a groove. Leave about a half inch of clearance on each side for standard drawer slides, and check your slide packaging for the exact clearance it needs before cutting.
- Slab doors: plywood with edge banding, fastest to build, suits frameless boxes.
- Shaker doors: frame-and-panel with a floating center, more traditional, needs more tools.
- Drawer boxes: 1/2-inch sides, 1/4-inch bottom, sized to your slide's clearance requirement.
The 1/3 rule for hardware sizing suggests a drawer pull's overall length should run roughly one-third of the drawer's width, which keeps pulls visually balanced instead of looking too small or oversized. For doors, use the door's height as a loose guide for pull placement rather than a strict formula. Frameless cabinets use 35mm concealed cup hinges bored directly into the side panel, while face-frame cabinets mount hinges to the frame edge, which is a more forgiving surface for a first-time drill.
How should you finish and protect plywood cabinet edges?
Raw plywood edges show visible plies, so covering them is both a durability step and a visual one. Iron-on edge banding is the fastest method for straight edges: heat activates the adhesive, and a flush trim bit or sanding block cleans up the excess. Solid-wood edging, glued and nailed along exposed edges, holds up to more wear and takes stain better than veneer banding.
- Iron-on edge banding: fast, inexpensive, works well on painted cabinets.
- Solid-wood edging: more durable, takes stain evenly, better for high-wear edges.
- Prefinished edge strips: skip the finishing step entirely on factory-coated plywood.
For paint-grade builds, sand all faces with 150 then 220 grit before priming, and use a bonding primer formulated for plywood to keep paint from peeling at the edges. For stained veneer faces, work through the same grits, then apply a pre-stain conditioner to even out how the veneer absorbs color. Seal the cabinet interior, especially near a sink base, with a couple of coats of polyurethane or a dedicated cabinet interior sealer to keep moisture from swelling the plywood layers over time.
Pro Tip: Finish all interior faces before final assembly whenever possible. It's far easier to sand and seal a flat panel on a workbench than to reach into an assembled box with a brush.
How do you install and level finished plywood cabinets?
Start with a toe-kick platform built from 2x4 lumber, set level across the full run with shims under the low spots. This platform carries the weight of every cabinet above it, so getting it level first saves you from fighting uneven doors and drawers later. Once the platform is level, set the cabinet on top and screw through the back nailer or top stretcher into wall studs, not just drywall.
- Build and level the toe-kick platform first, shimming as needed until a level reads flat across the entire run.
- Set the cabinet in place and screw through the rear stretcher into wall studs for a secure mount.
- Join adjacent cabinets by clamping the face frames or sides together and screwing through pre-drilled holes, keeping a consistent reveal for full-overlay doors.
- For a sink base, skip the full bottom shelf or notch it for plumbing clearance, and confirm the drain and supply lines have room before you screw the cabinet down permanently.
Leave a small, consistent gap between adjacent full-overlay doors, generally an eighth of an inch, so they don't rub against each other when opened and closed.
What should you double-check before you call the cabinet finished?
A few habits separate a cabinet that lasts from one that wobbles or binds within a year.
- Cut the back to outside dimensions and attach it early. It acts as a squaring jig, not just a cosmetic panel, and skipping this step is the most common reason a box ends up out of square.
- Dry-fit every assembly before glue goes on. A part that's an eighth of an inch off is easy to fix before assembly and nearly impossible to fix after.
- Label every part as you cut it. A pile of unlabeled plywood rectangles looks identical until you're trying to remember which side goes where.
- Keep pocket holes off finished faces. Plan your joinery so screw holes land on the inside of the cabinet, never on a face that will be visible once the door is hung.
- Consider prefinished plywood for interior faces. It skips sanding and sealing steps entirely, though you'll still need to finish any cut edges you expose.
Is building your own cabinets actually worth the effort?
The honest answer is that plywood cabinet construction rewards patience more than skill. Most failed builds don't come from a bad cut, they come from skipping the dry fit or rushing the back panel step that locks everything square. That single habit, cutting the back to outside dimensions and attaching it early, does more for a beginner's success rate than any tool upgrade.

Where conventional advice falls short is in treating tool investment as the barrier. A track saw or table saw makes repeat cuts faster, but a circular saw and a straightedge guide, used carefully, produce a cabinet just as square. The real gap is sequencing: cutting before deciding frameless versus face-frame, or skipping the diagonal check because the box "looks square."
If you're building one or two cabinets to learn the process, prioritize the squaring sequence over the shopping list. If you're facing a full kitchen's worth of boxes, weigh the total hours against buying finished plywood cabinets and spending that time on trim, painting, or the parts of the project that don't scale with practice.
— Nathan
Where plywood cabinets from Best Cabinet Specialist fit into this project
Building your own cabinets teaches you exactly what goes into a solid plywood box, and that knowledge makes it easier to judge a finished product when buying makes more sense for your timeline. Some cabinet specialists build cabinets with plywood boxes and solid wood doors, offering the same carcass material this guide walks you through, without the weekends spent cutting, drilling, and finishing.
- RTA Cabinets: shipped flat for straightforward assembly if you want the plywood durability without a full build from raw sheets.
- Assembled Cabinets: arrive ready to install for projects where your time is better spent elsewhere.
- Shaker Series and Classic Series: offer traditional and painted-style door options if you'd rather skip cutting frame-and-panel joints yourself.
If a full kitchen's cut list feels like more than your weekends can absorb, browse the RTA cabinet lineup or the assembled cabinet options to see plywood construction delivered ready for your space.
Sources
- Small entity compliance guide for formaldehyde standards (EPA)
- How to build basic kitchen cabinets: cut list and dimensions (RealWoodWorkPlans)
- How to build kitchen cabinets from plywood (WoodworkingAdvisor)
- Cabinet hardware sizing guide — the 1/3 rule (DoorCorner)
FAQ
What is the 1/3 rule for cabinet hardware?
The 1/3 rule states that a drawer pull's overall length should measure roughly one-third of the drawer's width for balanced proportions. Designers use this ratio as a starting point, then confirm center-to-center spacing before drilling.
What type of plywood is best for cabinet construction?
Birch veneer-core plywood is the standard choice for cabinet carcasses because of its stable core and smooth paintable or stainable face. Baltic birch is a stronger, void-free upgrade worth considering for face frames or exposed sides, and any panel you choose should meet TSCA Title VI formaldehyde limits for indoor use.
How thick should plywood be for a cabinet?
Cabinet sides, bottoms, and shelves should use 3/4-inch plywood, while back panels typically use 1/4-inch plywood. This combination is standard across most DIY cabinet cut lists and balances strength against weight and cost.
How do I build a cabinet using only plywood?
Cut your sides, bottom, stretchers, and back from plywood sheets, then join the box with pocket screws and glue before attaching the back to lock it square. Finish with edge banding on exposed edges, sand and seal the faces, then hang doors and drawers once the box is level and installed.