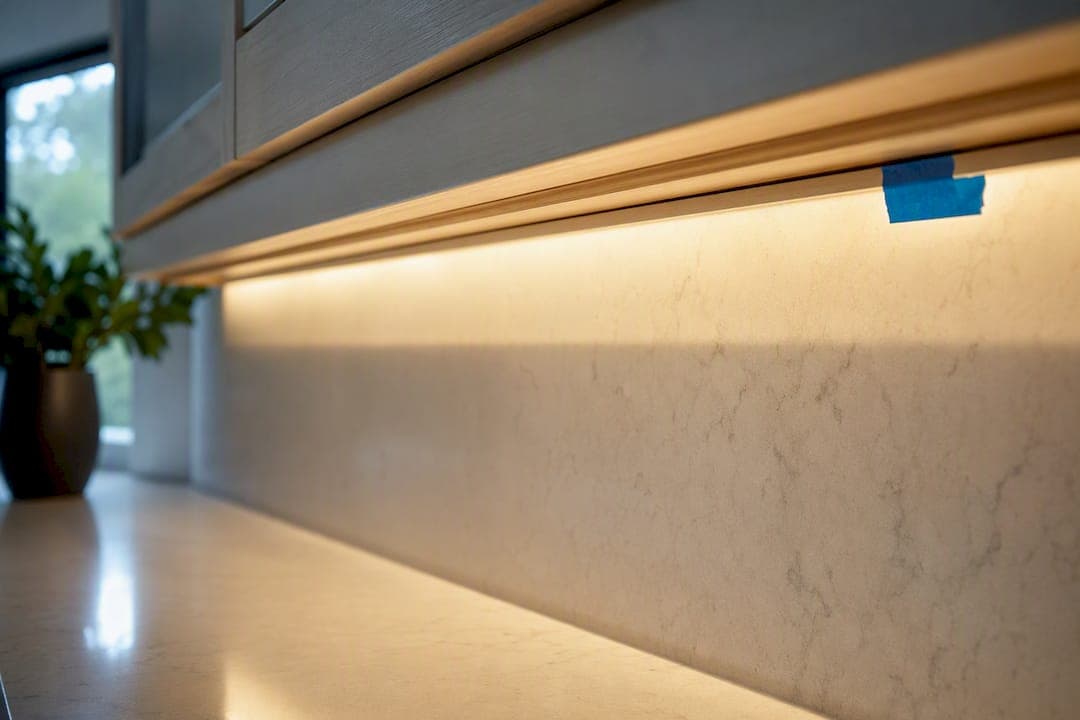
Light rail molding is a narrow strip of trim mounted along the bottom edge of wall cabinets, right where the cabinet box meets open air above the countertop. Its job is simple: hide under-cabinet lighting fixtures and wiring, block glare from those lights, and give the cabinet's underside a finished look instead of exposed plywood. You need it whenever you're finishing upper cabinets with clean sightlines or installing puck lights, LED strips, or fluorescent under-cabinet fixtures that would otherwise sit in plain view.
TL;DR:
- Light rail molding typically ships in 96-inch lengths and ranges from 7/8 to 2 1/4 inches in height, with profiles designed for traditional or contemporary styles.
- Deeper profiles provide better glare control and support larger fixtures, while shallow profiles create a nearly invisible finish for minimal cabinet disruption.
- Proper measurement of cabinet depth, clearance needs, and reveal is crucial to ensure the molding fits and functions without obstructing hardware or lighting.
- Material options include hardwood for staining, paint-grade MDF for painted finishes, and soft maple for better moisture resistance, depending on your project needs.
- Regular cleaning, gap checking, and touch-up repairs are essential for maintaining the trim's appearance and function over time.
Table of Contents
- Common Dimensions, Profiles, and How to Measure for Light Rail Molding
- Materials and Finish Options for Light Rail Molding
- How Does Light Rail Control Glare and Support Design?
- How Do You Cut and Install Light Rail Molding?
- What Should You Check Before Buying Light Rail Molding?
- How Do You Maintain and Repair Light Rail Molding?
- Publisher's Take: When to DIY and When to Call a Pro
- How Best Cabinet Specialist Fits Into Your Trim Project
- Sources
- FAQ
Common Dimensions, Profiles, and How to Measure for Light Rail Molding
Most light rail molding ships in 96 inch stock lengths that get cut down to fit each cabinet run, and cross sections typically range from about 7/8 inch to 2 1/4 inches in height, with projection (depth) varying by profile. A shallow, flat profile barely shows below the cabinet. A deeper, more ornamental one can house bulkier fixtures and cast a wider shadow line.

Profile names describe the shape cut into the wood: an ogee curves in an S shape for a traditional look, a bead profile adds a rounded ridge for subtle detail, and a shaker bevel keeps things flat and contemporary. Some suppliers also offer Greek key or fretwork motifs for a more decorative statement.
To measure correctly:
- Measure the cabinet's bottom depth, front to back, so the rail's projection doesn't block door swing or drawer clearance.
- Check the clearance needed for your light housing or LED strip channel before picking a profile height.
- Note the reveal (the gap between the cabinet face and rail) you want visible from below.
- Convert a spec line like "Height x Depth x Length" into a decision: taller height hides bigger fixtures, deeper projection blocks more glare, and length determines how many joints you'll need per run.
Materials and Finish Options for Light Rail Molding
Solid hardwood, usually maple, oak, or cherry, takes stain well and matches furniture-grade cabinet doors, but it costs more and needs careful finishing to avoid blotching. Paint-grade MDF gives you a perfectly smooth surface for painted kitchens without the grain telegraphing through the topcoat. Soft maple splits the difference: it paints cleanly and holds up better than MDF in humid spots near a sink or dishwasher.
Unfinished hardwood rail is the right call if you're staining to match an existing wood tone exactly, since prefinished pieces rarely blend perfectly with cabinets that have already aged or weathered. Prefinished rail saves labor but locks you into the manufacturer's color match.
- Solid hardwood: stain-ready, higher cost, more finishing work
- Paint-grade MDF: smooth finish, budget-friendly, moisture-sensitive
- Soft maple: paints well, moderate cost, better moisture tolerance than MDF
- Unfinished stock: best for custom stain matching
Pro Tip: If you're pairing light rail with RTA cabinets, order a sample of the cabinet door finish first and hold it against your rail material in the room's actual lighting. Undertones shift more than you'd expect between showroom light and kitchen light.
How Does Light Rail Control Glare and Support Design?
Light rail molding blocks direct glare by extending below the light housing far enough that the bulb or LED strip isn't visible at eye level, and deeper profiles block more light spill than shallow ones. The NKBA reports that 88% of design professionals now use lighting to shape mood in a kitchen, and 74% say it directly affects how occupants feel in the space, so the rail you choose is doing more than hiding hardware.
Surface-mounted rail sits flush against the cabinet's bottom edge and reads as one continuous piece. Inset light rail tucks up into a routed channel and can double as a decorative built-up detail rather than a strictly functional cover.
- Deeper profile: better for larger fixtures or when you want strong glare control
- Shallow profile: subtle, nearly invisible finish for minimal disruption to the cabinet line
- Matching finish: creates a seamless, cohesive cabinet run
- Contrasting finish: adds a deliberate accent line, a look supported by the rising personalization trend NKBA tracked, where Over half of professionals expect cabinets to carry statement colors
How Do You Cut and Install Light Rail Molding?
Start with the right tools: a miter saw for angled cuts, a coping saw for inside corners, a pneumatic brad nailer for fast fastening, clamps to hold pieces during glue-up, and a combination square to check your angles before you commit to a cut.
- Cut each piece about 2 inches longer than your final measurement, then dry-fit it against the cabinet run before cutting to exact length.
- Mark the miter heel, the point where the angled cut meets the rail's face, directly on the piece rather than trusting the saw's factory marks.
- Build or use an auxiliary fence or sled on your miter saw for the angled cuts. Wood Magazine's tight-fit wraparound technique relies on this setup, and it's the single biggest factor in getting gap-free corners on narrow stock.
- Test-fit every joint before you reach for glue or a nail gun. A rail that looks right dry can still shift once fastened.
- Glue and brad-nail rail to plywood cabinet carcasses for a permanent bond. On solid wood cabinet boxes, leave slightly oversized fastener holes or a hair of clearance so the wood can expand and contract with the seasons without cracking the joint.
- Sand, fill any small gaps with paintable caulk (never wood filler on a joint that needs to flex), then finish in the sequence that matches your project: paint or stain the rail before installing light fixtures, so you're not masking hardware mid-job.
Pro Tip: Dry-fit the entire run, including inside corners, before you cut a single piece to final length. It takes ten extra minutes and saves you from ruining an expensive stick of hardwood on a bad angle.
What Should You Check Before Buying Light Rail Molding?
Before you order, confirm the height, depth, and length listed on the product page match what you measured at the cabinet, not just the nominal size shown in a thumbnail photo. Stock rail commonly ships in 96 inch lengths cut to size, so check whether the retailer sells by the linear foot or the full stick.
- Verify species or material, and whether it ships prefinished or unfinished.
- Look for photos showing the profile installed in a real kitchen, not just a cross-section drawing.
- Order 10 to 15% extra length to cover miter mistakes and short offcuts.
- Confirm the return policy and ask whether your finish batch can be matched later if you need more down the road.
- Buy from moulding suppliers, cabinet accessory retailers, or a local cabinet maker for custom profiles that a big box store won't stock.
Lead times for stock rail usually run days; custom-matched profiles from a millwork shop can take several weeks, so order early if your project has a hard deadline.
How Do You Maintain and Repair Light Rail Molding?
Light rail collects dust and kitchen grease faster than most trim because it sits directly above heat and cooking activity. Wipe it weekly with a damp microfiber cloth and a mild dish soap solution. Skip ammonia-based cleaners on painted finishes since they can dull the sheen over time, and avoid soaking the wood, since standing moisture is what causes swelling and joint separation in the first place.

Check the miter joints twice a year for gaps. Kitchens go through real temperature and humidity swings between summer and winter, and solid wood rail moves with those changes even when installed correctly. A small gap at a corner joint usually means the caulk has dried out and cracked, not that the wood has failed. Scrape out the old bead, apply fresh paintable caulk, smooth it with a wet finger, and touch up paint once it cures.
For a rail that's chipped or gouged, sand the damaged spot lightly, fill it with wood filler on unfinished stock or spackling on painted MDF, then feather the edges before repainting. Stained hardwood is less forgiving. A chip usually means replacing that section rather than patching, since stain rarely blends over filler the way paint does. If your under-cabinet lights run warm, check the rail periodically for discoloration near the fixture. Excess heat can yellow paint faster than normal wear, which usually means the fixture needs better ventilation clearance, not a different rail material.

Publisher's Take: When to DIY and When to Call a Pro
For painted kitchens, paint-grade MDF matched to your cabinet doors gives the cleanest result at the lowest cost. For stained projects, order hardwood that matches your door species rather than guessing at a close substitute. Long runs, tricky inside corners, or integrated lighting installs are where hiring a finish carpenter pays off. If you want to go deeper on related trim work, our guides to scribe molding and cabinet crown molding cover the techniques that carry over directly.
— Nathan
How Best Cabinet Specialist Fits Into Your Trim Project
Getting the rail right only matters if the cabinets underneath it are built to last, and that's where Best Cabinet Specialist earns its place in your project. Every box ships with plywood construction and solid wood doors, so your light rail attaches to a surface built to hold a joint tight through years of seasonal movement, not particleboard that chips at the first brad nail.

Once you've measured your cabinet run and picked a rail profile, the next step is locking in cabinets that match your finish plan and your timeline. Best Cabinet Specialist ships fast and offers both RTA cabinets for hands-on installers and fully assembled cabinets for anyone who wants the boxes ready to mount. Browse the full cabinet lineup to find a door style and finish that pairs cleanly with the light rail you've chosen, and get your project moving without the long lead times that stall so many kitchen remodels.
Sources
For lighting and design context, see the NKBA Kitchen Trends Summit report. For fitting technique, see Wood Magazine's wraparound molding guide. For contrasting trim ideas, see this guide on trim and wood door pairing.
- NKBA | KBIS Kitchen Trends Summit highlights 2025 kitchen trends report and new video series
- Tight-fit wraparound moldings — Wood Magazine
FAQ
What Is Light Rail Molding for Cabinets?
Light rail molding is a narrow trim strip installed under wall cabinets to hide under-cabinet lighting, conceal wiring, and finish the cabinet's exposed underside. It comes in various profiles and materials, from flat paint-grade MDF to ornate stained hardwood.
Is Light Rail Molding Necessary?
It's not structurally required, but it's the standard way to hide light fixtures and wiring for a clean look under wall cabinets. Skipping it leaves the cabinet bottom and any lighting hardware exposed, which most homeowners find distracting once the lights are on.
What Is the Newest Trend for Kitchen Cabinets?
Personalization is driving current cabinet design, with 52% of professionals expecting cabinets to carry statement colors rather than sticking to neutral tones. White oak also ranked as the preferred finish among 59% of respondents in the same NKBA report.
What Is the Trim Around Cabinets Called?
The trim on cabinets goes by several names depending on placement: crown molding sits on top, light rail molding runs along the bottom, and filler strips or scribe molding close gaps at walls and corners. Each piece serves a distinct function even though they're often grouped together as cabinet moldings.
What Cabinets Pair Best With Light Rail Molding?
Cabinets with a solid, plywood-box construction give light rail a stable surface to attach to and hold its finish over time. Best Cabinet Specialist's RTA and assembled cabinet lines both use plywood boxes and solid wood doors that coordinate well with matched or contrasting light rail trim.