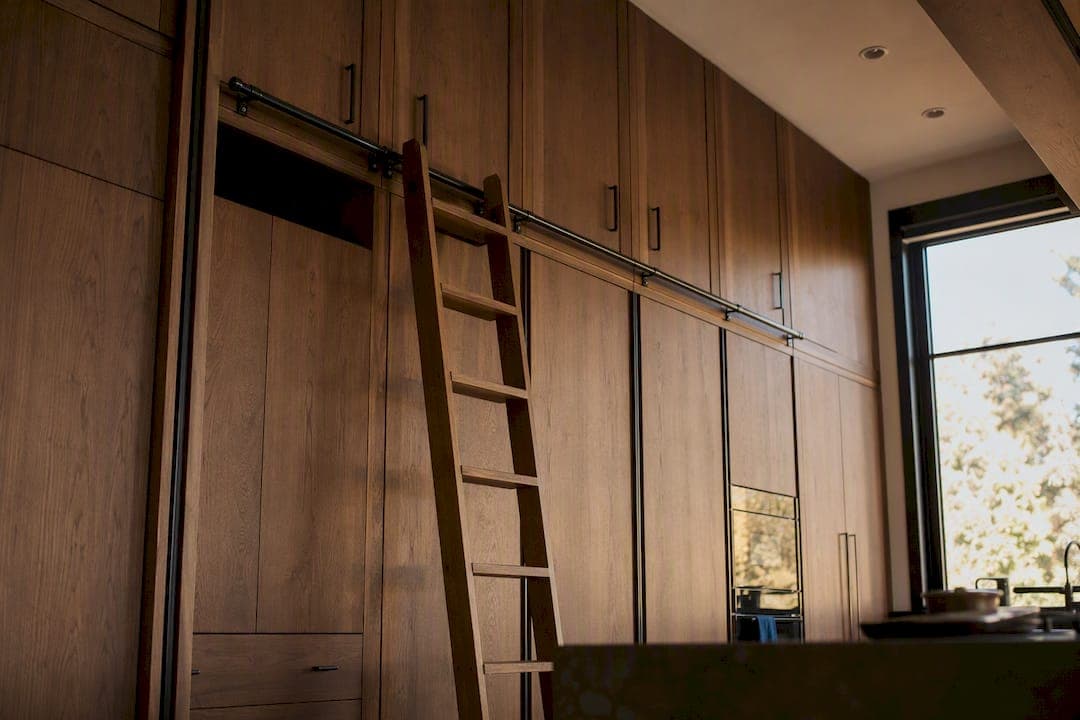
Yes, in most kitchens with 8 to 9 foot ceilings, running cabinets to the ceiling is the better choice. You get more storage and a cleaner, finished look for a modest cost increase. In rooms with 10 foot ceilings or higher, full-height runs can feel top-heavy, so weigh the access trade-offs covered below before committing.
TL;DR:
- Full-height cabinets increase storage and hide clutter but can feel overwhelming in rooms taller than 9 feet, requiring careful design choices.
- Using stock cabinet sizes that match your ceiling height minimizes extra costs, but custom options are necessary for irregular or very high ceilings.
- Reinforced hinges, plywood construction, and properly rated hardware are essential for durability in tall cabinet projects.
- Eliminating gaps through soffits or false panels reduces cleaning chores and creates a cleaner look, with top shelves reserved for seasonal or rarely used items.
- Proper planning of lighting and ventilation is crucial, as ceiling-height cabinets change how light and range hoods function within the space.
Table of Contents
- Cabinets to the Ceiling: Weighing the Pros and Cons
- How Tall Should Kitchen Cabinets Be for Your Ceiling?
- How Do You Extend Existing Cabinets to the Ceiling?
- What Goes on Top: Storage Zones and Access Tools
- How Do You Keep Tall Cabinets From Looking Top-Heavy?
- What Does It Cost to Take Cabinets to the Ceiling?
- Common Installation Mistakes When Cabinets Meet the Ceiling
- Best Cabinet Specialist's Approach to Tall Cabinetry Projects
- Cleaning and Maintaining Cabinets That Reach the Ceiling
- Does Cabinet Height Affect Kitchen Lighting and Ventilation?
- Do Ceiling-Height Cabinets Work Around Appliances and Hood Vents?
- Which Materials and Finishes Hold Up Best on Tall Cabinets?
- A Practical Checklist Before You Commit
- Get the Right Cabinets for a Ceiling-Height Project
- Sources
Cabinets to the Ceiling: Weighing the Pros and Cons
Cabinets that run floor to ceiling (sometimes called tall cabinets or full-height cabinetry) trade a bit of convenience for a lot of function. Here's what you gain and what you give up.
The upside is substantial. Extending cabinetry upward adds real storage volume you'd otherwise waste, and it closes off the awkward gap where dust and grease normally collect above standard uppers. Full-height cabinetry is particularly effective at hiding clutter and built-in appliances, which matters if your kitchen doubles as a pantry closet. Taller cabinet runs also stretch the eye upward, making a room feel taller than it is, and a seamless built-in look tends to read as a premium finish to future buyers.
Pro Tip: If storage is your main driver, measure what you actually own before committing to full-height cabinets. Bulky stand mixers and platters need mid-height access, not a ladder trip.
The trade-offs are just as real:
- Higher upfront cost. More linear footage of doors, boxes, and finish work adds up fast.
- Reduced accessibility. Top shelves usually require a step stool, and that's a hassle for daily-use items.
- Risk of visual heaviness. In rooms with 10 foot ceilings or taller, a continuous run of cabinetry can dominate the space instead of complementing it.
- Hardware demands. Taller doors need hinges rated for the extra weight and leverage.
Designers generally recommend taking cabinets to the ceiling in standard 8 to 9 foot rooms precisely because the storage and visual payoff outweighs the access cost at that scale. Once you cross into taller rooms, the calculus shifts, and that's where the measurement rules in the next section earn their keep.
Kitchen size matters here too. In a small galley kitchen, every extra cubic foot of storage counts, so full height nearly always wins. In a large kitchen with generous pantry space elsewhere, going all the way up is more of a style choice than a necessity.
How Tall Should Kitchen Cabinets Be for Your Ceiling?
Before choosing a method, measure the actual usable vertical space: from the finished floor to the underside of the ceiling drywall, not to any crown or trim that might already be there. Note any obstructions like soffits, ductwork, or bulkheads, since those change your real working height.
Once you have that number, match it against standard stock sizes. Wall cabinets commonly come in 12, 15, 18, 24, 30, 36, and 42 inch heights, and most kitchens can reach the ceiling by combining a base run of standard uppers with a stacked or extended piece on top.
| Ceiling height | Common cabinet combo | Notes |
|---|---|---|
| 8 to 9 ft | 42" upper cabinets | Often reaches ceiling with minimal or no filler |
| 8 to 9 ft | 36" upper + 18" stacked cabinet, or 42" upper + 12" stacked cabinet | Stacking is the most common approach for this height |
| 10 ft or higher | Soffit, false panel, or selective tall run instead of full height | Full-height runs can look disproportionate; partial height plus styled gap often reads better |
For anything outside these standard combos, custom cabinets or false panels fill the gap without forcing an odd stack height. False panels and soffits can also mimic the full-height look for less money if your ceiling height doesn't cooperate with stock sizing. Before ordering anything, run your numbers against a detailed measurement guide so you're not guessing at fractions of an inch.
How Do You Extend Existing Cabinets to the Ceiling?
If you already have standard uppers and want to close the gap, you have three realistic paths. Each has a different skill floor and a different price tag.
- Stack a second cabinet on top. Measure the exact gap above your existing uppers, subtract for a small scribe allowance, and order a stacking cabinet in that height (commonly 12" or 18"). Attach blocking to wall studs first. Stacked cabinets carry weight only if they're screwed into solid blocking, not drywall alone. Cap the seam with crown or a simple reveal strip for a finished transition.
- Replace uppers with extended, tall-door cabinets. This skips the visible seam entirely by using one continuous door front. It requires accurate hinge selection, since tall doors need hardware rated for the extra weight and leverage, and often calls for a center rail or reinforced hinge cup to prevent sagging over time.
- Build a soffit, fascia, or false panel. If full storage isn't the goal, frame a simple box above the existing cabinets and finish it to match your cabinet color or trim. This closes the gap visually for a fraction of the cost of real storage cabinets, though that decorative choice sacrifices usable space above the cabinets in exchange for a lower price and simpler build.
Pro Tip: Order tall doors in paint-grade MDF rather than wide solid-wood panels if you're painting. MDF resists the seasonal warping and paint cracking that wide solid-wood panels are prone to on large, flat surfaces.
Stacking uppers is a reasonable weekend DIY project for anyone comfortable finding studs and running a level. Extended tall-door replacements and soffit framing are trickier: they involve more precise cuts, custom trim work, and often benefit from a second set of hands. If you're not confident cutting crown molding to an inside corner or you're working with an uneven ceiling, hiring a finish carpenter for that portion alone is money well spent.
What Goes on Top: Storage Zones and Access Tools
The top tier of a ceiling-height cabinet run works best when you plan what lives there before you fill it randomly. Treat your cabinetry in three zones: daily-use items at counter to eye level, weekly items in the mid-upper zone, and anything you touch once a season on the very top shelf.
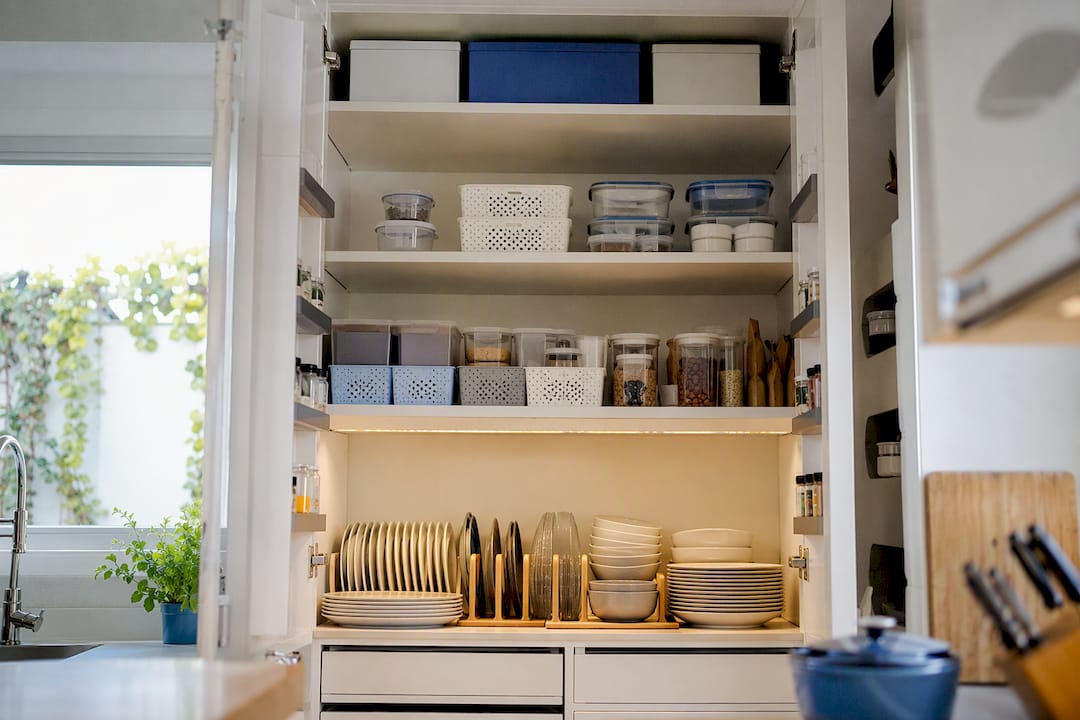
Top shelves are best reserved for seasonal or rarely used items like holiday serveware, large stockpots, or the panini press you use twice a year. That single planning decision solves most of the "but I can't reach it" complaints homeowners have after installation.
For the top shelf items you do need occasionally, a few access tools make a real difference:
- A sturdy two-step folding stool tucked in a nearby closet handles most kitchens fine.
- Pull-down shelf mechanisms bring a shelf to counter height with a light tug, useful for anyone with mobility concerns.
- A rolling library ladder mounted on a rail works well in larger kitchens and doubles as a design statement.
- Appliance garages built into a mid-height cabinet reduce how much needs to live up top at all.
Pro Tip: If anyone in your household has limited mobility, plan your daily and weekly zones within easy reach and dedicate the top tier entirely to seasonal storage. That one decision does more for usability than any ladder or step stool.
Hardware matters as much as layout. Soft-close hinges rated for the door's actual weight prevent slamming and sagging, and for anything above eye level, confirm the hinge cup and mounting plate are rated for the door size before you order.
How Do You Keep Tall Cabinets From Looking Top-Heavy?
A wall of cabinetry from counter to ceiling can look like a monolith if you don't break it up somewhere. The fix isn't to avoid full height, it's to design around it.
Designers view full-height cabinetry as a way to create a calmer, more finished kitchen, but the same designers warn against making every surface identical, since a wall of solid doors reads as heavy no matter how well it's built. A few proven fixes:
- Swap one or two upper doors for glass fronts to add depth and break up the solid mass.
- Use open shelving for a single section instead of doors, especially near a display-worthy corner.
- Choose a lighter paint color for the upper tier if your lower cabinets are dark, which visually lifts the ceiling line.
- Add scribe molding and a clean reveal line where cabinets meet the ceiling instead of forcing a flush, gap-free seam.
- Run integrated lighting under the transition point between stacked cabinets to add a shadow line that reads as intentional.
- Anchor the room with a lighter or contrasting island so the tall run doesn't dominate every sightline.
None of this requires abandoning full height. It just means treating the top tier as a design element, not an afterthought bolted on to gain storage. Small changes like these are also cheap to specify up front, since a mixed-finish order costs about the same as an all-matching one when you're already placing a cabinet order.
What Does It Cost to Take Cabinets to the Ceiling?
Extra height means extra everything: more linear feet of cabinetry, taller doors, stronger hinges, and more finish work at the ceiling line. Budgeting for a few specific line items keeps surprises off your invoice.
The main cost drivers are:
- Additional cabinet boxes or extended box height, which adds material regardless of the method you choose.
- Tall door panels, which typically cost more per square foot than standard-height doors due to material stability requirements.
- Reinforced hinges and hardware rated for heavier, taller doors.
- Crown, trim, and scribe work at the ceiling transition, which takes a finish carpenter more time than a standard reveal.
- Extra installation labor, since stacked cabinets require precise blocking and leveling that standard uppers don't.
Stock tall cabinet options are the most budget-friendly route if a manufacturer's standard sizes happen to match your ceiling height. Semi-custom sits in the middle, letting you adjust height in smaller increments without a full custom build. Fully custom cabinetry costs the most but solves oddball ceiling heights cleanly.
If your budget doesn't stretch to full-height storage everywhere, you don't have to choose all or nothing. False panels, soffits, or a single tall run over the range and sink can deliver most of the visual payoff for a fraction of the material and labor cost of extending every cabinet in the kitchen.
Common Installation Mistakes When Cabinets Meet the Ceiling
Most ceiling-height cabinet problems trace back to one issue: nobody accounted for the fact that ceilings are rarely flat. Plan for the irregularity instead of fighting it.
- Assume the ceiling is uneven. Installers typically leave a small intentional gap and use scribe molding or crown rather than forcing every cabinet box to fit a perfectly flush line, which avoids cutting and re-cutting boxes on site.
- Add blocking before cabinets go up. Stacked uppers and tall single runs need solid blocking anchored to studs, not just drywall anchors, especially for anything holding real weight.
- Level the first cabinet obsessively. Every cabinet after it references that first one, so an error at the start compounds down the whole run.
- Match reveals and trim carefully. A crown that's coped cleanly at inside corners looks intentional; one that's mitered and gapping looks like a rush job.
- Check hinge wear points early. Heavier tall doors show hinge sag faster than standard doors if the hardware wasn't rated correctly at installation.
Best Cabinet Specialist's Approach to Tall Cabinetry Projects
Tall doors and stacked uppers put more stress on a cabinet box than standard configurations, which is exactly where construction quality shows up first. Best Cabinet Specialist builds every box from plywood rather than particleboard, and pairs it with solid wood doors, both of which hold up better against the warping and sagging that heavier, taller panels are prone to over time.
That construction matters even more once you add reinforced hinges for a 42 inch or stacked cabinet door, since a flimsy box will flex under that hardware load over years of use. As a women-owned and veteran-owned business, Best Cabinet Specialist ships fast enough that a stacked-cabinet project doesn't stall out waiting weeks on a single missing piece.
Before ordering, run your numbers through the upper cabinet height guide to match stock sizes to your ceiling, and check the cabinet layout guide for zoning ideas.
Cleaning and Maintaining Cabinets That Reach the Ceiling
The biggest maintenance win with ceiling-height cabinets is also the simplest: there's no open ledge left to collect dust and cooking grease. Standard uppers leave an exposed top surface that needs wiping every few weeks, and grease from cooking tends to settle there in a sticky film that's genuinely unpleasant to scrub off years later.
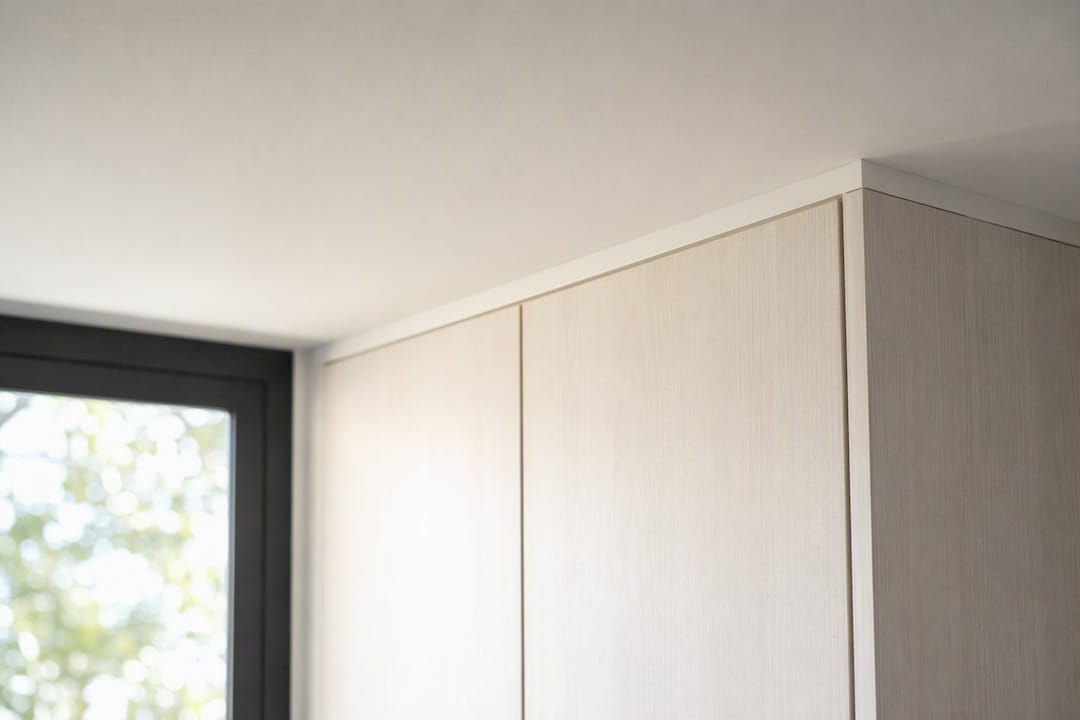
Close that gap and the problem disappears entirely, since there's no horizontal surface left exposed to collect anything.
What does change is how you clean the doors themselves, especially near the top of a tall run. A cabinet door 8 or 9 feet up needs a step stool for anything beyond a quick wipe, so plan for occasional deep cleaning rather than daily attention up there. Glass-front sections need slightly more care since fingerprints and smudges show more visibly than they do on a solid door, particularly under kitchen lighting.
Finish choice affects maintenance too. A matte or textured finish hides everyday smudges better than high-gloss lacquer, which is worth considering for any tall door within arm's reach of cooking splatter. For the sections up high that see hands only occasionally, gloss and glass are perfectly practical since they're rarely touched.
Overall, ceiling-height cabinetry trades a small amount of occasional step-stool cleaning for the elimination of a recurring grease-and-dust chore. Most homeowners find that a fair trade once they've lived with it a season.
Does Cabinet Height Affect Kitchen Lighting and Ventilation?
Running cabinets to the ceiling changes how light moves through a kitchen, mostly for the better if you plan the lighting layer correctly. Standard uppers with a gap above them sometimes rely on that gap for indirect light bounce, but that's an inefficient source at best. Ceiling-height cabinets remove that gap, so the lighting plan needs to shift to under-cabinet fixtures and dedicated ceiling cans instead.
Under-cabinet LED strips become more important, not less, once your uppers reach the ceiling, since they're now your primary task lighting for the counter below. Placing lighting at the transition point between a stacked upper and a base cabinet also adds a subtle shadow line that helps break up a tall run visually, which doubles as both function and design.
Ventilation is a separate, more practical concern. Range hoods, whether under-cabinet or wall-mounted, need clearance specified by the manufacturer, and that clearance doesn't change just because your cabinets now run to the ceiling. If you're planning a hood insert built into a tall cabinet surround, confirm the manufacturer's minimum clearance above the cooking surface before finalizing your cabinet height plan, since a mis-measured surround is one of the more expensive mistakes to correct after installation.
Ducted ventilation routed up through a tall cabinet run also needs planning before the boxes go in, not after. Retrofitting duct work through an installed ceiling-height cabinet is far more disruptive than through a standard upper with open space above it.
Do Ceiling-Height Cabinets Work Around Appliances and Hood Vents?
Full-height cabinetry generally works well around appliances, provided you plan clearances before you order boxes rather than after. Refrigerators are the most common friction point: a standard fridge cabinet surround already accounts for a specific height, and running the cabinet above it to the ceiling usually means adding a stacked panel or filler above the appliance cabinet rather than a single continuous box.
Range hoods deserve their own planning pass. A decorative wood hood insert built into a tall cabinet surround needs to match the manufacturer's minimum and maximum mounting height above the cooktop, and that number doesn't move just because the cabinetry around it now reaches the ceiling. Measure the hood clearance first, then build your cabinet plan around that fixed number.
Built-in appliances like wall ovens or microwave drawers integrate cleanly into a ceiling-height run since they're typically boxed in with filler panels regardless of cabinet height. The main adjustment is making sure the panel above a wall oven cabinet still allows for heat clearance per the appliance manufacturer's spec sheet.
If you're adding an appliance garage as part of your top-tier storage plan, position it in the mid-upper zone rather than the very top. That keeps small appliances like coffee makers or toasters at a reachable height while still freeing counter space, which is usually the actual goal behind adding a garage in the first place.
Which Materials and Finishes Hold Up Best on Tall Cabinets?
Tall doors move more than standard doors because they're bigger, and that has real implications for what material belongs on a ceiling-height cabinet.
For painted finishes, paint-grade MDF outperforms wide solid-wood panels on large door fronts, because solid wood expands and contracts with humidity across its width, and a wide panel shows that movement as cracking along the paint line over a few seasons. MDF's engineered core stays dimensionally stable, which matters more as door height climbs.
For stained or natural wood finishes, solid wood doors remain the better call, since the goal there is showing genuine wood grain rather than a flawless painted surface, and minor seasonal movement is far less visible on a stained finish than under gloss paint.
Hinges deserve equal attention to the door material itself. Heavier, taller doors need hinges rated for that specific weight and swing arc, and soft-close mechanisms reduce wear on both the hinge and the door edge over years of daily use. Skimping on hinge grade to save a few dollars per door is one of the more common regrets homeowners mention after living with tall cabinets for a year or two.
Finish sheen also plays a functional role. A satin or matte finish on lower, frequently touched doors hides fingerprints better than high gloss, while the top tier, touched rarely, can carry a glossier finish or glass front without the same maintenance trade-off.
A Practical Checklist Before You Commit
Before you order a single cabinet, run through four steps: measure your actual ceiling height, list what needs to live in each storage zone, pick the method that fits your ceiling and budget, and confirm the math against your total project cost.
The homeowners who end up happy with a ceiling-height kitchen are the ones who measured twice and planned storage zones before falling in love with a photo. The ones who regret it usually skipped straight to ordering doors without checking hinge ratings or ceiling variance first.
If you're on the fence, measure your ceiling this week and compare it against the upper cabinet height guide before you spend money on anything.
— Nathan
Get the Right Cabinets for a Ceiling-Height Project
Best Cabinet Specialist builds the two things a tall cabinet project actually needs to hold up over time: plywood boxes that won't sag under a stacked upper, and solid wood doors that handle daily use without warping. That combination matters more here than in a standard kitchen, since ceiling-height runs put extra weight and leverage on every hinge and joint.

Fast shipping means a stacked-cabinet project doesn't sit half-finished for weeks waiting on one missing box, and the upper cabinet height guide walks you through matching stock sizes to your exact ceiling before you order. For local installation examples, Wood Made's kitchen cabinet services show what finished stacked and tall-door projects look like in real kitchens.
Ready to plan your ceiling-height layout? View cabinet options and request a project quote to get exact pricing for your measurements.
Sources
- Should cabinets go to the ceiling? | The Spruce
- Should kitchen cabinets go right up to the ceiling? | Livingetc
- Kitchens: floor-to-ceiling cabinets storage | Dezeen
- Floor to ceiling cabinets: Complete guide for homeowners - D and G Flooring