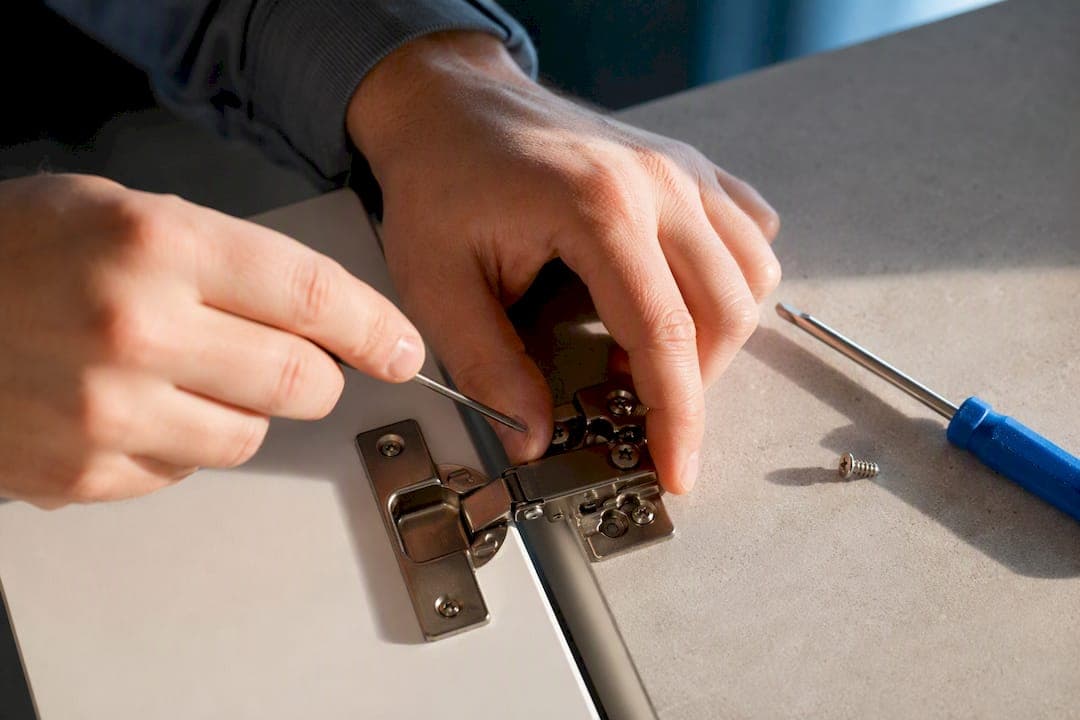
Most soft-close hinge problems clear up in three moves: tighten the cup and mounting screws, align the door across its three adjustment axes, and only then touch the damper if your hinge has a tension control. Test after every quarter-turn. If the door still slams or stops short, the damper itself is likely worn, and an adapter clip or a replacement hinge is your next step.
TL;DR:
- Tighten all hinge screws before making any adjustments to prevent misalignment caused by loose fasteners.
- Adjust the side-to-side, height, and depth screws separately in small increments to correct alignment and flushness issues.
- Only modify the damping tension if your hinge has an external adjustment screw, and do so gradually while testing the soft-close function.
- Replace the hinge if it shows cracks, fluid leaks, or stripped screw threads, rather than attempting to repair worn dampers or damaged arms.
- Regularly test door closure consistency and recheck screws seasonally to maintain optimal soft-close performance.
Table of Contents
- What Tools Do You Need to Adjust Soft Close Hinges?
- Which Screw Adjusts What on a Soft Close Hinge?
- How Do You Adjust Soft Close Hinges Step by Step?
- How Do You Adjust the Soft Close Tension on a Hinge?
- Why Won't My Soft Close Hinges Close Properly?
- Should You Repair or Replace a Soft Close Hinge?
- How Do You Test and Maintain Soft Close Hinges?
- What Homeowners Get Wrong About Soft Close Hinges
- Where This Guide's Information Comes From
- Sources
- FAQ
What Tools Do You Need to Adjust Soft Close Hinges?
Half the frustration with hinge adjustment comes from working with the wrong tool or an unsupported door. Get your setup right first, and the rest goes fast.
You need very little to do this job properly:
- A Phillips screwdriver (magnetic bit tip helps hold small screws)
- A small flathead screwdriver for slotted damper adjusters
- A flashlight or phone light to see inside the cabinet box
- A soft cloth to protect finished doors from scratches
- Optional: a small ruler or a shim for measuring gaps and propping doors level while you work
Before you turn a single screw, clear the cabinet interior and swing the door fully open so you can see the whole hinge. If you're loosening mounting plate screws, support the door with your free hand or a wedge. An unsupported door can drop suddenly and bend the hinge arm or crack the cabinet face frame.
Take a minute to inspect the hardware. Look for stripped screw heads, hairline cracks in the hinge arm, or a cup that wobbles in its socket. Tightening loose cup screws inside the door and the mounting plate screws on the cabinet is one of the most common fixes because a loose fastener lets the hinge pivot out of true, which throws off both alignment and soft-close engagement.
Pro Tip: Never lubricate the damper cylinder. Silicone spray or oil can seep into the hydraulic mechanism and make the close speed erratic or cause it to fail early. Save the lubricant for squeaky screws only, and even then, use it sparingly.
Which Screw Adjusts What on a Soft Close Hinge?
Concealed European-style hinges look intimidating until you know the three screws are doing three separate jobs. Learn the map once, and every future adjustment gets easier.
Most soft-close hinges have three main adjustment axes: side-to-side (horizontal), up-and-down (vertical), and in-and-out (depth). Here's where to find each one:
- Side-to-side screw: usually centered on the hinge arm, closest to the hinge cup. Turning it shifts the door left or right relative to the frame.
- Depth screw: typically at the rear of the hinge arm, closer to the cabinet side. This one moves the door in or out so the face sits flush with the cabinet edge.
- Height (vertical) adjustment: not a dedicated screw on most models. Instead, you loosen the mounting plate screws that attach the hinge to the cabinet side, slide the door up or down, then retighten.
A separate, smaller screw or dial on the hinge arm or cup controls damping, when the hinge includes that feature at all. It's often a slotted screw, a small toggle, or a tiny plunger near the pivot point. Not every hinge has one. Some budget and mid-range hinges use a sealed hydraulic cylinder with no external adjustment at all, so if you can't find a damping screw after a careful look, don't force anything, because the model probably wasn't built with that feature.
Before you start turning anything, snap a quick photo of the hinge or mark the current screw position with a fine-tip marker. That way, if an adjustment makes things worse, you know exactly how far to back off.
How Do You Adjust Soft Close Hinges Step by Step?
This is the core procedure, and the order matters. Fix the mechanical basics first, align the door on all three axes, and save the damper for last. Alignment should be prioritized before attempting to adjust soft-close tension, since most closing complaints trace back to a door that's slightly crooked rather than a bad damper.
Step 0: Tighten before you adjust.
Grab your Phillips screwdriver and snug every cup screw and mounting plate screw on the hinge you're working on. Support the door with one hand while you do this so it doesn't sag or twist. Loose screws let the hinge arm flex under the door's weight, which throws off alignment even after you've made careful adjustments. This single step resolves a surprising number of "broken" soft-close complaints before you touch a single adjustment screw.
Step 1: Fix side-to-side alignment.
Close the door and look at the gap between it and its neighbor, or between the door and the cabinet frame if it's a single door. If the gap is wider at the top than the bottom, or the door leans left or right, the horizontal screw needs attention.
- Locate the side-to-side screw in the middle of the hinge arm.
- Turn it a quarter turn in the direction that closes the gap. Clockwise generally pulls the door one way, counterclockwise the other, but this varies by hinge brand, so test the direction on the first turn.
- Close the door and check the gap again.
- Repeat in quarter-turn increments until the gap is even, top to bottom.
If your door hangs on two hinges, work the top hinge first, then the bottom, since the top hinge usually has more leverage over how the door hangs. On a three-hinge door, the middle hinge often needs the least adjustment and can be left as a stabilizer once the top and bottom are aligned.
Step 2: Fix the height.
Height problems show up as a door that sits too high or low relative to the cabinet or the door next to it. Since most concealed hinges don't have a dedicated vertical screw, you'll adjust this at the mounting plate.
- Loosen (don't fully remove) the two mounting plate screws that anchor the hinge to the cabinet side.
- Slide the door gently up or down while supporting its weight.
- Hold the door in position and retighten the mounting plate screws.
- Open and close the door once to confirm it didn't shift during tightening.
Small moves here go a long way. Even an eighth of an inch of vertical shift can make a door look noticeably crooked next to its neighbor.
Step 3: Fix the depth.
Depth issues show up as a door that sticks out further than the one beside it, or one that sits recessed and rubs against the frame when it swings shut.
- Find the rear screw on the hinge arm, closer to the cabinet wall than the side-to-side screw.
- Turn it in quarter-turn increments to pull the door in or push it out.
- Close the door and sight down the face of the cabinet to check flushness against the adjacent door or drawer front.
- Adjust the matching hinge on the same door if the depth issue is only visible on one corner.
Testing after every change
Use the quarter-turn rule: make one small adjustment, close the door, and look at it before turning anything further. Overcorrecting is the single most common mistake DIYers make, because a screw that needs an eighth of a turn often gets a full turn instead, and then the door swings too far the other way.
A simple trick for measuring gaps precisely: slide a thin index card or a business card into the gap at the top, middle, and bottom of the door. If the card moves freely at all three points with the same light resistance, your alignment is even. If it's tight in one spot and loose in another, you still have adjusting to do.
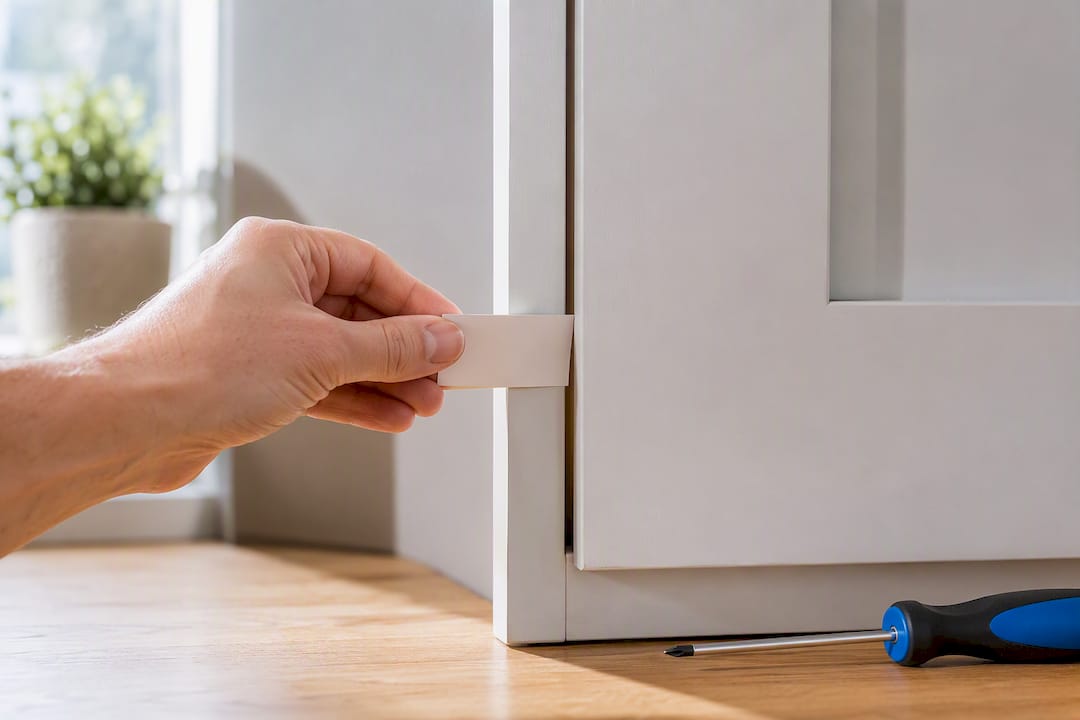
Pro Tip: Work on one door at a time and finish all three axes before moving to the next. Jumping between doors makes it hard to remember which adjustment you already tested, and you'll end up repeating steps.
How Do You Adjust the Soft Close Tension on a Hinge?
Once the door hangs straight and flush, you've earned the right to touch the damper, but only if your hinge actually has a tension control.
Check the hinge arm and cup carefully for a small slotted screw, a toggle switch, or a tiny plunger. If a hinge has a damping adjustment, it's typically a smaller screw on the hinge arm or cup. If you don't see one after a close inspection with a flashlight, stop looking. Some hinges rely on a sealed hydraulic cylinder with no external adjuster, and trying to force a screw that doesn't exist risks cracking the plastic housing.
When a tension control is present, the general rule is:
- Tightening the screw usually increases damping resistance, which slows the close speed.
- Loosening it usually reduces resistance, which speeds the close back up.
That said, hinge brands aren't consistent about this, so check any markings on the hinge itself, and treat the first adjustment as a test rather than a fix.
Make your changes in quarter-turns, exactly like the alignment steps. Close the door after each turn and watch the last two inches of travel closely. A well-tuned soft-close hinge slows down smoothly and lets the door settle fully shut with a soft click, not a clunk. If you tighten too far, the door can stop just short of latching, which looks like a failure but is actually over-damping. Back off a quarter turn and retest.
- Confirm the damper control exists before adjusting anything.
- Adjust one hinge at a time if the door has two or three.
- Test the full swing, not just the last inch, since some hinges damp the entire arc rather than just the finish.
- If the door won't latch even at the lightest damping setting, the issue is probably alignment, not tension. Go back and recheck the three axes.
Pro Tip: If your hinge has no damping screw and the soft-close feature has stopped working, an adapter clip that snaps onto the existing hinge arm can restore the slow-close function for a fraction of the cost of new hinges. Match the clip to your hinge's brand and arm shape for the best fit.
Why Won't My Soft Close Hinges Close Properly?
Troubleshooting a misbehaving door gets much easier once you match the symptom to its most likely cause instead of guessing at random fixes.
The door slams instead of closing softly. This usually points to a worn or failing damper, but check alignment first. A door that's slightly out of square can close at an angle that misses the damper's contact point entirely, which looks identical to a dead damper from the outside. Fix the alignment, retest, and only assume the damper has failed if slamming continues.
The door stops a few inches short and won't latch. This is the signature sign of over-damping. Back off the tension screw a quarter turn and test again. If there's no tension screw, the mounting plate may be loose, letting the door hang at a slight angle that prevents full contact with the latch.
The door hangs crooked next to its neighbor. Nine times out of ten, this is a height or depth issue rather than anything related to soft-close function. Work through Steps 1 through 3 in order and don't skip straight to the damper.
The door rubs against the frame or an adjacent door. Check depth first, then side-to-side. On multi-hinge doors, uneven adjustment between the top and bottom hinge creates a twist that makes the door drag in one spot even when it looks straight from a distance.
To spot a genuinely worn damper rather than a misalignment problem, open the hinge cup area and look for a small hydraulic cylinder. A leaking damper often shows a faint oily residue around the piston or feels loose when you press on it by hand, with no resistance at all. That's a mechanical failure, not something a screwdriver fixes.
Here's a fact worth remembering before you spend money on new hardware: most closing problems are caused by misalignment rather than the damper. Homeowners often replace a hinge that was never actually broken, when a few minutes of alignment work would have solved it.
- Slamming door: recheck alignment, then damping, then inspect for a worn damper.
- Won't latch: loosen tension screw, or check for a loose mounting plate.
- Crooked door: work through all three axes before assuming a hardware failure.
- Rubbing or dragging: check depth and side-to-side together, especially on multi-hinge doors.
If your kitchen or bathroom door needs more than a hinge adjustment, and you're staring at swollen particleboard or a door that's simply worn out, a service like One Day Doors & Closets walks through what's actually involved in a full door swap versus a hinge repair.
Should You Repair or Replace a Soft Close Hinge?
Not every hinge problem gets solved with a screwdriver. Knowing when to stop adjusting and start replacing saves you time and prevents a cabinet door from getting worse.
Replace the hinge when you see any of these:
- A visible crack in the hinge arm or cup, even a hairline one, since it will likely fail under repeated use.
- Fluid leaking from the damper cylinder, which signals the hydraulic seal has failed and can't be repaired.
- Stripped screw threads in the door or cabinet that won't hold a screw even after tightening.
- A missing adjustment feature on a hinge you assumed had one, meaning the design simply can't do what you need.
If the damper is worn or leaking, replacement of the hinge is usually the practical option. Before you replace the whole hinge, though, consider a soft-close adapter clip. These small clips snap onto many standard (non-soft-close) hinge arms and add the damping function without swapping hardware. They're a fast, low-cost fix, and matching the clip to your hinge's brand and arm profile makes a real difference in how well it fits and functions.
If a mounting plate screw hole has stripped out from repeated tightening, don't give up on the cabinet side. A slightly longer screw, or a wood-filled epoxy repair in the old hole, restores a solid mounting surface before you refit the hinge. This is far cheaper than replacing a cabinet box over a stripped screw hole.
When you do need a fresh hinge, match these specs before you buy:
- Cup diameter: 35mm is the most common size on residential cabinets, though older or specialty cabinets sometimes use a different bore.
- Overlay or inset type: full overlay, half overlay, and inset doors each need a different hinge geometry.
- Hinge-to-hinge spacing: measure the existing spacing so the new hinge lines up with existing screw holes when possible.
- Number of hinges per door: taller or heavier doors often use three hinges instead of two, and all of them need to match.
- Adjustable damping: if you want the option to fine-tune closing speed down the road, choose a hinge model that actually offers that adjustment rather than a sealed, non-adjustable unit.
Best Cabinet Specialist's guide on soft-close versus self-close hinges breaks down warranty differences worth knowing before you buy, and the roundup of soft-close cabinet hinge options is a useful reference for matching cup diameter and overlay type to your existing setup.
How Do You Test and Maintain Soft Close Hinges?
A single successful close doesn't prove the adjustment worked. Consistency over repeated cycles is the real test, and a little seasonal upkeep keeps you from repeating this whole process every few months.
- Open and close the door 10 to 15 times in a row and confirm the door closes at the same speed and lands in the same position every time.
- Check the gap at the top, middle, and bottom of the door, and compare it to the neighboring door or drawer front for consistency.
- Listen closely during the last two inches of travel for any grinding, clicking, or catching sound, which can signal a hinge arm that's rubbing against the cabinet frame.
- Recheck all hinge screws once each season, since wood cabinets expand and contract slightly with humidity changes, which can loosen fasteners over time.
- Wipe away dust and debris from the hinge cup and arm with a dry cloth, but skip any lubricant on the damper cylinder itself.
- Call a professional if you find stripped screw holes that won't hold even with a longer screw, a cracked door panel, or a hinge that fails again within weeks of a fresh adjustment.
Open and close the door 10 to 15 times to confirm consistent operation before calling the job done. It's the difference between a fix that looks good once and one that actually holds up.
What Homeowners Get Wrong About Soft Close Hinges
The biggest misconception homeowners bring to this job is fear. They worry that turning the wrong screw will damage a $30 hinge or crack an expensive door, so they either avoid the adjustment entirely or overcorrect out of nervousness once they start. In practice, concealed hinges are built for exactly this kind of end-user tuning. A quarter turn in the wrong direction doesn't break anything. It just means you turn it back.
The second mistake is skipping straight to the damper. Homeowners assume a slamming door means a broken soft-close mechanism, when it's usually a door that's a sixteenth of an inch out of alignment. Fix the geometry first, every time, before you touch a tension screw.
The most useful shortcut in this entire process is the index card trick for measuring gaps. It costs nothing, takes two seconds, and gives you a consistent, repeatable way to check alignment instead of eyeballing it, which is where most DIY adjustments go wrong.
If you're shopping for replacement hinges or new cabinet doors afterward, cup diameter and overlay type are the two specs that matter most for compatibility. Best Cabinet Specialist builds its cabinet lines with plywood boxes and solid wood doors specifically so that hardware swaps and future adjustments stay straightforward instead of turning into a bigger renovation. Screenshot this before you start: tighten, align on three axes, test with a card, then adjust damping only if your hinge has that control.
— Nathan
Where This Guide's Information Comes From
The step-by-step procedures in this guide draw from hands-on hinge adjustment documentation, including Furnica's breakdown of the three adjustment axes and damping controls, Wurth Louis & Company's guidance on prioritizing alignment before tension adjustments, and FixUpFirst's repair and replacement checklist for failed dampers.
Hinge designs vary between manufacturers, especially when it comes to damping mechanisms and screw placement. If you're working with a specific brand of hinge, check the manufacturer's installation sheet for exact adjustment directions and torque limits before making changes.
Sources
- How to adjust soft-close hinges (Furnica)
- How to Adjust Soft Close Hinges (Wurth Louis & Company)
- How to Fix a Kitchen Cabinet Soft-Close Hinge (FixUpFirst)
FAQ
Why Are My Soft-Close Hinges Not Closing Properly?
Misalignment is the most common cause, not a broken damper. Check side-to-side, height, and depth adjustments before assuming the soft-close mechanism itself has failed.
Which Screw Do You Adjust on a Soft Close Hinge?
The middle screw on the hinge arm usually controls side-to-side movement, the rear screw controls depth, and height is adjusted by loosening the mounting plate screws. A separate, smaller screw or dial, when present, controls damping tension.
What Are Common Problems With Soft Close Cabinet Hinges?
The most frequent issues are doors slamming instead of closing softly, doors stopping short of latching, crooked alignment next to neighboring doors, and rubbing against the cabinet frame. Most trace back to loose screws or misalignment rather than hardware failure.
How Do You Adjust Soft Close Hinges That Open Too Far?
Doors that swing too far open or don't sit flush usually need a depth or side-to-side adjustment rather than a damping change. Turn the relevant screw in quarter-turns and test the door's position after each small adjustment.
Can You Adjust Soft Close Hinges Without Removing the Door?
Yes. Side-to-side, height, and depth adjustments are all made with the door still attached and closed against the cabinet, which lets you see the effect of each turn immediately.